In this guide you will find color-coded references to other guides and materials:
- Dark orange links to other guides or anchors within this guide
- Purple links to videos in pop-up viewboxes
- Blue links to images in pop-up viewboxes
Intro
Sniper Rifles are long range primary weapons, exclusive to Infiltrators. Most Sniper Rifles fit into one of these two categories:
Semi Auto Sniper Rifles (SASR). These fast firing rifles can take rapid follow-up shots, but require two headshots to kill most enemies.
Bolt Action Sniper Rifles (BASR). These rifles are much more powerful, and can potentially kill in one headshot, but they need to be rechambered between shots, which significantly reduces overall rate of fire.
Do not be confused by SAS-R, which is an NC BASR.
While all Sniper Rifles are fully capable of killing enemies with bodyshots, it often takes too long, giving the enemy a lot of time to take cover, and for enemy snipers to countersnipe you. Firing several shots in a row also broadcasts your position to other nearby enemies.
So both Sniper Rifle types focus on getting headshots, and killing enemies with as few shots as possible.
By default, TR and VS infiltrators use 99SV and VA39 Spectre semi auto rifles respectively, NC infiltrators use NC-14 Bolt Driver.
Similarly to Shotguns, differences between Sniper Rifles of different factions are mostly cosmetic, with the exception of Empire Specific and Semi Auto sniper rifles.
Compared to other precision weapons, like Scout and Battle Rifles, Sniper Rifles deal more damage per shot, but have bad moving accuracy, and in most cases require the user to be stationary while shooting.
Sniper Rifle Mechanics
Sniper Rifles follow the same Weapon Mechanics as other weapons.
Scope Sway
Rifles with 6x-12x magnification scopes have Scope Sway; whenever you Aim Down Sights, your crosshair will float around a certain area.
All Sniper Rifles with sway have the same amount of Scope Sway. As far as we know, it is constant, across all scopes and all situations. Naturally, higher magnification scopes will magnify Scope Sway, the same way they magnify recoil.
Holding Breath
Players can hold “Hold Breath” key (default “shift”) to almost completely suppress Scope Sway. Target Focus Implant can increase the amount of time you can Hold Breath.
Additionally, “long range” Semi Auto Sniper Rifles have access to a free Ballistics Computer attachment, which completely removes Sway on all scopes.
Bullet Drop
Bullets in PlanetSide 2 are affected by Gravity:
- Most primary weapons: 11.25
- Sniper Rifles: 7.5 (33% less)
- VS Semi Auto Sniper Rifles and Phaseshift: 0
Ballistic Table
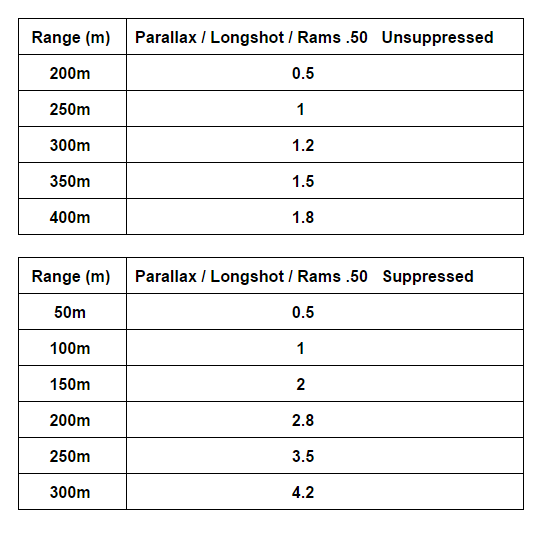
Ballistic Table helps to compensate for bullet drop while doing long range sniping, especially with a Suppressor.
A ballistic table contains the distance to the target, and a number of mildots that you have to raise your aim by in order to compensate for drop.
Here’s an (outdated) example table for Suppressed RAMS .50 using 10X scope.
| Distance, m | Drop, mildots | Infantry Height, mildots |
| 100 | 1.25 | 5 |
| 150 | 2 | 3.5 |
| 200 | 2.5 | 3 |
| 250 | 3 | 2.5 |
 This table also includes the number of mildots in a full-height infantry target. You can use it to measure the distance to the target, or you can use Sweeper HUD implant for that purpose.
You can go to VR Training, write a ballistic table on a piece of paper and then pin it to the monitor with a sticker.
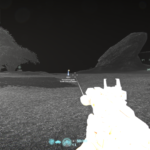
Ballistic Crosshair Overlay


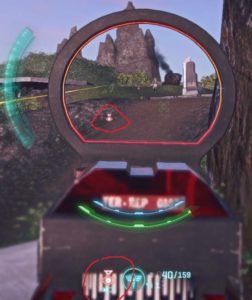
This is an alternative to a Ballistic Table. This example crosshair is configured for:
- 6x zoom and 550 m/s projectile velocity Sniper Rifles, such as Long Range Semi-Auto Sniper Rifles and Tier 2 Bolt Action Rifles.
- 1920 x 1080 resolution.
- Vertical FoV of 74 degrees.
Markings on the left show the height of standard infantry target at 200m and 250m. Use them to measure distance to the target, and then use the couples of dots below the crosshair to compensate for bullet drop. Video demonstration. Download link.
There are no markings for closer range, because within 150m these rifles are mostly point and click. This makes Ballistic Crosshair Overlay mostly pointless, because most of the “useful” sniping is done within that distance.
To use it you will have to install Recursion Stat Tracker with a Crosshair Overlay module. In case you’re wondering, this is completely legit and you will not get banned for using it.
This particular example is mostly just proof of concept. It will not work for players with other Vertical FoV or resolution, or for a rifle with a different Zoom or Projectile Velocity.
If you’d like to use a Ballistic Crosshair Overlay, you would probably have to create your own, using a bit of Photoshop and a few screenshots.
Field of View
Having the right FoV settings is especially important for snipers.
- With lower FoV, enemies will occupy more space on your screen, making it easier to land headshots at long range.
- WIth higher FoV, you will see more of the game world on your screen, which can allow for better situational awareness in CQC sniping.
Increased Headshot Damage Multiplier
Weapons usually deal increased damage when hitting the head:
- Most primary weapons: 2x
- Bolt Action Sniper Rifles: 2.1x
- Phaseshift in “bolt action” mode: 2.2x
Increased Fire Detect Range
When you fire an unsuppressed weapon, your position is highlighted as a dot on the minimap of all enemies within this Fire Detect Range:
- Most primary weapons: 40m.
- Sniper Rifles: 100m.
- Directive Sniper Rifles: 150m.
- TRAP-M1: 40m
Increased Tracer Visibility
Sniper Rifles have more visible tracers than other firearms. They are thicker, and linger for longer.
Increased Scope In Time
Scope In Time is the time it takes for a weapon to transition from Hip Firing to Aiming Down Sights.
- Most primary weapons: 0.15 seconds
- Rifles with 6x-12x magnification scopes: 0.3 seconds.
- “Close range” sniper rifles that use 1x-4x scopes: 0.2 seconds.
Additionally, while scoping into high magnification overlay scopes, you will have a temporary blackout, and there will be a short animation with crosshair moving in. Overall, it takes about extra 30-50ms.
These values refer only to weapon animation, Cone of Fire Mechanics are a separate issue.
Additional Forward Grip Benefit
In addition to its usual effects, Forward Grip reduces Vertical Recoil by 15% for all Sniper Rifles, except TRAP-M1. Forward Grip bears a 0.1 second Equip Time penalty for all Sniper Rifles.
Semi Auto Sniper Rifles
VS Semi Auto Sniper Rifles do not have bullet drop.
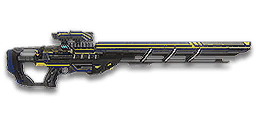
Long Range
99SV

Gauss SPR

VA39 Spectre

These are classic “long range” semi auto sniper rifles with access to 6x through 12x overlay sniper scopes. They can take rapid follow-up shots, and are more effective at killing enemies with body shots than most other sniper rifles.
They have exclusive access to Ballistics Computer – a rail attachment that completely removes Scope Sway on all scopes. Unlocked and equipped by default.
VS Semi Auto Sniper Rifles have no bullet drop and slightly higher velocity, and they do slightly more damage within 100m, but less damage at 100m+.
All Semi Auto Sniper Rifles kill standard targets in 2 headshots at all ranges, so the damage difference mostly applies to sniping Heavy Assaults, or hitting bodyshots.
99SV and Spectre are the starting weapons for TR and VS Infiltrators, respectively.
Unlock cost: 325 ![]() or 250
or 250 ![]()
Bullets to Kill
- BS = Bodyshot
- HS = Headshot
- X + 1 = X Headshots + 1 Bodyshot
| Infantry | Full Nano | NMG HA + Nano | Resist HA | |
| TR and NC Rfiles |
3 BS: all |
4 BS: all 2 HS: all 1 + 1: <115m |
5 BS: <112m |
4 BS: <73m 2 HS: <73m 2 + 1: 74m+ |
| VS Rifle | 3 BS: <121m 2 HS: all 1 + 1: <122m |
4 BS: <143m 2HS: all 1 + 1: <95m |
5 BS: <93m 6 BS: 94 – 157m 2 HS: <93m 2 + 1: 94 – 157m |
4 BS: <66m 4 BS: 67 – 149m 2 HS: <66m 2 + 1: 67 – 149m |
To boil this information down to a memorable form:
Semi Auto Rifles kill infantry in 2 headshots at all ranges, and in 1 headshot and 1 bodyshot within ~100m. Heavy Assaults require an extra headshot.
Close Range
KSR-35

Impetus

Phantom

These “close range” variants are mostly similar to their “long range” brethren. The main difference is that “close range” variants sacrifice damage at range and the ability to take rapid follow up shots to gain access to low-zoom scopes without any scope sway: iron sights, 1x, 2x, 3.4x and 4x reflex scopes, but not HS/NV scope.
They also have shorter Scope In Time (0.2 seconds versus 0.3), but slightly worse recoil properties and lower velocity.
Unlock cost: 650 ![]() or 499
or 499 ![]()
Bullets to Kill
- BS = Bodyshot
- HS = Headshot
- X + 1 = X Headshots + 1 Bodyshot
| Infantry | Full Nano | NMG HA + Nano | Resist HA | |
| TR and NC Rfiles |
3 BS: all |
4 BS: all 2 HS: all 1 + 1: <59m |
5 BS: <56m |
5 BS: all 3 HS: all 2 + 1: <53m |
| VS Rifle | 3 BS: <98m 2 HS: all 1 + 1: <98m |
4 BS: <127m 2HS: all 1 + 1: <66m |
5 BS: <63m 6 BS: 64 – 145m 2 HS: <63m 2 + 1: 64 – 145m |
5 BS: <99m 6 BS: 100 – 175m 3 HS: <175m 2 + 1: <59m |
To boil this information down to a memorable form:
Semi Auto Rifles kill infantry in 2 headshots at all ranges, and in 1 headshot and 1 bodyshot within ~50m. Heavy Assaults require an extra headshot.
SASR Mechanics
Tap Firing Issues
Tap Firing refers to the technique of firing single shots while letting the crosshair fully recenter before each shot.
Given proper timing, Tap Firing provides good accuracy and optimal damage output. Weapon’s affinity for Tap Firing is determined by its Recentering Speed.
Good Tap Firing skills are generally important for using any semi-auto weapon, but Semi Auto Sniper Rifles also have a big and unique issue related to overzealous Tap Firing.
SARS are among the few weapons with negative Recoil Recovery Delay, and they fully Recenter before the Refire Time is over – before you can take another shot. Especially if you use them with a Forward Grip, which reduces Vertical Recoil for sniper rifles, and thus reduces the time the weapon needs to recover recoil.
However, unlike Recoil, Cone of Fire does not start recovering until Refire Time is over.
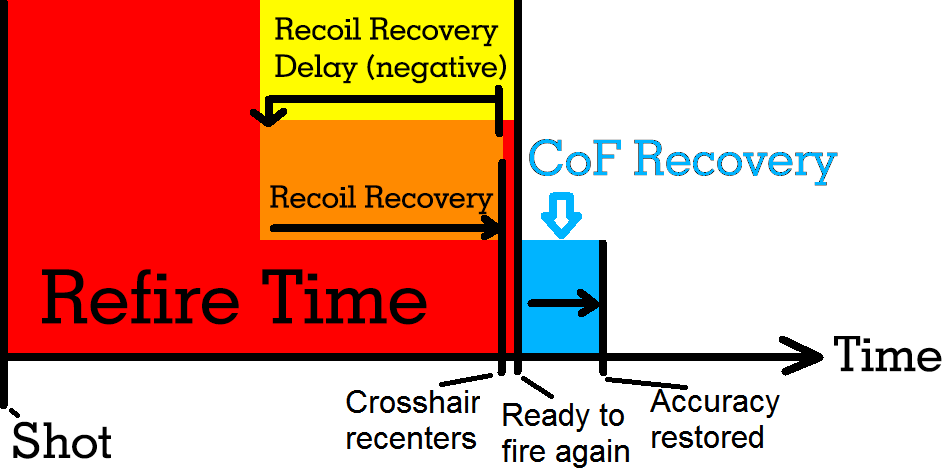
So if you fire as soon as you can, you will fire before Cone of Fire recovers, and you will be more likely to miss.
| Can fire again by | CoF Recovers by | Recoil Recovers by | /w Forward Grip | |
| Long Range SASR | 0.26 sec | 0.2615 | 0.251 | 0.233 |
| Close Range SASR | 0.26 sec | 0.3 | 0.261 | 0.241 |
For both SASR, recoil recovery finishes before CoF recovery starts, even without Forward Grip. One could argue that Forward Grip provides an extra moment to correct the crosshair placement between shots, but the difference of ~0.02 seconds is imperceptible to the eye.
Effectively, Forward Grips is useless for SASR.
These issues are less apparent for “long range” SASR, as they reset CoF very quickly.
Bolt Action Sniper Rifles
VS Bolt Action Rifles have bullet drop.
Each faction has a large selection of Bolt Action Rifles. They all have slightly different stats, with main differences in reload time, velocity, bolt chamber time, and the distance at which they can kill an enemy in one headshot.
Bolt Action Rifles are identical between factions.
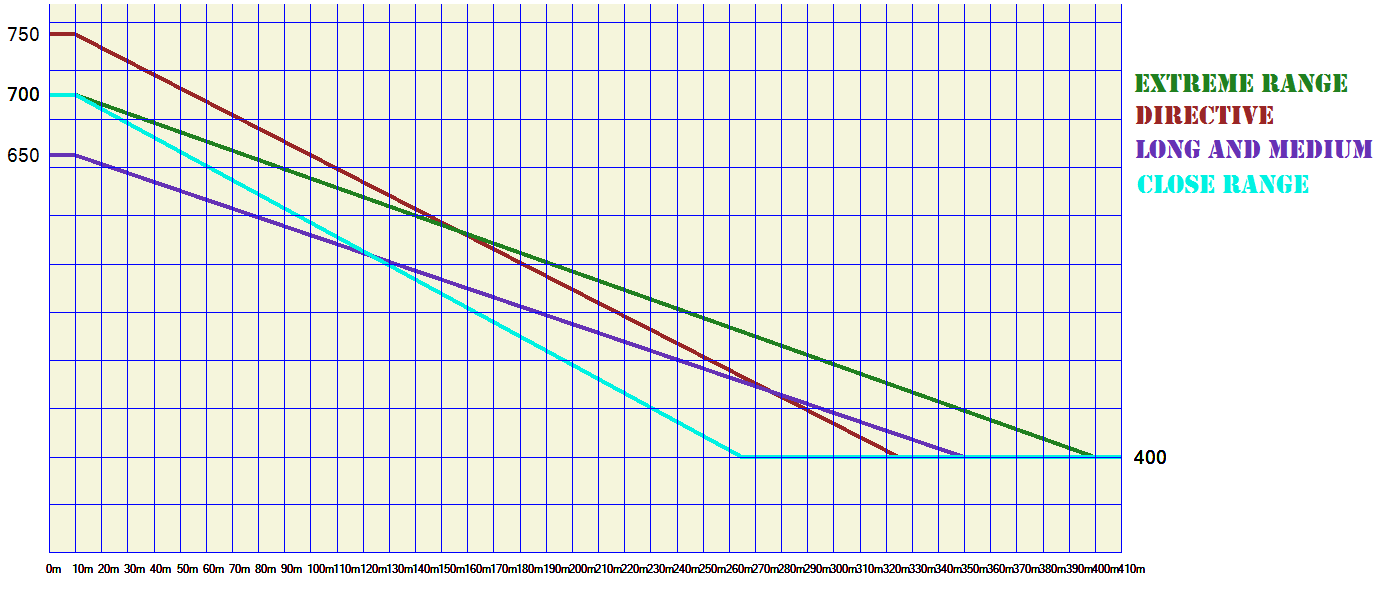
BASR Damage Comparison
Tier 1 – Close Range
TSAR-42

SAS-R

Ghost

Time Between Shots: 1100 + 170 = 1.27 seconds
OHK Range: 200m
Damage: 700 @ 10 – 400 @ 265
Velocity: 500 m/s
Reload Time: 2.8 / 4 sec
Ammo: 5 / 40
Scope In Time: 0.2 seconds
Scope Selection: 1x through 4x
The weapon of choice for Close Quarters Sniping.
Unlock cost: 650 ![]() or 499
or 499 ![]()
Tier 2 – Medium Range
M-77B

NC14 Bolt Driver

XM98

Time Between Shots: 1225 + 170 = 1.395 seconds
OHK Range: 250m
Damage: 650 @ 10 – 400 @ 350
Velocity: 550 m/s
Reload Time: 2.8 / 4 sec
Ammo: 5 / 40
Scope In Time: 0.3 seconds
Scope Selection: 6x through 12x
These are the most versatile Bolt Action rifles. They have a great balance of stats – almost as fast as Close Range rifles, almost as effective at range as Long Range rifles. They’re also dirt cheap.
Most of the “useful” sniping is usually done within 150m or so, and these rifles are arguably the best choice for that range segment.
Comparatively low projectile velocity will require you to deliberately compensate for projectile drop when going for targets outside 150m.
Bolt Driver is the starting Infiltrator weapon for NC.
Unlock Cost: 325 ![]() or 250
or 250 ![]()
Tier 2 – Long Range
SR-7

LA80

V10

Time Between Shots: 1395 + 170 = 1.565 seconds
OHK Range: 250m
Damage: 650 @ 10 – 400 @ 350
Velocity: 600 m/s
Reload Time: 3.1 / 4.7 sec
Ammo: 8 / 48
Scope In Time: 0.3 seconds
Scope Selection: 6x through 12x
These rifles take longer to rechamber and reload, but they gain increased velocity and magazine size.
Unlock cost: 1000 ![]() or 699
or 699 ![]()
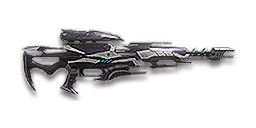
Tier 3 – Extreme Range
RAMS .50

EM4 Longshot

Parallax VX3

Time Between Shots: 1500 + 170 = 1.670 seconds
OHK Range: 300m
Damage: 700 @ 10 – 400 @ 400
Velocity: 650 m/s
Reload Time: 4.2 / 5.575 sec
Ammo: 5 / 40
Scope In Time: 0.3 seconds
Scope Selection: 6x through 12x
These rifles have the highest projectile velocity among conventional Bolt Action rifles, as well as the highest OHK Range, but they take the longest to rechamber and reload.
Superior velocity means you don’t have to compensate for Projectile Drop within 200m or so, basically making these rifles “point and click”.
When sniping targets at 250m+, take an extra second to properly Hold Breath and compensate for Scope Sway, because at those ranges even suppressed Scope Sway can mess with your crosshair placement.
Unlock cost: 1000 ![]() or 699
or 699 ![]()
BASR Mechanics

Bodyshots
BASR can kill full Nanoweave infantry with 2x Bodyshots within:
- Tier 1: 73m
- Tier 2: 44m
- Tier 3: 107m
So if the target is being particularly evasive, and you can’t land a headshot, it may be better to go for easier bodyshots.
Melee Combo
All BASR can reliably kill a standard infantry unit with a melee combo, and it can be an effective way of disposing enemies that managed to close the distance with you.
An enemy with full Nanoweave + Aux. Shield will be able to survive a melee combo from a Tier 2 BASR, but it should be a rare combination.
Try to develop a habit of equipping a sidearm right after a melee combo. Recovering and rechambering a BASR after a melee combo is going to take more than two seconds, and it’s better to do that after you make sure there are no enemies around.
Alternatively, you can use this trick to quick melee after a shot during the chamber animation.
Sidearm Combo
When faced with an enemy at close range, it’s a common technique to land an “easy” bodyshot, and then finish off the enemy with a sidearm.
Bolt Action Chamber Time
The Bolt Chamber Time shown on in-game weapon stat sheet doesn’t tell the whole story. You can learn more about it here, or just use the values provided in this guide.
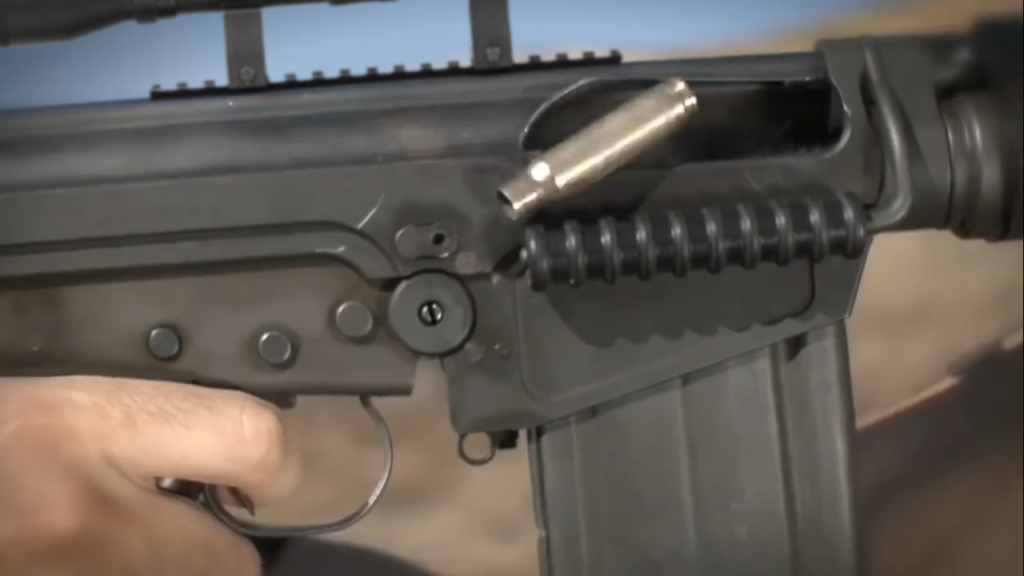
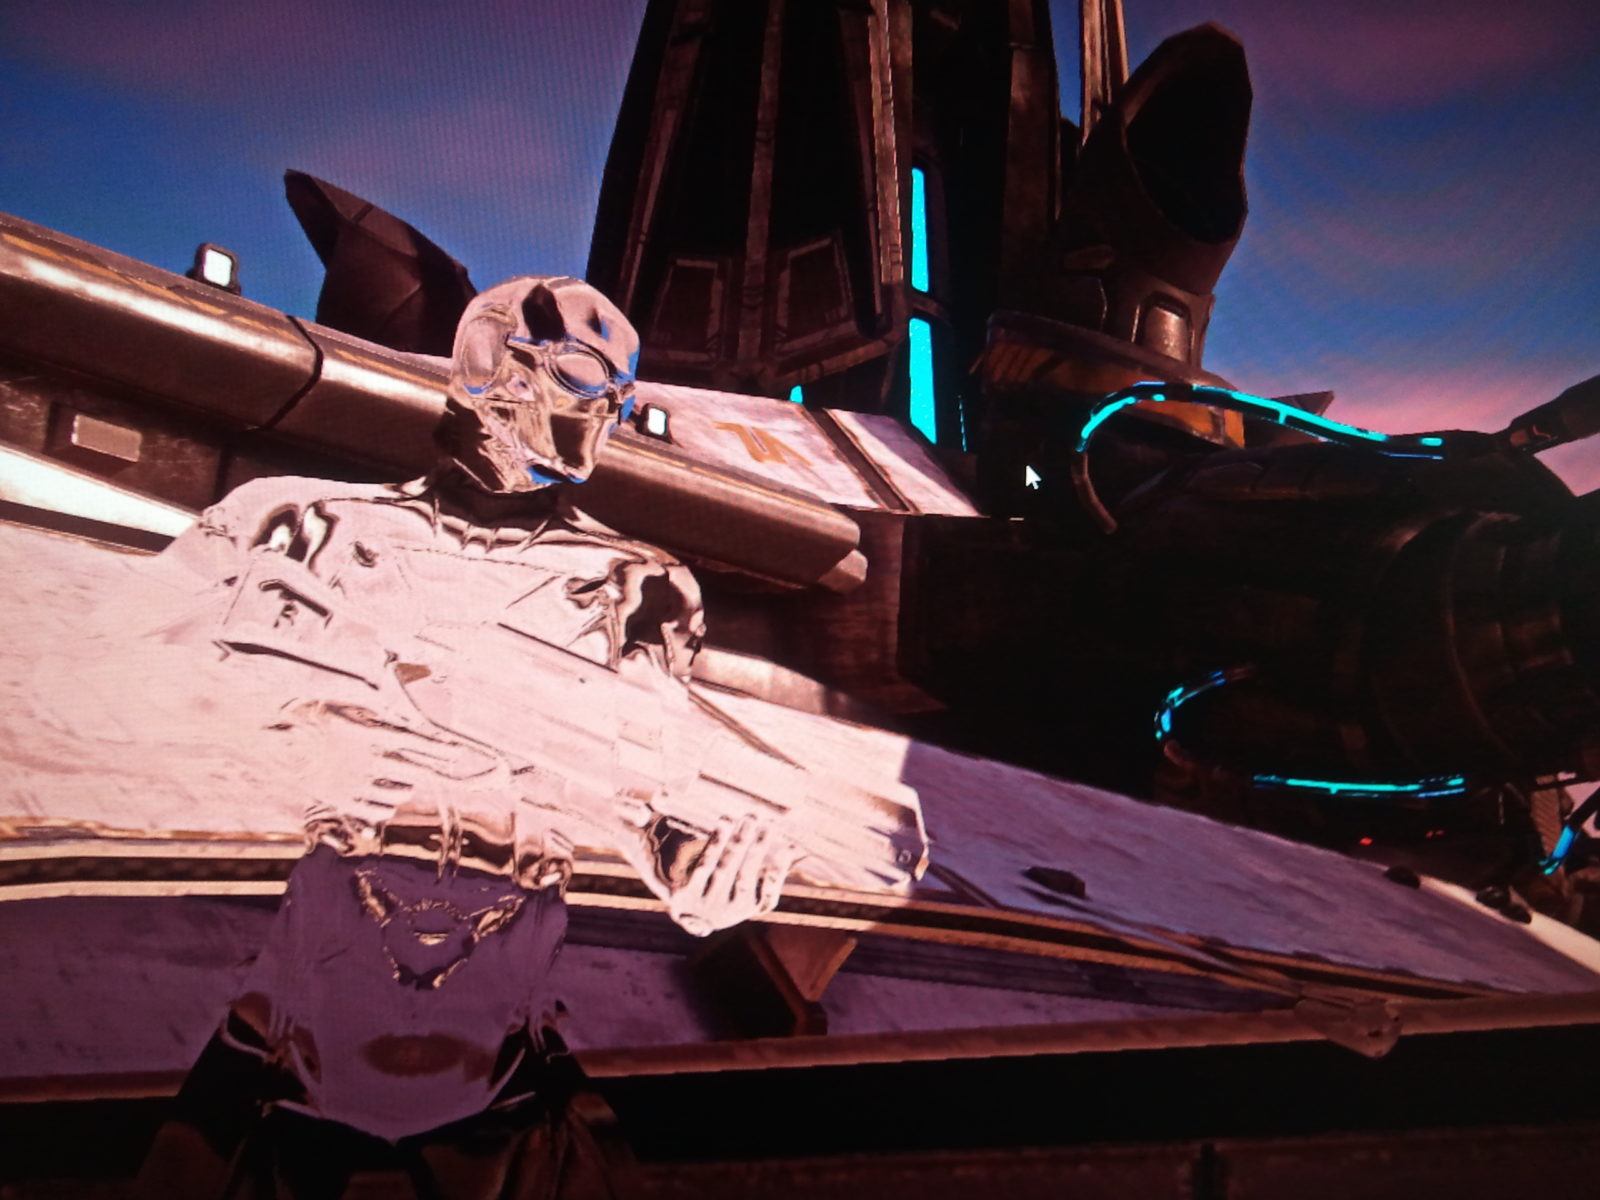
Straight Pull Bolt
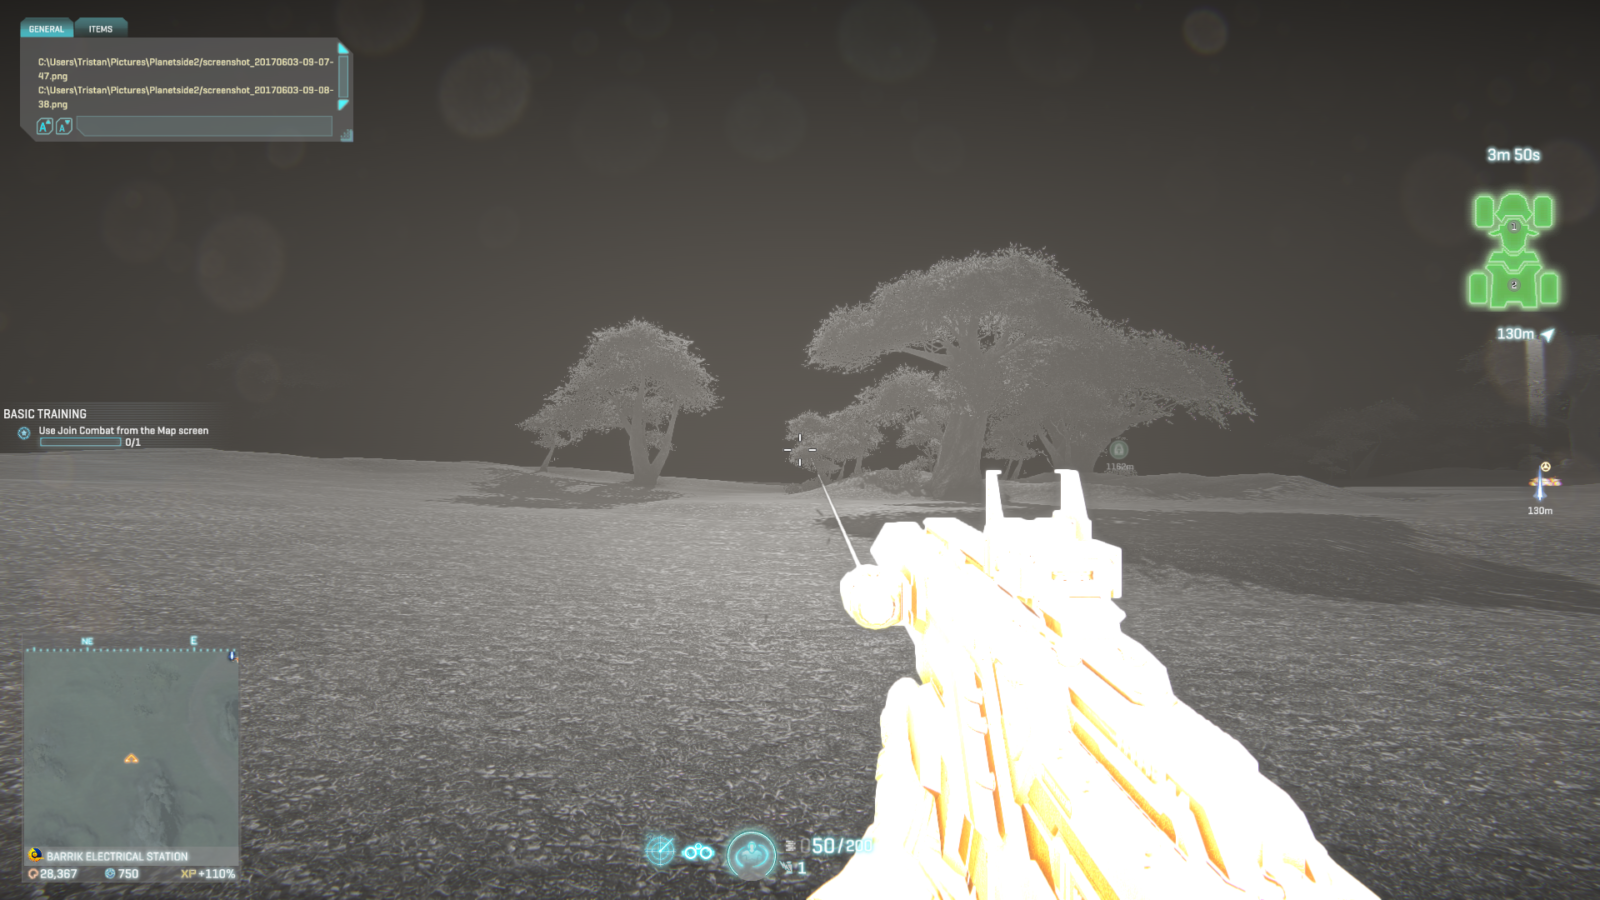
Normally, you can’t rechamber your rifle while Aiming Down Sights, and you have to always leave ADS to let rechamber animation begin. You will not be able to ADS during rechambering.
![]()
 Straight Pull Bolt attachment allows you to start rechambering the rifle as soon as Refire Time is over, and enables you to enter and leave ADS at any time during rechambering.
VS version of this attachment is called Supercooled Coil.
This significantly increases your effective Rate of Fire, as you don’t have to sit through Scope In Time after each shot. However, this can potentially lead to developing bad habits, such as tunnel visioning, so remember to often break ADS during rechambering to take a look around.
Quick-scoping
Normally, a Bolt Action Rifle with a 6x+ scope is a liability at a distance between 3m and 6m. Hip fire is still too bad, and high magnification makes it very inconvenient to ADS, not to mention that ADSing itself takes more than 0.3 seconds.
The standard procedure is to close the distance and go for a melee combo, or a hip fire headshot at nearly melee range, but it’s not always possible. Equipping a sidearm also takes half a second, and you might be dead by then.
Quick-scoping gives you another combat option in that situation. It relies on the fact that Cone of Fire Reduction starts as soon as you begin ADSing, and takes roughly as long. So by the time you would fully complete ADS animation, you would have 100% accuracy. However, you don’t need 100% accuracy to hit a shot on a target within 3-5m.
A skilled player with impeccable timing can fire an “accurate enough” shots during ADS animation, before the crosshair becomes visible.
To perform this trick you have to fire about ~0.2 seconds after you start Aiming Down Sights. You can release ADS key right after you click fire.
- This trick benefits a lot from having Crosshair Overlay.
The optimal amount of time to be holding ADS before firing depends on whether you’re going for a headshot or a bodyshot. Headshots require tighter CoF, so you have to give it more time to shrink.
Another factor is whether you were moving or stationary when you started ADSing. If you were standing still, your hip fire CoF was a bit smaller, so it would take a bit less time to reduce to the size you need.
Quick-scoping is not advised when going for a headshot on a full health enemy player. This has a lot of potential to fail, and even when done in 100% optimal way, you’re shaving off roughly a tenth of a second.
Quick-scoping is much more viable when going for a bodyshot to finish off an already wounded enemy. Then you don’t have to hold ADS for nearly as long to get an accurate enough shot, and you have much more margin for error.
You can see Mustarde doing a bit of quick scoping in this video.
Empire Specific Sniper Rifles
TRAP-M1
TRAP-M1 is classified as a Sniper Rifle, but functionally it is a burst fire Scout Rifle. TRAP has two fire modes: 3 round and 2 round bursts.
2x burst has less recoil and CoF Bloom, and is intended for longer ranges than 3x burst. As other sniper rifles, TRAP has poor hip fire.
TRAP-M1 spent a lot of time in underpowered state, so it accumulated a lot bad faith with the community, often being called a “trap purchase”. However, the weapon has received a trickle of buffs over the years, and now is in a pretty good shape.
Taking advantage of full rate of fire takes a bit of getting used to, but allows for a surprisingly high damage output even with bodyshots. The unusual damage model of 184 – 167 makes this weapon very consistent over range, and you can always switch to 2x burst mode when you need accuracy over firepower.
AF-8 RailJack
One of the few true railguns in NC arsenal, Railjack is the hardest hitting bolt action rifle, and has the highest projectile velocity of any infantry weapon in the game.
As always, there’s a catch: Railjack has a 0.2 second firing delay between trigger pull and the actual shot, which makes it somewhat tricky to use, because you still need to adjust aim for target movement during those 0.2 seconds.
If we include firing delay into bullet travel time, a bullet from EM4 Longshot will reach the target within 552m faster than a bullet from Railjack. So in order to benefit from its higher velocity, you have to be compensating for target movement during the fire delay. Otherwise, Longshot is objectively a better weapon.
Tip: you can bind “Fire” to your keyboard, so you can fire the Railjack without having to click the mouse. This should make it easier to keep tracking the target with the mouse during those 0.2 seconds.
Due to firing delay, RailJack is the easiest rifle to quick-scope with. With other rifles, you need to have very precise timing. RailJack’s firing delay does it for you. Simply click ADS, then immediately click fire, and your shot will have a nearly perfect accuracy, without having to ADS all the way.
This is excellenty demonstrated in this video.
Phaseshift VX-S
Embracing adaptability and versatility, Phaseshift can switch between “semi auto” and “bolt action” fire modes, though in reality the “bolt action” mode is just a more powerful semi auto mode.
In semi-auto fire mode, Phaseshift has similar performance to a TR / NC “long range” SASR, though it can fire only 6 shots before overheating.
In “bolt action” fire mode, Phaseshift has much more recoil, but kills standard infantry in one headshot within ~257m, and you can make two back to back shots, potentially killing two targets under a second (example).
It is highly recommended to use Phaseshift with a Forward Grip, as it reduces the high Vertical Recoil of “bolt action” mode.
Both fire modes don’t have any bullet drop, which effectively makes Phaseshift the only OHK-capable weapon without bullet drop. This makes it an interesting choice for a Suppressor, which reduces velocity to 467 m/s and OHK Range to ~240m.
Phaseshift also uses heat mechanic instead of ammunition. It doesn’t require reloading, and effectively has infinite ammo, but it needs to cool down between shots. Mechanics:
Firing accumulates heat. The amount of accumulated Heat Per Shot depends on the fire mode. When you stop firing, after a Heat Recovery Delay, the weapon starts bleeding off the heat at a Heat Recovery Rate.
There is only so much heat the weapon can accumulate at once, equal to Heat Capacity. If you overheat your weapon, the weapon will suffer an Overheat Penalty before it can start cooling down, and you will not be able to fire again until the weapon fully cools down.
Directive Sniper Rifles
Bighorn .50M

The Moonshoot

Parsec VX3-A

Time Between Shots: 1.5 + 0.17 = 1.67 seconds
OHK Range: 250m
Damage: 750 @ 10 – 400 @ 325
Velocity: 680 m/s
Reload Time: 3.86 / 5 sec
Ammo: 5 / 40
Vertical Recoil: 0.3
Hip CoFs: 5.5 / 6.25 / 6 / 6.75 / 1
Minimap Detect Range: 150m
The only way to obtain one of these sniper rifles is to complete the auraxium level of Sniper Rifle Directives.
The Directive Sniper Rifles have a unique combination of attachments: special HVA, Compensator and Straight Pull Bolt.
They can be treated as a variant of Extreme Range BASR. Directive Rifles have higher velocity than any conventional BASR, and they deal the most damage within 150m. However, they have increased Fire Detection Range, as well as shorter OHK Range.
Cross-faction Rifles
NSX Daimyo
| DIRECT DAMAGE | 225 @ 10m – 175 @ 350m |
| RATE OF FIRE | 180 RPM |
| VELOCITY | 600 m/s |
| AMMO | 3 / 30 |
| RELOAD TIME | 2.2 sec / 3 sec |
| UNLOCK COST | 1000 |
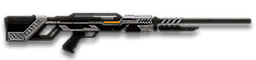
Semi-Auto
NSX Daimyo is a rather unique semi auto sniper rifle. It deals low damage to body, but thanks to Headshot Damage Multiplier of 5x, it is capable of killing infantry in one headshot within 180m.
Landing a headshot is pretty much the only way to kill with this weapon; it simply doesn’t have enough damage per mag to kill even one infantryman with bodyshots.
On the other hand, if you can land headshots, Daimyo lets you take 3-4 potentially lethal shots in a period of time where a BASR would be able to make 2 shots at most. Daimyo has the most immediate killing potential of any sniper rifle.
However, even if you are capable of consistently landing headshots on multiple enemies back to back, there are other considerations:
- Daimyo cannot kill deployables in one shot.
- Leveraging Daimyo’s advantage over a bolt action rifle means firing several shots without recloaking inbetween, which is potentially dangerous.
- Daimyo has more projectile drop than other sniper rifles with the same velocity. This is intentional.
Daimyo is most effective in the range bracket between 20m and 100m, and it directly competes with Tier 1 “Close Range” BASR. Compared to them, Daimyo has a set of other disadvantages.
- Tier 1 BASR can kill NMG / Adrenaline HAs within 22m. Daimyo cannot kill any shielded Heavy Assault in one shot.
- An accidental bodyshot with a BASR can be often converted to a kill with a second bodyshot. Daimyo is limited to headshots as the only option.
- When suddenly confronted by an enemy at extremely close range, a Tier 1 BASR can go for a bodyshot, and then finish off the enemy with a quick melee strike or a few sidearm shots. With the Daimyo it’s either headshot or I should have already had my pistol out. (c) AnuErebus
The weird combination of relatively high velocity and strong bullet drop is often brought up as Daimyo’s greatest downside, but at the moment it’s not clear whether this amount of drop is intentional, because based on its stats, it should have exactly the same drop and velocity as Tier 3 BASR.
While Daimyo can be spammed more or less effectively, perhaps you should treat it simply as a rifle that lets you take another shot if you miss. You still should recloak often for the sake of survivability.
Due to inconvenient drop, Daimyo is most effective when you are fighting against enemies on flat ground, so you don’t have to adjust for drop against every new target. Like other NSX weapons, Daimyo seems to be especially effective in one specific scenario, and mediocre in all other scenarios. It’s an interesting and unusual, polarizing weapon, but if you’re looking for tried and true, consider using a Tier 1 BASR instead.
In addition to the standard Darklight Flashlight, Daimyo has access to a couple of other rail attachments:
Anti Materiel Rifles
NS-AM7 Archer
| DIRECT DAMAGE | 400 @ 25m – 200 @ 200m |
| INDIRECT DAMAGE | 100 @ 1m – 25 @ 3m |
| TIME BETWEEN SHOTS | 1.5 + 0.25 = 1.75 sec |
| VELOCITY | 525 m/s |
| AMMO | 5 / 30 |
| RELOAD TIME | 3.0 sec / 4.25 sec |
| UNLOCK COST | 1000 |

Bolt-Action
Archer is a special rifle, available only to Engineers. It is weak against infantry, but capable of dealing high damage to MAXes and minor damage to armored vehicles. If Archer’s bullet travels more than 25m, it will deal splash damage in a small area.
Archer has surprisingly good Hip Fire accuracy, which can be useful against targets at close range. Archer also has 0.75x ADS Movement Speed Multiplier.
Since archer takes up the primary weapon slot, and it’s not effective against infantry, Archer Engineers have to rely on sidearms for infantry combat.
You can use the Toolbox to calculate Archer’s damage to different vehicles.
NS-AM8 Shortbow
| DIRECT DAMAGE | 400 @ 25m – 200 @ 150m |
| INDIRECT DAMAGE | 100 @ 1m – 25 @ 3m |
| TIME BETWEEN SHOTS | 1.5 + 0.25 = 1.75 sec |
| VELOCITY | 525 m/s |
| AMMO | 3 / 36 |
| RELOAD TIME | 2.8 sec / 3.65 sec |
 Bolt-Action
NS-AM8 Shorbow is one of the possible item rewards for winning a Critical Mass Alert, this is the only way to obtain it. You must already own NS-AM7 Archer in order to be eligible for this loot reward.
Shortbow is a variant of the NS-AM7 Archer with the following differences:
- Smaller magazine.
- Faster reload.
- Uses 1x or 2x optics.
- Has shorter Equip and Unequip Times, as well as access to Comfort Grip.
The latter would be the main reason to use Shortbow over Archer; it’s a weapon that you quickly pull out to deal with a MAX at close range, and then just as quickly put back.
Gameplay Tips
This video by Wrel does an excellent job of covering basics of Sniping.
A bit more advanced video by Cyrious Gaming.
Sniping seems very simple on the surface. And indeed, there is nothing particularly hard about using a Bolt Action Rifle to headshot a stationary enemy within 100m. Hold Breath, point and click, collect certs.
However, this shallow approach won’t get you very far. Bad snipers constantly get counter sniped, and struggle to kill anyone important, and are generally useless to their faction.
Choosing a Position
This topic is well-covered in Wrel’s video above, but to re-iterate, you want to find a flanking position to a mass of enemy players.
You need a piece of cover that you can hide behind while reloading and recharging cloak. This can be a rock, a tree, a hill, a pile of boxes, etc.
Ideally, you want to be on the high ground, as it makes you less noticeable, harder to reach, and gives you a better view.
Getting into a good position might require some Parkour skills or a Wraith Flash. A disposable Valkyrie or Ejection Seat ESF are also popular ways of getting into a position.
Looking for Targets
In real life snipers, always work in pairs, and have a partner to designate targets for them. In Planetside, you’re on your own. Here are some places where you can find targets to snipe:
- Near spawns – Sunderers, spawn tubes. Do not shoot. Freshly respawned players have invincibility, and even if you kill, they’re gonna respawn a few seconds later anyway.
- Choke points – enemies involved in a cover-based firefight with your allies near any door, corridor, bridge, narrow passing. Even between player made structures and parked vehicles.
- Cover – places where the enemy hides, repairs, heals, goes AFK, has tea parties. That includes vehicles running for cover. If they are running – that means repair. That means mostly stationary Engineer heads.
- Windows – easy targets since they have to stay still to shoot through a window.
- Landing pads – favorite spots for Engineers behind turrets and snipers.
- Phalanx Turrets – Engineers like to repair them and snipers like to hide around them. Fun fact: At certain distance turrets don’t render so you can shoot through them. It’s a bug exploit. Don’t make it your life goal.
- Trees, Rocks, Corners – Think of the best places you would hide if you were going to snipe.
- Terminals – Do not hesitate to shoot the heads before they disappear in the vehicle.
- Enemy Explosives – People like to leave mines in weird places.
Being Useful
Obviously, you won’t be contesting any points while sniping from a hill. As a Sniper, your power lies in the ability to kill any infantry target within hundreds of meters. So that’s what you must be doing: thinning out enemy numbers by killing enemies that your allies can’t reach.
Especially:
- Counter-snipe enemy snipers. Pay attention to their tracers and try to catch them out of cloak.
- Assassinate enemy Medics and Engineers behind turrets.
- Interrupt Heavy Assaults who are lining up Rocket Launcher shots.
- Harass enemy Light Assaults, who are trying to flank from high ground.
- Snipe enemy deployables, such as Shield Recharging Fields and Spawn Beacons.
Even distracting enemies and forcing them to take cover against you is a form of oppression, and can be enough to turn the tides in your favor.
Pay constant and conscious attention to what you are doing and how effective you are. If you’re sitting among allies, and just snipe whoever shows their face, then you’re not solving the chokepoint, you are the chokepoint.
Rhythm
Sniping is all about the rhythm:
- Cloak and move out of cover
- Pre-aim at a target
- Hold Breath
- Correct Aim and Decloak
- Stand still and shoot to kill
- Cloak and Move, while taking a look at the Minimap and around your character.
- Repeat.
Enemy snipers are by far the biggest threat to you. To avoid getting counter-sniped, you have to get in the rhythm. You only want to be decloaked and stationary for as long as it takes to fire off a shot.
You have to be stationary while shooting, because Sniper Rifles have poor moving accuracy, and will struggle to hit a headshot on an enemy outside 20m.
Right after a shot, you want to cloak and move, even if just a little bit. If you don’t move, an enemy sniper might just send a shot to where he last seen your head, and snipe you out of cloak.
Make sure to always move a few meters in a random direction. An experienced or a lucky sniper might adjust for your movement, and snipe you out of cloak even after you moved (!).
Protecting Flanks
Remember to take a look around once in a while, and pay attention to the minimap. After enemy snipers, your second biggest threat is enemy Light Assaults, who can and will hunt you down.
Don’t let them catch you off guard. If you see an enemy approaching, and he’s too close to be sniped, you can still get an advantage: cloak and crouchmove into a better position, and open fire with your sidearm on enemy’s back.
Always keep an ear out and listen.
Most of snipers play like they are AFK, looking down the scope. They can be spotted/taunted, I can cloak and activate a power knife multiple times without them paying any attention.
Be careful about spotting enemies. Your voice will give away your position, making you much easier to find if someone’s already looking for you.
EMP Combo
You can throw an EMP to about 40 meters out, and affected standard infantry will die from one SASR headshot or one BASR bodyshot.
Sidearm Love
Being comfortable with your sidearm of choice really pays off for a sniper. It will be your go-to weapon in most close quarters situations, and you really should invest your skill and resources into it.
You may want to steal a page or two from Stalkers’ book.
Hold Breath Management
It is highly recommended to use Target Focus implant while sniping, as it trivializes Hold Breath Management, and gives you much more breathing room while lining up shots.
When using a Bolt Action Rifle, remember to release Hold Breath key while the weapon is rechambering. This way you can squeeze in several shots even without Target Focus implant.
Muscle Memory
“Muscle memory” refers to leading moving targets and compensating for bullet drop on the subconscious level, without having to think about it. This ability develops naturally, but it takes a while.
The velocity difference between Sniper Rifles is enough to throw off your muscle memory, so if you are serious about sniping, it is highly recommended to stick with one rifle and one scope, unless you’re doing Directives.
Drag-shooting
See: Drag Shots.
Close Quarters Sniping
Refer to this guide by Davregis.
Sniper’s Loadout
Hunter Cloaking vs NAC
Hunter Cloaking is the default choice, as it guarantees a lot of uptime, gives you freedom of movement when moving into a sniping nest, and has a quick recharge.
Nano Armor Cloaking has been used in the past by some very successful infiltrators, as it significantly increases survival chances in a sniping duel, and almost removes any chance of being sniped out of cloak.
However, short duration and long recharge would make NAC impractical for most players.
Recon Device vs Motion Spotter
Recon Device if you want to support your allies with Recon from a safe distance. However, it runs out of darts quickly, and massively benefits from running Ammo Printer implant. It also requires quite a lot of upgrades to become truly useful.
Motion Spotter if you want to protect yourself from being flanked. Great longevity and effectiveness even at lower ranks.
Suit Slot
Flak Armor can be surprisingly useful, as it is not uncommon for snipers to come under vehicle fire.
Nanoweave Armor. Gives you an edge in case you get flanked. Increases your survival chances in ranged duels against automatic weapons and non-infiltrator enemies. Mostly useful for Close and Medium range sniping.
Advanced Shield Capacitor. Reduces downtime if you get injured. Arguable usefulness, because a headshot from an enemy sniper will kill you even if you’re at full health, and if you take a bodyshot, you will take some health damage as well, and would have to eat a Med Kit just to benefit from ASC.
And as a Sniper, you should always have free access to a piece of cover to let you regenerate shields in peace.
Adrenaline Pump. Makes you faster while getting into position, but does nothing for you once you arrive.
Ammunition Belt. Can be useful for experienced snipers, who legitimately run out of ammo once they find a good position. Ammo Printer Implant makes this obsolete, though.
Utility Slot
Normally you would run Med Kits, but AP Mines can also be useful in certain situations. If your sniping nest has limited approach paths, you can place mines to protect your flanks.
While doing a bit more aggressive infiltrating, VS and NC mines can be combined with EMP Grenades for devastating multikills.
Implants
Recommended
- Battle Hardened is crucial when sniping from amidst allies, you cannot afford to miss critical shots due to screenshake.
- Target Focus. Enough said about it.
Honorable Mentions
- Ammo Printer. Solves ammo issues, and provides a steady supply of Recon Darts and Motion Spotters.
- Regeneration. A convenient way of restoring health if you’re not running Med Kits.
- Catlike 5. Invaluable in getting to good positions, and makes it easier to escape or fight back if you get flanked.


