As the title suggests this is a guide for the mouse sensitivity settings for the FPS-MMO ‘Planetside 2’. It covers the factors affecting the movement of your crosshair, what overall sensitivity would benefit you, as well as how to set it, the effect of DPI on your settings and finally non-Infantry sensitivities.
If you’re already bored of reading and haven’t previously thought about your settings, use one of these.
Setting 1
Mouse DPI: 400
Mouse Sensitivity: 0.348
Aimed Sensitivity: 0.364
Scoped Sensitivity: 0.456
Use Raw Mouse Input: Enabled
Mouse Acceleration: Disabled
Setting 2
Mouse DPI: 800
Mouse Sensitivity: 0.212
Aimed Sensitivity: 0.228
Scoped Sensitivity: 0.300
Use Raw Mouse Input: Enabled
Mouse Acceleration: Disabled
Would you like to know more? Read on. Everyone’s doing their part, are you? The war effort needs your effort. Service guarantees citizenship.
What affects your in-game movement?
The way your character handles in-game should be determined by just two variables, your mouse’s DPI (or CPI, if you want to be pedantic) and the in-game sensitivity sliders. To achieve this, enable the Use Raw Mouse Input setting and make sure Mouse Acceleration is turned off.
The former makes sure that any software mouse acceleration from your Operating System does not affect PS2 while the latter disables any acceleration from the game itself. Mouse acceleration increases your crosshair’s speed depending on the speed at which you move your mouse and it is almost universally considered best to play with this setting turned off, as it reduces your accuracy.
Lastly, OS mouse sensitivity settings do not affect the movement of your crosshair, neither do your PS2 Graphics settings such as your Field of View or Resolution (unless your settings are too high and your machine cannot maintain a stable, high FPS. If your CPU is bottlenecking performance, ticking ‘Reduce Input Lag’ can help alleviate control problems.).
However, note that graphics settings, especially FoV, can have a significant impact on how the game feels. The lower your FoV, the faster your camera seems to move around the world as you are effectively playing ‘zoomed in’ with only a smaller portion of the game world rendered on your monitor. You can play with this setting a bit to see what’s comfortable for you; a higher FoV gives more situational awareness, while a lower FoV makes it easier to see things in the distance.
Turn Distance / Overall Sensitivity
The handling of your character is measured by the distance you have to move your mouse to make a full turn of 360 degrees, a.k.a. Turn Distance. This is a useful number to know as you can use it to make sure your settings are the same across several games, allowing you to carry over muscle memory.
To find your Turn Distance, simply point your crosshair at a particular spot and move your mouse horizontally until you’ve made a complete turn and are looking at the same spot again. Then, using a ruler, measure the distance that your mouse has traveled.
Settings with a longer Turn Distance are referred to as having a low Overall Sensitivity while those with a shorter Turn Distance as having a High Overall Sensitivity.
For Planetside 2, the relationship between your DPI + Sensitivities and the Turn Distance is rather involved. Halving your DPI doubles your Turn Distance, but the Sensitivity has no easy relationship to the other two. For instance, at 400 DPI at a sensitivity of 1 corresponds to 1.85cm/360, while 400 DPI at 0.5 sensitivity corresponds to 7.9cm/360.
Fortunately there are calculators online that do this work for you. You can make a copy of a calculator I’ve created here that will do the math for you, or you can have a look at https://www.mouse-sensitivity.com/ where you can convert your settings to and from other games.
Note that the in-game sliders only allow you to configure sensitivities in steps of 0.004. You can set a much more precise sensitivity by opening UserOptions.ini in your Planetside 2 directory and manually inputting values.
They can be found under the [General] header and here you may enter any number between 0.000000 and 1.000000 for any sensitivity you like, as long as the number has exactly six decimal places. This is especially useful if you use a high DPI as you need a lower sensitivity to compensate.
What is a good Turn Distance to use?
Among veteran players it is generally accepted that a high Turn Distance is desirable. As such, values around 20cm/360 are common, but many players will use a setting closer to 30cm/360 (dedicated fps players may even use 50cm/360 or beyond). This allows a player to be much more precise, enabling them to score hits and headshots from much farther away than they normally would.
On the other hand, having a very large Turn Distance means the controls are more cumbersome, which is not good for your ability to respond to being attacked from behind. With Planetside’s emphasis on verticality and the fact you can be attacked from all sides, this is a bad thing – especially if you’re playing a mobile Light Assault or SMG Infiltrator.
The answer to the title of this section may disappoint, as there is no one good answer here. The perfect Distance/360 for you will depend on your playstyle, your habits, the size of your mouse mat, your mouse grip and a wealth of other factors. Trial and error is the only way to find what suits you. Still, here are a couple of pointers.
Try to go up to at least 12cm/360, preferably 15cm/360. These are still considered to be on the high-sensitivity end, but are perfectly serviceable. Note that most games offer 5cm/360 to 8cm/360 by default so this might feel like quite a jump to you, but you’ll get used to it in no time if you stick with it. Do so, the benefits are worth it. You can consider going higher eventually, but this is not strictly necessary because of point 4 below. .
If you use a Fingertip grip to hold your mouse you may find it harder to adjust to this Turn Distance or to move beyond it. Chances are that this is because the movement of your mouse is coming from your wrist and fingertips rather than your entire arm. If you do this, learning to use your arm to aim can help you. Though Palm and Claw grip users likely already do this, it’s worth restating that the movement of the mouse should come more from your arm the higher your Turn Distance. .
For obvious reasons, it’s not a good idea to set your Turn Distance higher than the width of your mouse mat. A reasonable upper limit would be 90% of your mouse mat’s width. This ensures you can do a half-turn in either direction without having to lift your mouse. If you want to go higher, it’s advisable to get a bigger mat. Regardless of size, a good quality mouse mat is a good investment for any shooter. .
It is possible to have a ‘best of both worlds’ scenario where you retain both the mobility afforded by a low Turn Distance and the accuracy of a high Turn Distance. Planetside 2 has different sliders for different purposes: “Mouse Sensitivity” affects Hipfire only, “Aimed Mouse Sensitivity” affects ADS (Aiming Down Sights) using Ironsights, x1 and x2 Reflex sights, as well as the IRNV scope, “Scoped Mouse Sensitivity” affects ADS for x3.4 scopes and above. .
Note that the Turn Distance for any ADS mode is increased by a factor of 1.6 and then further multiplied by the magnification of the sight. Ironsights and x1 sights secretly have a x1.35 magnification built-in so, for the same ADS and Hipfire sensitivities, a x1 Reflex sight will have a Turn distance that is 1.6 x 1.35 = 2.16 times larger. All other sights have the magnification they claim to have, so a x2 Reflex will have a Turn Distance that is 1.6 x 2 = 3.2 times larger and so on. The Aimed and Scope Turn Distance in this guide refer to the x1 Reflex and x6 Scope (default sniper), but the calculator provided can do the math for any weapon optic in the game. .
This means that you can retain your high-sensitivity hipfire Turn Distance of 15cm/360, but set higher values for the ADS modes. I personally use 15cm/360 for Hipfire, 30cm/360 for Aimed and 100cm/360 for Scoped. This gives me a nice balance between mobility and accuracy. I wouldn’t recommend setting your Aimed and Scoped Turn Distance at much higher than x2 and x6 your Hipfire Turn Distance respectively, as that makes it difficult to compensate for recoil on automatic weapons. .
To get more mileage out of these values you can use a variable DPI option present on most modern gaming mice. I’ve a function called “DPI Shift” bound to a button that, when pressed, cuts my DPI in half so that I get 60cm/360 aiming and 200cm/360 scoped. This is really useful for counteracting scope sway on Sniper Rifles and for any kind of shooting beyond the 40 meter mark. If you plant to use this, ensure that your variable DPI does not go below 400, which will introduce inaccuracies.
The Effect of DPI
So far we’ve talked a lot about Turn Distance, but not too much about DPI. This is because, unless your mouse DPI is set exceedingly high, you will be able to find a sensitivity that gives you your desired Turn Distance. That is to say, for hipfire, 0.347074 sensitivity at 400 DPI gives you the same 15cm/360 as 0.078411 sensitivity at 2000 DPI. That said, the raw DPI of your mouse does play an important factor in the accuracy of your mouse movement. Many other, more qualified people have written at great length about this so I’ll keep this short.
Roughly speaking, a lower DPI at the same overall sensitivity will make your mouse movement less fine-grained and vice-versa. If you set your DPI too low you may experience pixel-skipping, which makes it more difficult to aim at things in the distance. Conversely, if you set your DPI too high even the slightest movements of your mouse will make the crosshair jitter across the screen, which decreases accuracy.
There will be several DPI values that avoid either extremes, depending on the specifications of your mouse. Setting your mouse to a non-native DPI will also cause inaccuracies and, if you’re not entirely sure of what your mouse is designed to handle, a DPI of 400 or 800 is a safe choice. For comparison, a Google Docs spreadsheet on GS:GO pro players’ settings reveals that DPI values between 400 and 1800 are common. If you would like to know more, there are a couple of links below. Understanding mouse settings is important, we can ill afford another Klendanthu.
Check out the links in this blog’s Performance Guide for more technical guides on gaming mice.
A word on non-Infantry sensitivities
With the luxury we are afforded by having three separate sliders with distinct purposes for Infantry gameplay, it is unfortunate that the sensitivities are a bit of a mess when it comes to vehicles. I don’t have a lot of experience as either a driver or a pilot so I will refrain from giving any comments on what your settings should be, but I will remark the following.
Non-Infantry sensitivities are a lot less of a mess than they used to be. Recently Daybreak has created a new slider specifically for vehicle secondaries, which alleviates some of the issues we had before.
Stationary turrets, such as Base turrets or Engineer MANA turrets will use your Hipfire sensitivity when firing normally, but your Aimed sensitivity when holding down the right mouse button. Base turrets have a built-in limit that restricts your turn rate, even if you set the sensitivity very high. .
When in a Lightning or Main Battle Tank, the turn rate of your main gun is determined by your Vehicle sensitivity and, like base turrets, have an upper limit to the traverse speed of the gun. Unlike base turrets, however, the turn speed of your main gun is still determined by the Vehicle sensitivity when you use your optics (zoom/thermal/nightvision). This means that you need to choose between turn rate and accuracy for your main gun’s sensitivity.* .
Secondary weapons both Ground and Air vehicles use the Vehicle Gunner sensitivity, whether using optics or not. The maximum turn rate of these mounted weapons is not restricted in any way.* .
Aircraft use Flight Vehicle Sensitivity for everything else, even the optics on the front guns. Strangely, the roll and pitch rate for aircraft is directly affected by the sensitivity setting and can be massively increased by using a higher sensitivity. Go into VR Training, equip a Galaxy with High-G or Precision Drops Airframe and set your sensitivity to maximum and watch your skywhale dance like a ballerina. Try the same thing with your Empire-Specific Fighter of choice.
Obviously, a high sensitivity makes aircraft difficult to control and makes it neigh-on impossible to hit anything with front guns (if any). However, if you’re just looking to get from A to B and evade fire, a high Flight Vehicle Sensitivity may benefit you.
*I’ve read in multiple places that dedicated tankers often use a mouse button to reduce their mouse’s DPI to improve long-range accuracy, especially with the Saron Laser Cannon on top of a Magrider or Harasser.
Thank you for reading this guide, I hope the information therein is useful to you. Feedback, or pointing out any errors or inaccuracies you spot is always appreciated and can be done in the comments below.
Happy Shooting!And remember, the only good bug is a dead bug!
Nawyria
Updated Oct 9, 2016 to reflect changes in vehicle settings. Also added a an extra paragraph on how FoV affects the feel of gameplay.
PlanetSide 2 Construction System allows players to build their own bases to create fortifications and provide support for the war effort. Building and sustaining bases requires mining Cortium with a special vehicle – ANT.
Cortium
Cortium crystals spawn randomly all over the world of PlanetSide 2. Depending on size, they contain 2 000, 6 000 or 35 000 Cortium.
ANTs can mine Cortium from these crystals. Fully mined Cortium crystals disappear and respawn later.
ANT – Advanced Nanite Transport – mining and construction vehicle. The driver controls a mining tool in front, and there’s another mining tool on top of the ANT, which can be replaced by a secondary weapon. ANTs have the same weapon selection as Sunderers.
ANTs are relatively fast and maneuverable, and with the right upgrades become very good at climbing hills.
Capacity: ANTs carry up to 8 000 Cortium by default, upgradeable to 10 000.
Mining: to mine Cortium, drive up to a Cortium crystal and press and hold “fire” button to activate the mining laser:
Default Yellowjacket laser at the front mines at a rate of ~200 Cortium per second and does not overheat.
Top mining laser has the same mining rate, but overheats quickly.
WLT-Howler is an alternative front laser, which has a higher mining rate, but quickly overheats.
ANT HUD has 2 bars: left bar represents the amount of Cortium in ANT’s cargo hold, and the right bar shows how much Cortium remains in the crystal you’re mining. You can mine in third person, though you won’t be able to see the capacity HUD.
Siege weaponry: ANT’s Top Mining Laser and WLT-Howler can be used to deal intense damage to constructed objects.
Mineral Radar: ANT will passively detect nearby Cortium deposits and show then on the minimap. This passive ability can be upgraded to increase detection range.
Deploy: ANTs can be deployed (default key “B”), giving access to a Construction Terminalon the back.
Transport Cloak – while active, cloaks the ANT. Without Vehicle Stealth certifications, a cloaked ANT will still be visible on the minimap of nearby enemies.
C-Barrier – while active, increases Armor by 20% for all sides except bottom.
Turbo – provides a boost to acceleration and maximum speed.
Using these abilities requires and spends Cortium.
Turbo is the most consistently useful ability, including running away, climbing hills, ramming enemy vehicles, or just moving between Cortium Nodes a bit faster, and it doesn’t care whether you’re soloing or working in a squad. At the same time, it is also the hardest to use properly and drains the most Cortium.
Just a light tap on the Turbo will bump up your maximum speed if you’re moving across flat terrain.
ANT Turbo works like a rocket, and it doesn’t require ANT’s wheels to be touching the ground in order to boost your speed.
Reinforced Armor: this defensive certification will increase ANT’s Health by 10%.
These recommendations apply to mostly solo builders that want to avoid direct confrontation with the enemy or working as a part of a larger group.
Cortium Capacity: +1000 for 50 Certs.
Mineral Radar 2 and 3: detects Cortium within 400m. 300 Certs in total.
C300 Turbo Engine 1:150 Certs.
Or Transport Cloak 1: 50 Certs and Vehicle Stealth 2: 130 Certs.
Racer Chassis 2:300 Certs in total.
Basilisk:200 Certs. Reliable, easy to use, versatile and dirt-cheap.
Construction Terminals
ANT construction terminal
Cortium Silo Terminal
Construction Terminals
Deployed ANTs and Cortium Silos provide access to Construction Terminals.
Each time you want to build something, you have to buy it from a Construction Terminal. You can buy it with Cortium stored inside, or with Certification Points.
By default, players can buy: Cortium Silo, AI Turret, Rampart Wall and Bunker.
Other schematics must be first unlocked with Certification Points or Daybreak Cash. Schematics unlocked with Daybreak Cash will be unlocked for all characters on your account.
Once you buy a construction item, it will appear in your inventory, and remain there until you place it or log out. You are free to move to other locations, switch weapons and spawn vehicles.
However, if you respawn or redeploy, the object will disappear from your inventory, wasting the resources spent on it. Also, your inventory can hold only one construction item at a time, so if you try to buy another item, the first one will disappear.
How to build
To build a bought item, select it in your inventory. You will see a blueprint before you.
Controls and Restrictions
Hold left or right mouse button to rotate the blueprint. Hold “Ctrl” to slow down the rotation.
Hold both mouse buttons and move the mouse back or forward to move the blueprint away or closer to you.
You have to make sure that blue spheres on the blueprint are under ground, and green spheres are above the ground.
Press the action key (default “E”) to start construction.
Blueprints can be placed only on ground, and not on large objects, such as bridges or rocks.
After placement, it takes 45 seconds for an object to fully construct. While under construction, player-constructed objects take much more damage, and they can be damaged by small arms.
Each schematic can be built by an individual player only a limited amount of times. This limit is shown at the top right corners of all construction items’ icons in the build menu.
This limitation is tied to specific players, so, for example, two players can build up to 6 Rampart Walls together.
Exclusion Area
Some construction objects cannot be placed too close to each other, this is called “exclusion area”. It is supposed to be indicated by a red ring on the ground, but often it’s not displayed at all.
No-construction Zones
Most of the “conventional” PlanetSide 2 bases have circular no-construction zones around them. These zones become visible whenever you’re in an ANT, or trying co construct something.
ANTs can’t be deployed inside those zones, and you cannot place any blueprints inside them. Additionally, no-construction zones are protected from Flail and Glaive constructed artillery, but not from Orbital Strikes.
You are free to build anywhere outside no-construction zones, including enemy territory.
A coordinated outfit squad can purchase a bunch of items, load up in a Galaxy, fly deep behind enemy lines, drop and raise up a whole base within minutes. Then they can hack or construct a vehicle terminal, spawn a bunch of ANTs and start mining Cortium for their Silo.
Previewing Placement
Credit: thanks to /u/Rip17 for explaining this feature.
There is a trick you can use to preview the placement of a constructed object before you actually begin construction. For example, this is useful when trying to build several Rampart Walls without any gaps between them.
To preview placement, press Ctrl + F11 to “hide weapon”, and then hit “E”. The object will remain in place, allowing you to move around and check placement.
Press Ctrl + F11 again to “show weapon”, and then you can hit “E” again to begin construction, or swap to another inventory item to cancel placement.
Ikanam Biolab and Others
Most of the “conventional” PlanetSide 2 bases have no-construction zones around them, but there are exceptions, like Ikanam Biolab, located on Amerish. Players are allowed and encouraged to build their own bases on top of the Ikanam’s structure.
In addition, there are several bases without no-construction zones that consist of just a Vehicle Capture Point.
Schematics
All constructed objects can be repaired by using Engineer’s Repair Tool on the small blue console. Every constructed object has one.
“Hard” objects, like Turrets and Structures can be damaged only by weapons capable of damaging armored vehicles, and they don’t take friendly fire damage.
“Soft” objects, like Modules, Spawn Tubes and Spires, can be damaged by all weapons and they take 70% reduced friendly fire damage.
The Q-menu can be used to restrict access to many constructed objects.
Core
Cortium Silo
Unlock cost: free
Build cost: 2000 Cortium Cortium Drain Rate: 2 / sec Limit per player: 1 Exclusion Area with other Silos: ~210m
Cortium Silo is the heart of any constructed base.
Many constructed objects will continuously drain Cortium from the silo. Drain starts when the object is fully constructed, and persists until the object is destroyed.
While you canconstruct objects outside of a Silo’s range, they will decay rapidly and disappear within minutes, even if they don’t require a constant supply of Cortium to function (e.g. a Pillbox).
Constructed objects and Silo itself will also start decaying if the Silo runs out of Cortium, so it is extremely important to always keep some Cortium in the Silo. Note that Silo itself has a small Cortium drain.
Silo’s owner and their squadmates will receive a warning when Cortium level falls below 1000.
Silo can store up to 50 000 Cortium. A small light atop of the silo and bars on its sides will indicate the stored amount.
Silo costs 2 000 Cortium to build, but it spawns with 2 000 Cortium inside, so it’s essentially a free building. You can deposit Cortium into a Silo from an ANT the same way you mine minerals – drive up and hold “fire”. Once deposited, Cortium cannot be extracted from Silos.
Tip: You can deposit Cortium into a silo while it’s being built.
Silo provides access to a Construction Terminal. By default, any ally can deposit Cortium into your Silo or access the terminal to build something, but you can use the Silo’s Q-menu to restrict access.
Owner of the Silo and his squadmates can access Deconstruction Tool from a Construction Terminal, and deconstruct anything inside the Silo’s power range, so you have a bit of control of what other players are building, and you can delete unwanted structures.
When powered by a nearby Silo, provides a respawn point for nearby allies.
Tube’s owner is awarded a small amount of XP for every respawn.
Spawn Tube takes small arms damage and has about 10 000 effective health against bullets, meaning that 2-3 magazines from an average rifle will take it out.
Spawn Tube begins to function as a spawn point the moment it is placed, before it is fully built. Unclear if bug. (Thanks to Danath for this info).
Binding: any allied player can walk up and press the action key to bind to the Spawn Tube. This will allow the player to respawn on this particular Tube from anywhere on the continent. A player can be bound only to one Tube at a time.
Note: this functionality is currently broken, and it’s possible to respawn on any Tube from any range.
Modules
These small box-like objects enhance other constructed items around them. Modules require a constant supply of Cortium from a nearby Silo in order to function.
Different modules can be placed near each other, but modules of the same type have a 25m exclusion radius around them.
Turret AI Module
Makes nearby constructed Turrets automated. They will automatically target nearby enemies, and return fire when fired upon from longer ranges. Turrets can still be manned and targeted manually, if need be.
Additionally, Flail and Glaive IPC artillery cannons require an AI Module to function.
Repair Module
Automatically repairs nearby constructed items, except the Repair Module itself.
Skywall Shield Module
Creates an aerial shield 15m above the module. The shield:
Blocks all projectiles from above, including those fired by allies. Projectiles from below can pass freely.
Vehicles touching the shield will take ~1500 damage once.
Aerial shield will be temporarily disrupted if hit by Glaive IPC constructed artillery.
Structure Shield Module
Creates one-way shields in the loopholes in nearby Structures to allow allied players to fire from safety.
Shielded Bunker
Shielded Rampart Wall
View through tower shield
View through garage shield
Creates vehicle shields in Sunderer’s Garage entrances. In case of Sunderer Garage, shields will stop projectiles from both sides, but they will allow enemy infantry to pass through.
Shielded Garage
Shielded Garage
The player can interact with the Structure Shield Module to make affected constructed objects invulnerable for a short time. Interacting takes 5 seconds, invulnerability lasts for 30 seconds, after which there is a 30 second cooldown. Invulnerability is lost if the module is destroyed.
Alarm Module
This module will alert the owner and their squad when an enemy is detected or a construct is attacked within 100 meters of it.
Reinforcements Module
If you have a Sunderer deployed in range of this module, allied infantry will be able to deploy from across the whole continent on that Sunderer, as long as the base meets the requirements to be “reinforcements needed“. Generally, this means that there are more enemies in the region than allies.
Module
Cortium Cost
Limit per player
Effective Radius
Cortium Drain Rate
Unlock Cost
Certs
DBC
Repair
300
3
25m
0.5
500
249
Turret AI
500
2
20m
1000
399
Skywall
500
1
40m
1500
799
Structure Shield
300
2
35m
1000
399
Alarm
400
1
100m
1000
399
Reinforcements
1000
1
25m
1250
399
Structures
In addition to providing cover for defending infantry, these fortifications can and should be used to protect key base Modules and Spawn Tubes.
Durable fortification with firing areas for infantry on the first floor, and an open area on top. When powered by a nearby Silo, Bunkers provide access to an Infantry Terminal.
Two Modules, one Bunker
Elysium Spawn Tube in Bunker
If deployed low enough, Bunker’s corridor can conceal a Spawn Tube and 1-2 Modules. Usually, this doesn’t result in a blocked exit.
A large tower structure that can be occupied by infantry. The roof hatch can be used by enemies to get into the Tower. When affected by a Structure Shield module, the hatch gains a shield which blocks large projectiles, but will still let through enemy players and C4
Fortified structure with shooting areas for infantry. The roof hatch can be used by enemies to get into the Pillbox. When affected by a Structure Shield module, the hatch gains a shield which blocks large projectiles, but will still let through enemy players and C4.
Pillbox can be used to hide up to five Modules, with the entrance blocked by a Spawn Tube. Keep in mind that allies, yourself included, cannot pass through the Tube either.
Modules in a Pillbox, with the entrance blocked by a Spawn Tube. It’s not invulnerable, killing the Spawn Tube lets you get in, a there is a gap between the tube and door frame through which one can shoot through.
The intention is to make it harder to just “snipe” modules from some arcane angle.
When building in such a way, you have to put the Pillbox first, and only then build inside. You also have to make sure that Pillbox’s floor is below the ground.
Alternatively, you can put the Spawn Tube deeper inside the Pillbox, and leave the entrance open, but then Pillbox will fit at least one Module fewer.
A large multi-purpose structure. The Garage can provide cover to a single Sunderer, and still have enough room left for Structure Shield Module, Reinforcements Module and Pain Spire.
Alternatively, the garage can house an Elysium Spawn Tube, all five Modules, and a Pain Spire. It can also be used as a base entrance. Any MBT will fit through the garage.
Vehicle Ramp
Unlock cost: 1000 Certs / 399 DBC Build cost: 300 Cortium Cortium Drain Rate: 0 / sec Exclusion Radius with other Ramps: 0m Limit per player: 2
A multi-purpose vehicle ramp. Among other applications, can be potentially used to allow only one-way movement of vehicles in a narrow space.
Defense
Turrets
Hoplon AA Turret – Full Sized Pic
Hoplon AA Turret
AI Turret
AV Turret
Low Profile AV Turret
Turret Entrance
Cortium Drain Rate: 0 / sec Exclusion Radius between all Turrets: 20m
Mannable turrets for base defense. There are AI, AA and AV versions. Turrets use heat ammo mechanic, but they’re not affected by AMP Station bonus to turret cooldown.
Despite looking like a common base Flak turret, constructed Hoplon AA Turret does not have a Flak effect, and functions more like a simple machinegun, such as Walker. Worth noting that when manned by a player, the AA turret is about as effective against infantry as the dedicated anti-infantry turret, though it has more limited aiming angles downwards.
Turrets don’t require power to function, and it is possible to build them anywhere outside no-construction zones to temporarily fortify a specific area. Without Silo, turrets will decay within minutes, though.
Turrets can be automated via Turret AI Module, in which case they will automatically attack respective targets within Attack First Radius, and engage enemies within Return Fire Radius if they damage the Turret or another constructed object nearby. In this case, the turret will keep tracking the enemy for 10 seconds, even if they leave the Return Fire Radius, though in that case the turret will stop firing.
Notes:
Automated AA Turrets will target enemy drop pods.
Automated turrets ignore cloaked units.
Automated turrets engage only their intended targets, e.g. AV turret will not target infantry.
Turret
Cortium Cost
Limit per player
Attack First Radius
Return Fire Radius
Unlock Cost
Certs
DBC
AI
400
1
50m
300m
Free
AA
400
1
150m
500m
500
249
AV (High Profile)
400
1*
100m
300m
500
249
AV (Low Profile)
300
1000
499
* – both variants of the AV turret count for the same limit. You can have only one built.
A long horizontal wall with firing areas for infantry. Height of the wall can be varied greatly, creating a low wall just to protect infantry, or a high wall to provide cover for vehicles and structures.
Lumifiber Rampart Wall – has Lumifiber faction-colored trim. Counts to the same limit as Rampart Wall.
A large wall that can withstand a moderate amount of damage. Unaffected by Structure Shield Module.
Vehicle Gate
Unpowered Vehicle Gate without structure shield module
Unpowered Vehicle Gate
Hidden Structure Shield Module
Powered Vehicle Gate
Unlock cost: 1000 Certs / 399 DBC Build cost: 400 Cortium Cortium Drain Rate: 0.5 / sec Exclusion Radius with other Gates: 0m Limit per player: 2
Provides a frame for a large force field that blocks enemy vehicles and all projectiles in both directions. Must be powered by a nearby Silo in order to generate the force field. Structure Shield Module is not required to generate the force field.
Tactical
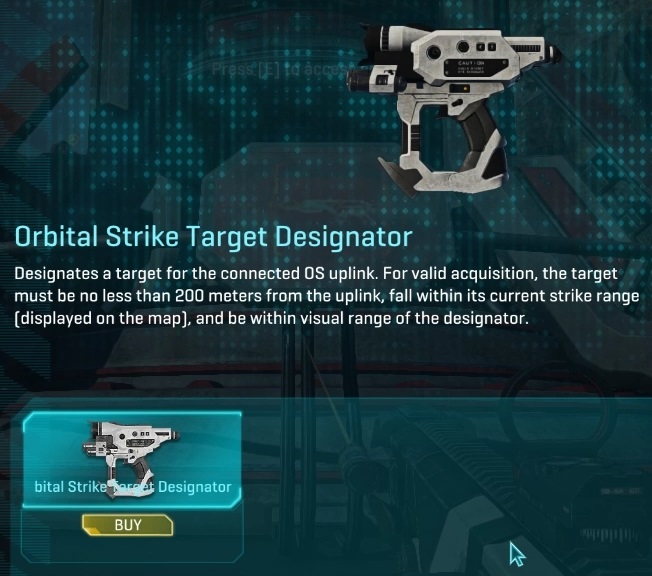
Orbital Strike Uplink
Unlock cost: 2000 Certs / 1499 DBC Build cost: 3000 Cortium Cortium Drain Rate: 4 / sec Exclusion Radius with another Uplinks: 500m Limit per player: 1
When powered by a nearby Silo, and after a sufficient charging time, the Uplink can unleash devastating Orbital Strikes at nearby enemy positions, including standard lattice bases.
Mechanics
When powered by a Silo, the Uplink passively gains charge over time. As the charge increases, so does the Uplink’s striking distance:
Striking distance starts at 0m and increases by ~50 meters per minute.
Minimum striking distance is 200m (~4 minutes charge time) and it is displayed on the map as an orange circle.
Current striking distance is displayed as a yellow circle, and the current charge level is indicated by power bars on the Uplink itself.
Maximum striking distance is 800m (15 minutes charge time).
Enemies within ~700-800m of the Uplink can see the current striking distance on the map.
Firing an Orbital Strike consumes charge from the Uplink based on the used striking distance. For example, an Orbital Strike within 33% of maximum striking distance will consume 33% of the Uplink’s maximum charge. So if the Uplink is sufficiently charged, it is possible to to call in several close range Orbital Strikes in a row.
The Designator fires darts to mark the location for the Orbital Strike. It can shoot only while aiming down sights, and has a short range of ~60m.
Redeploying or respawning will remove the Designator from your inventory.
Uplink’s owner always gets credit for kills, regardless who used the Target Designator.
Uplink has to be powered by a Silo in order to fire.
After a target has been designated, it takes a few seconds for the Orbital Strike to fire. All nearby units, including enemies, are warned about incoming strike via radio message, and can see the strike’s indicator on the minimap.
Orbital Strike deals devastating damage in a relatively small radius of ~40m, killing all units and destroying all constructed items, and then the damage starts tapering off. The damage is applied in a full column, meaning it will destroy targets even at a flight ceiling.
Orbital Strike will also knock back nearby units, especially infantry, often it is the fall damage that kills them.
Infantry inside buildings will be knocked back, and can receive collision damage, but not direct damage from the OS itself.
Damage to friendly units is greatly reduced, to the point that you can call Orbital Strikes at your own Constructed Bases that are being overrun with enemies, and the OS is likely to deal less damage than enemies would.
Destroying an Orbital Strike Uplink
Orbital Strike Uplinks are notoriously hard to destroy due to (now fixed) bugs and lack of understanding of some of the mechanics.
The Orbital Strike Uplink behaves differently depending on whether it is powered by Silo or not.
When powered, the Uplink’s chassis (the antenna spire) becomes invulnerable to all damage. The only way to destroy a powered Uplink is to destroy the core.
However, while powered, the whole Uplink, including the core, gains an invisible layer of shields that absorb quite a lot of damage. You can take the shields down and expose the core for ~10 seconds by shooting anywhere the chassis with any AV weapon.
Shields around the Core
Exposed Core
Exposed core can be damaged even by small arms fire. However, if you don’t destroy the core fast enough, shields will regenerate.
When not powered, the Uplink can be destroyed by directly damaging the chassis by any AV weapon. However, unpowered Uplink doesn’t have a core.
Depending on situation, it may be faster to destroy the Silo, and then kill the Uplink by destroying its chassis.
However, if Silo is well protected and constantly getting repairs, while the Uplink is exposed, and you can sustain damage for a lot of time, you can take down the Uplink’s shields and destroy the core. I believe this circumvents enemy attempts to repair the Uplink as well.
When destroyed, the Uplink deals a large amount of damage to everything nearby.
Note: there have been some indications that Uplink’s chassis being indestructible while powered by a Silo is not intended behavior.
The Flail
Unlock cost: 1500 Certs / 799 DBC Build cost: 500 Cortium Cortium Drain Rate: 0 / sec Exclusion Radius with other Artillery: 0m Limit per player: 1
Flail is a long range artillery piece; it fires salvos of four anti-vehicle shells on locations painted by a special Dart Device. Only targets outside no-constructed zones can be designated. Flail is mostly useful for attacking other constructed bases, however it is countered by Skywall Shields.
Mechanics
When Flail is powered by a Silo and connected to a Turret AI Module, its owner and their squadmates can access the Dart Device from the Flail.
The Dart Device fires invisible darts that slowly fly on a ballistic trajectory with a lot of projectile drop. It is technically possible to designate targets hundreds of meters away, but the dart can be tricky to hit. Dart Device is lost if player respawns or redeploys.
Flail has a minimum range of 100m, and a maximum range of 600m.
Darts will self-destruct when fired into no-construction zones, but they can be fired from no-construction zones.
There is about a 15 second delay between the dart hitting and shells hitting the target, depending on how much the Flail’s turret has to turn to face the target.
Dart Device has an unlimited supply of darts, but there is a ~15 second cooldown between uses. Weird things can happen if you try to fire two darts back to back. Second barrage may not fire at all, or the second dart can change the location of the first barrage.
Flail fires a salvo of 4 shells that deal splash damage to vehicles and infantry. These shells do not seem to have a direct damage component. Flail’s targeting indicator on the minimap is visible to enemies.
Each shell deals up to 750 damage, which scales down to about 450 damage at 20m or 25m.
Flail’s shells use Damage Type 46. As far as we know, it’s not used by any other weapon, and no units have special resistances to it.
Shells land fairly close to the dart, and in a tight grouping, but there is still a drift of several meters, so targets at the very edge of the splash zone can take damage from one or several shells depending on chance.
A full Blockade Armor Sunderer (6000 health) survives one salvo with about 30% health remaining.
A Deployment Shield Sunderer survives one salvo with very roughly 40% health remaining, and will be destroyed by a second salvo.
It is assumed that a good hit with a Flail’s salvo will “one shot” every other ground vehicle, except maybe for MBTs.
Glaive Ionized Particle Cannon is an artillery piece intended to disrupt constructed bases within 1000m range. Glaive requires a Turret AI Module to function.
Glaive fires volleys of three shells with a large spread. Each shell:
Deals up to 550 damage, including to vehicles.
Will temporarily disrupt Skywall Shield if the aerial shield is hit.
Base owner or their squadmates can interact with the Glaive to equip an IPC Targeting Dart, which can designate targets between 100m and 1000m from the Glaive.
Unlike Flail and Orbital Strike, Glaive will keep pounding at a designated area for at least several minutes with multiple salvos. Skywall Shields disrupted by Glaive will automatically regenerate, just in time to be disabled by the next volley.
This means that if a base is protected by a Skywall Shield module, it will cancel each other out with the Glaive. However, if multiple Glaives are used to bombard the same area, or if there is no Skywall Shield in place, then Glaive will be able to damage and disrupt other constructed objects it hits.
Routing Spire
Routing Spire
Router Pad
Unlock cost: 500 Certs / 399 DBC Build cost: 300 Cortium Cortium Drain Rate: 1 / sec Limit per player: 1 Exclusion Radius with other Spires: 50m
Routing Spire provides access to a deployable Router Pad, which (for now) can be placed anywhere on the continent to provide a respawn point for allies within 300m of the pad. Router Pad can be deployed in lattice bases, including buildings’ rooftops and underground tunnels.
Pad’s owner is awarded with a small amount of XP for every respawn.
A Router Pad in the right place can make all the difference during attack or defense, but it is also easily destroyed even by small arms fire.
Currently, the Router Pad will remain operation even if the Routing Spire is destroyed or loses power, but this is a bug. Intentional behavior is that Router Pad gets destroyed.
Router Pad occupies the same inventory slot as other purchased constructed objects, and it will disappear from your inventory if you respawn or redeploy.
Pain Spires deal 100 damage per second to enemy infantry and MAXes in a 15m radius. Pain Spires seem to be the most useful when constructing all-in-one bases in Sunderer Garages. Vehicle Shields generated by Structure Shield Module will protect modules inside the Garage, while the Pain Spire will keep the enemy infantry out.
Pain Spire can be destroyed by small arms, and it has about 20 000 effective health against bullets, meaning that 4-5 magazines out of an average rifle will take it out.
2x C4 leave Pain Spire with about 20% health left.
Support
Instead of Nanites, spawning vehicles at constructed vehicle terminals costs Cortium, equal to 2x amount of the usual vehicle’s price in Nanites.
Terminals can be hacked by enemy infiltrators, but they won’t be able to spawn vehicles.
Increases morale of nearby allied units, and incurs a similar penalty to enemies.
Field Tools
All Field Tools and artillery targeting darts are mutually exclusive. Only one can be equipped at a time.
Deconstruction Tool
This tool can be used by owner of the Silo to delete unwanted constructed objects within that Silo’s power radius.
Useful Tools
This excel sheet by Ascidon aka SoSaltySalt can quickly calculate costs for different construction objects and the drain rate, as well as how far an OSU can charge with a certain amount of cortium as well as the time it takes.
Since the Construction System is so open and modular, players are allowed to build all kinds of different bases for many purposes, and the potential impact of a constructed base will increase exponentially with some teamwork involved.
For example, a constructed base with vehicle terminals can help sustain a vehicle push over an open ground, while providing cover for anti-air units and potentially some artillery support with the Flail.
Any base with an Orbital Strike Uplink can project a lot of firepower into neighboring territories, while a fortified encampment with turrets, walls and bunkers can serve as an effective roadblock, when placed into a tight canyon or near a bridge.
However, all Constructed Bases share an important feature – regardless of how many layers of passive defense you stack up, the base will still easily fall to even one enemy player, if they are determined enough. Every base needs defenders and a constant supply of Cortium to stay operational. Depending on how well they are placed, passive defenses can delay enemies for a variable amount of time, but that’s about it.
Overall, outside of the Orbital Strike shenanigans, the Construction System struggles to find place in the overall meta of the game due to many difficulties associated with Construction, such as the annoyance of farming minerals in a mostly non-combat vehicle, huge cert investments, and the overall time cost it takes to mine Cortium and build something that you can potentially never benefit from, and something that can be undone by a single enemy. So despite huge potential and uniqueness, Construction System is mostly ignored by the community in favor of less complicated gameplay.


