PlanetSide 2 Construction System allows players to build their own bases to create fortifications and provide support for the war effort. Building and sustaining bases requires mining Cortium with a special vehicle – ANT.
Cortium 
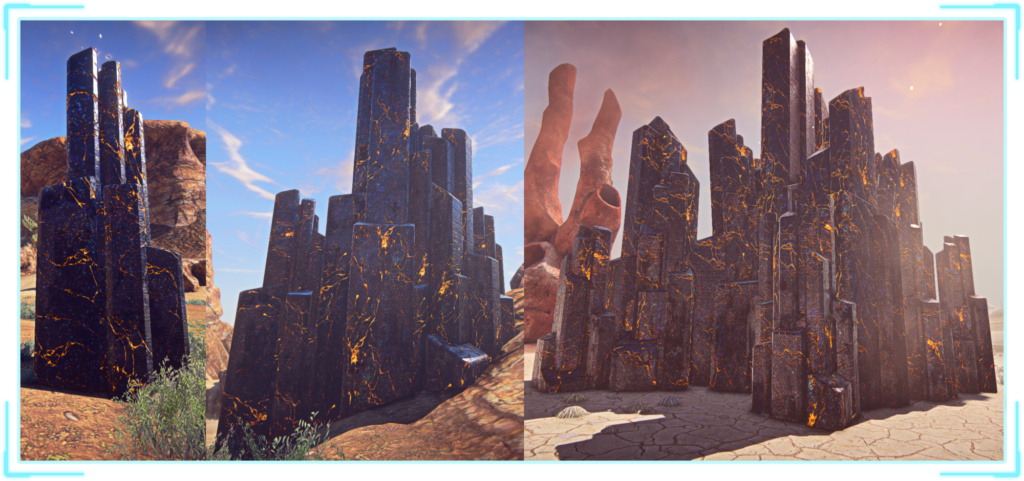
Cortium crystals spawn randomly all over the world of PlanetSide 2. Depending on size, they contain 2 000, 6 000 or 35 000 Cortium.
ANTs can mine Cortium from these crystals. Fully mined Cortium crystals disappear and respawn later.
ANT
Cost: 200 Nanites
Health: 4000
Crew (4): driver/miner, secondary miner/gunner, 2 passengers.
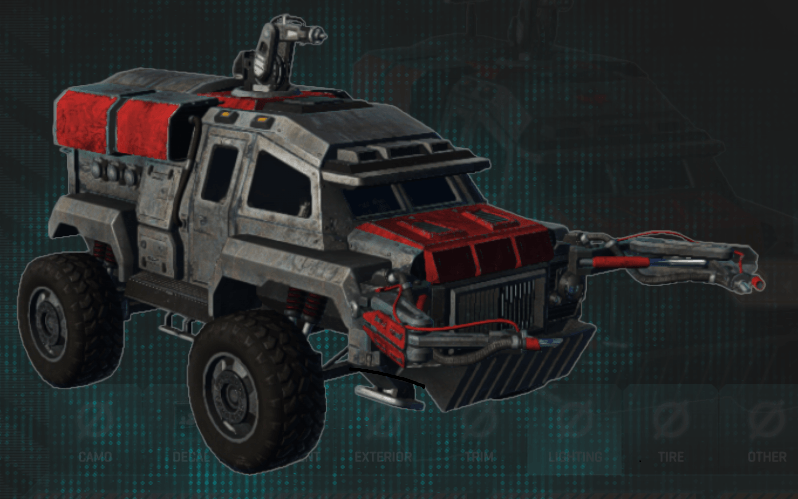
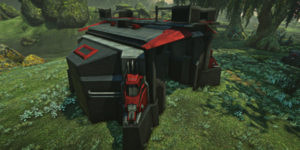
ANT – Advanced Nanite Transport – mining and construction vehicle. The driver controls a mining tool in front, and there’s another mining tool on top of the ANT, which can be replaced by a secondary weapon. ANTs have the same weapon selection as Sunderers.
ANTs are relatively fast and maneuverable, and with the right upgrades become very good at climbing hills.
Capacity: ANTs carry up to 8 000 Cortium by default, upgradeable to 10 000.
Mining: to mine Cortium, drive up to a Cortium crystal and press and hold “fire” button to activate the mining laser:
- Default Yellowjacket laser at the front mines at a rate of ~200 Cortium per second and does not overheat.
- Top mining laser has the same mining rate, but overheats quickly.
- WLT-Howler is an alternative front laser, which has a higher mining rate, but quickly overheats.
ANT HUD has 2 bars: left bar represents the amount of Cortium in ANT’s cargo hold, and the right bar shows how much Cortium remains in the crystal you’re mining. You can mine in third person, though you won’t be able to see the capacity HUD.
Siege weaponry: ANT’s Top Mining Laser and WLT-Howler can be used to deal intense damage to constructed objects.
Mineral Radar: ANT will passively detect nearby Cortium deposits and show then on the minimap. This passive ability can be upgraded to increase detection range.
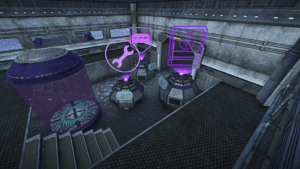
Deploy: ANTs can be deployed (default key “B”), giving access to a Construction Terminal on the back.
Special Utility: in addition to common vehicle Utility Slots, ANTs have access to special abilities:
- Transport Cloak – while active, cloaks the ANT. Without Vehicle Stealth certifications, a cloaked ANT will still be visible on the minimap of nearby enemies.
- C-Barrier – while active, increases Armor by 20% for all sides except bottom.
- Turbo – provides a boost to acceleration and maximum speed.
Using these abilities requires and spends Cortium.
Turbo is the most consistently useful ability, including running away, climbing hills, ramming enemy vehicles, or just moving between Cortium Nodes a bit faster, and it doesn’t care whether you’re soloing or working in a squad. At the same time, it is also the hardest to use properly and drains the most Cortium.
- Just a light tap on the Turbo will bump up your maximum speed if you’re moving across flat terrain.
- ANT Turbo works like a rocket, and it doesn’t require ANT’s wheels to be touching the ground in order to boost your speed.
Reinforced Armor: this defensive certification will increase ANT’s Health by 10%.
ANT Certifications
Recommended Certifications
These recommendations apply to mostly solo builders that want to avoid direct confrontation with the enemy or working as a part of a larger group.
- Cortium Capacity: +1000 for 50 Certs.
- Mineral Radar 2 and 3: detects Cortium within 400m. 300 Certs in total.
- C300 Turbo Engine 1: 150 Certs.
- Or Transport Cloak 1: 50 Certs and Vehicle Stealth 2: 130 Certs.
- Racer Chassis 2: 300 Certs in total.
- Basilisk: 200 Certs. Reliable, easy to use, versatile and dirt-cheap.
Construction Terminals
Construction Terminals
Deployed ANTs and Cortium Silos provide access to Construction Terminals.
Each time you want to build something, you have to buy it from a Construction Terminal. You can buy it with Cortium stored inside, or with Certification Points.
By default, players can buy: Cortium Silo, AI Turret, Rampart Wall and Bunker.
Other schematics must be first unlocked with Certification Points or Daybreak Cash. Schematics unlocked with Daybreak Cash will be unlocked for all characters on your account.
Once you buy a construction item, it will appear in your inventory, and remain there until you place it or log out. You are free to move to other locations, switch weapons and spawn vehicles.
However, if you respawn or redeploy, the object will disappear from your inventory, wasting the resources spent on it. Also, your inventory can hold only one construction item at a time, so if you try to buy another item, the first one will disappear.
How to build
To build a bought item, select it in your inventory. You will see a blueprint before you.
Controls and Restrictions
- Hold left or right mouse button to rotate the blueprint. Hold “Ctrl” to slow down the rotation.
- Hold both mouse buttons and move the mouse back or forward to move the blueprint away or closer to you.
- You have to make sure that blue spheres on the blueprint are under ground, and green spheres are above the ground.
- Press the action key (default “E”) to start construction.
- Blueprints can be placed only on ground, and not on large objects, such as bridges or rocks.
After placement, it takes 45 seconds for an object to fully construct. While under construction, player-constructed objects take much more damage, and they can be damaged by small arms.
Each schematic can be built by an individual player only a limited amount of times. This limit is shown at the top right corners of all construction items’ icons in the build menu.
This limitation is tied to specific players, so, for example, two players can build up to 6 Rampart Walls together.
Exclusion Area
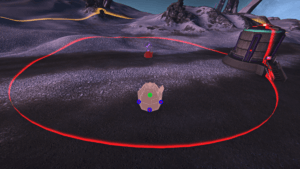
Some construction objects cannot be placed too close to each other, this is called “exclusion area”. It is supposed to be indicated by a red ring on the ground, but often it’s not displayed at all.
No-construction Zones
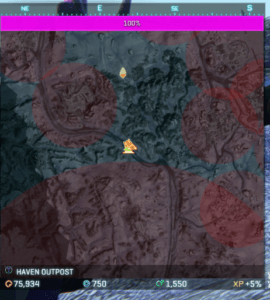
Most of the “conventional” PlanetSide 2 bases have circular no-construction zones around them. These zones become visible whenever you’re in an ANT, or trying co construct something.
ANTs can’t be deployed inside those zones, and you cannot place any blueprints inside them. Additionally, no-construction zones are protected from Flail and Glaive constructed artillery, but not from Orbital Strikes.
You are free to build anywhere outside no-construction zones, including enemy territory.
A coordinated outfit squad can purchase a bunch of items, load up in a Galaxy, fly deep behind enemy lines, drop and raise up a whole base within minutes. Then they can hack or construct a vehicle terminal, spawn a bunch of ANTs and start mining Cortium for their Silo.
Previewing Placement
Credit: thanks to /u/Rip17 for explaining this feature.
There is a trick you can use to preview the placement of a constructed object before you actually begin construction. For example, this is useful when trying to build several Rampart Walls without any gaps between them.
To preview placement, press Ctrl + F11 to “hide weapon”, and then hit “E”. The object will remain in place, allowing you to move around and check placement.
Press Ctrl + F11 again to “show weapon”, and then you can hit “E” again to begin construction, or swap to another inventory item to cancel placement.
Ikanam Biolab and Others
Most of the “conventional” PlanetSide 2 bases have no-construction zones around them, but there are exceptions, like Ikanam Biolab, located on Amerish. Players are allowed and encouraged to build their own bases on top of the Ikanam’s structure.
In addition, there are several bases without no-construction zones that consist of just a Vehicle Capture Point.
Schematics
- All constructed objects can be repaired by using Engineer’s Repair Tool on the small blue console. Every constructed object has one.
- “Hard” objects, like Turrets and Structures can be damaged only by weapons capable of damaging armored vehicles, and they don’t take friendly fire damage.
- “Soft” objects, like Modules, Spawn Tubes and Spires, can be damaged by all weapons and they take 70% reduced friendly fire damage.
- The Q-menu can be used to restrict access to many constructed objects.
Core
Cortium Silo
Unlock cost: free
Build cost: 2000 Cortium
Cortium Drain Rate: 2 / sec
Limit per player: 1
Exclusion Area with other Silos: ~210m
Cortium Silo is the heart of any constructed base.
Many constructed objects will continuously drain Cortium from the silo. Drain starts when the object is fully constructed, and persists until the object is destroyed.
While you can construct objects outside of a Silo’s range, they will decay rapidly and disappear within minutes, even if they don’t require a constant supply of Cortium to function (e.g. a Pillbox).
Constructed objects and Silo itself will also start decaying if the Silo runs out of Cortium, so it is extremely important to always keep some Cortium in the Silo. Note that Silo itself has a small Cortium drain.
Silo’s owner and their squadmates will receive a warning when Cortium level falls below 1000.
Silo can store up to 50 000 Cortium. A small light atop of the silo and bars on its sides will indicate the stored amount.
Silo costs 2 000 Cortium to build, but it spawns with 2 000 Cortium inside, so it’s essentially a free building. You can deposit Cortium into a Silo from an ANT the same way you mine minerals – drive up and hold “fire”. Once deposited, Cortium cannot be extracted from Silos.
Tip: You can deposit Cortium into a silo while it’s being built.
Silo provides access to a Construction Terminal. By default, any ally can deposit Cortium into your Silo or access the terminal to build something, but you can use the Silo’s Q-menu to restrict access.
Owner of the Silo and his squadmates can access Deconstruction Tool from a Construction Terminal, and deconstruct anything inside the Silo’s power range, so you have a bit of control of what other players are building, and you can delete unwanted structures.
Elysium Spawn Tube
Unlock cost: 500 Certs / 249 DBC.
Build cost: 400 Cortium.
Cortium Drain Rate: 0 / sec
Limit per player: 1
- When powered by a nearby Silo, provides a respawn point for nearby allies.
- Tube’s owner is awarded a small amount of XP for every respawn.
- Spawn Tube takes small arms damage and has about 10 000 effective health against bullets, meaning that 2-3 magazines from an average rifle will take it out.
- Spawn Tube begins to function as a spawn point the moment it is placed, before it is fully built. Unclear if bug. (Thanks to Danath for this info).
Binding: any allied player can walk up and press the action key to bind to the Spawn Tube. This will allow the player to respawn on this particular Tube from anywhere on the continent. A player can be bound only to one Tube at a time.
Note: this functionality is currently broken, and it’s possible to respawn on any Tube from any range.
Modules
These small box-like objects enhance other constructed items around them. Modules require a constant supply of Cortium from a nearby Silo in order to function.
Different modules can be placed near each other, but modules of the same type have a 25m exclusion radius around them.
Turret AI Module
Makes nearby constructed Turrets automated. They will automatically target nearby enemies, and return fire when fired upon from longer ranges. Turrets can still be manned and targeted manually, if need be.
Additionally, Flail and Glaive IPC artillery cannons require an AI Module to function.
Repair Module
Automatically repairs nearby constructed items, except the Repair Module itself.
Skywall Shield Module
Creates an aerial shield 15m above the module. The shield:
- Blocks all projectiles from above, including those fired by allies. Projectiles from below can pass freely.
- Vehicles touching the shield will take ~1500 damage once.
- Infantry touching the shield will be EMPd.
Firing at the shield does not damage the module, but with enough concentrated fire, the shield can be taken down. In that event, an allied player has to interact with the Skywall Shield Module to reset it.
Aerial shield will be temporarily disrupted if hit by Glaive IPC constructed artillery.
Structure Shield Module
Creates one-way shields in the loopholes in nearby Structures to allow allied players to fire from safety.
Creates vehicle shields in Sunderer’s Garage entrances. In case of Sunderer Garage, shields will stop projectiles from both sides, but they will allow enemy infantry to pass through.
The player can interact with the Structure Shield Module to make affected constructed objects invulnerable for a short time. Interacting takes 5 seconds, invulnerability lasts for 30 seconds, after which there is a 30 second cooldown. Invulnerability is lost if the module is destroyed.
Alarm Module
This module will alert the owner and their squad when an enemy is detected or a construct is attacked within 100 meters of it.
Reinforcements Module
If you have a Sunderer deployed in range of this module, allied infantry will be able to deploy from across the whole continent on that Sunderer, as long as the base meets the requirements to be “reinforcements needed“. Generally, this means that there are more enemies in the region than allies.
| Module | Cortium Cost | Limit per player | Effective Radius | Cortium Drain Rate | Unlock Cost | |
| Certs | DBC | |||||
| Repair | 300 | 3 | 25m | 0.5 | 500 | 249 |
| Turret AI | 500 | 2 | 20m | 1000 | 399 | |
| Skywall | 500 | 1 | 40m | 1500 | 799 | |
| Structure Shield | 300 | 2 | 35m | 1000 | 399 | |
| Alarm | 400 | 1 | 100m | 1000 | 399 | |
| Reinforcements | 1000 | 1 | 25m | 1250 | 399 | |
Structures
In addition to providing cover for defending infantry, these fortifications can and should be used to protect key base Modules and Spawn Tubes.
Bunker
Unlock cost: free
Build cost: 400 Cortium
Cortium Drain Rate: 0 / sec
Limit per player: 2
Durable fortification with firing areas for infantry on the first floor, and an open area on top. When powered by a nearby Silo, Bunkers provide access to an Infantry Terminal.
If deployed low enough, Bunker’s corridor can conceal a Spawn Tube and 1-2 Modules. Usually, this doesn’t result in a blocked exit.
Infantry Tower
Unlock cost: 1500 Certs / 799 DBC
Build cost: 500 Cortium
Cortium Drain Rate: 0 / sec
Limit per player: 1
A large tower structure that can be occupied by infantry. The roof hatch can be used by enemies to get into the Tower. When affected by a Structure Shield module, the hatch gains a shield which blocks large projectiles, but will still let through enemy players and C4
Pillbox
Unlock cost: 1000 Certs / 399 DBC
Build cost: 400 Cortium
Cortium Drain Rate: 0 / sec
Limit per player: 1
Fortified structure with shooting areas for infantry. The roof hatch can be used by enemies to get into the Pillbox. When affected by a Structure Shield module, the hatch gains a shield which blocks large projectiles, but will still let through enemy players and C4.
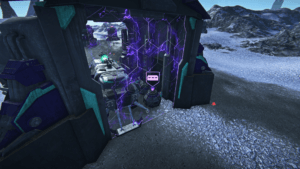
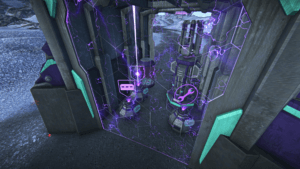
Pillbox can be used to hide up to five Modules, with the entrance blocked by a Spawn Tube. Keep in mind that allies, yourself included, cannot pass through the Tube either.
Modules in a Pillbox, with the entrance blocked by a Spawn Tube. It’s not invulnerable, killing the Spawn Tube lets you get in, a there is a gap between the tube and door frame through which one can shoot through.
The intention is to make it harder to just “snipe” modules from some arcane angle.
When building in such a way, you have to put the Pillbox first, and only then build inside. You also have to make sure that Pillbox’s floor is below the ground.
Alternatively, you can put the Spawn Tube deeper inside the Pillbox, and leave the entrance open, but then Pillbox will fit at least one Module fewer.
Sunderer Garage
Unlock cost: 1500 Certs / 799 DBC
Build cost: 500 Cortium
Cortium Drain Rate: 0 / sec
Limit per player: 1
A large multi-purpose structure. The Garage can provide cover to a single Sunderer, and still have enough room left for Structure Shield Module, Reinforcements Module and Pain Spire.
Alternatively, the garage can house an Elysium Spawn Tube, all five Modules, and a Pain Spire. It can also be used as a base entrance. Any MBT will fit through the garage.
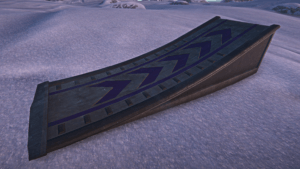
Vehicle Ramp
Unlock cost: 1000 Certs / 399 DBC
Build cost: 300 Cortium
Cortium Drain Rate: 0 / sec
Exclusion Radius with other Ramps: 0m
Limit per player: 2
A multi-purpose vehicle ramp. Among other applications, can be potentially used to allow only one-way movement of vehicles in a narrow space.
Defense
Turrets
Cortium Drain Rate: 0 / sec
Exclusion Radius between all Turrets: 20m
Mannable turrets for base defense. There are AI, AA and AV versions. Turrets use heat ammo mechanic, but they’re not affected by AMP Station bonus to turret cooldown.
Despite looking like a common base Flak turret, constructed Hoplon AA Turret does not have a Flak effect, and functions more like a simple machinegun, such as Walker. Worth noting that when manned by a player, the AA turret is about as effective against infantry as the dedicated anti-infantry turret, though it has more limited aiming angles downwards.
Turrets don’t require power to function, and it is possible to build them anywhere outside no-construction zones to temporarily fortify a specific area. Without Silo, turrets will decay within minutes, though.
Turrets can be automated via Turret AI Module, in which case they will automatically attack respective targets within Attack First Radius, and engage enemies within Return Fire Radius if they damage the Turret or another constructed object nearby. In this case, the turret will keep tracking the enemy for 10 seconds, even if they leave the Return Fire Radius, though in that case the turret will stop firing.
Notes:
- Automated AA Turrets will target enemy drop pods.
- Automated turrets ignore cloaked units.
- Automated turrets engage only their intended targets, e.g. AV turret will not target infantry.
| Turret | Cortium Cost | Limit per player | Attack First Radius | Return Fire Radius | Unlock Cost | |
| Certs | DBC | |||||
| AI | 400 | 1 | 50m | 300m | Free | |
| AA | 400 | 1 | 150m | 500m | 500 | 249 |
| AV (High Profile) | 400 | 1* | 100m | 300m | 500 | 249 |
| AV (Low Profile) | 300 | 1000 | 499 | |||
* – both variants of the AV turret count for the same limit. You can have only one built.
Rampart Wall
Unlock cost: free
Build cost: 400 Cortium
Cortium Drain Rate: 0 / sec
Limit per player: 3
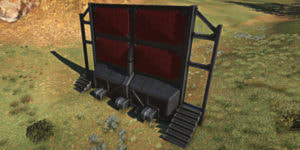
A long horizontal wall with firing areas for infantry. Height of the wall can be varied greatly, creating a low wall just to protect infantry, or a high wall to provide cover for vehicles and structures.
Lumifiber Rampart Wall – has Lumifiber faction-colored trim. Counts to the same limit as Rampart Wall.
Blast Wall
Unlock cost: 1000 Certs / 399 DBC
Build cost: 300 Cortium
Cortium Drain Rate: 0 / sec
Limit per player: 2
A large wall that can withstand a moderate amount of damage. Unaffected by Structure Shield Module.
Vehicle Gate
Unlock cost: 1000 Certs / 399 DBC
Build cost: 400 Cortium
Cortium Drain Rate: 0.5 / sec
Exclusion Radius with other Gates: 0m
Limit per player: 2
Provides a frame for a large force field that blocks enemy vehicles and all projectiles in both directions. Must be powered by a nearby Silo in order to generate the force field. Structure Shield Module is not required to generate the force field.
Tactical
Orbital Strike Uplink
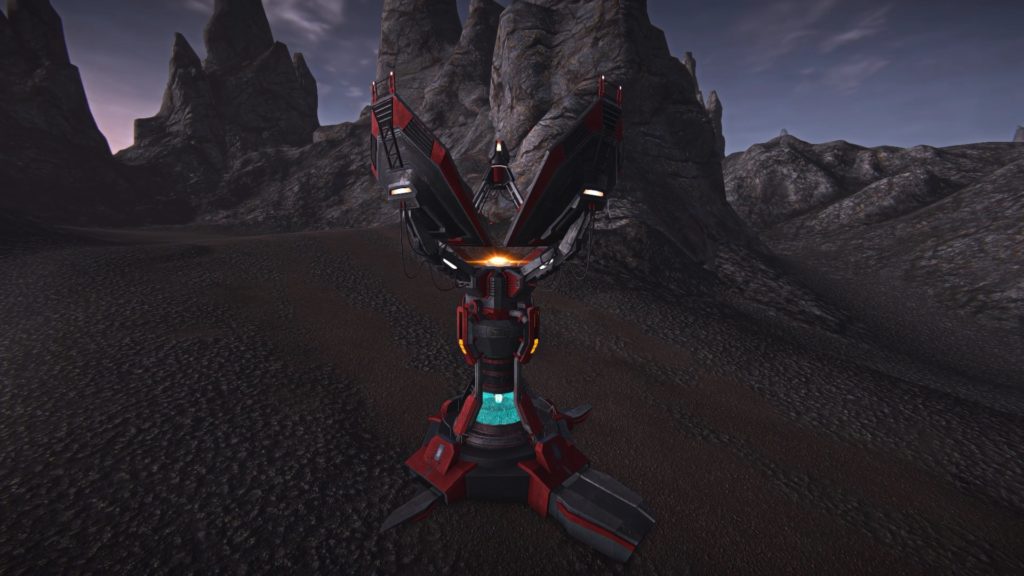
Unlock cost: 2000 Certs / 1499 DBC
Build cost: 3000 Cortium
Cortium Drain Rate: 4 / sec
Exclusion Radius with another Uplinks: 500m
Limit per player: 1
When powered by a nearby Silo, and after a sufficient charging time, the Uplink can unleash devastating Orbital Strikes at nearby enemy positions, including standard lattice bases.
Mechanics
When powered by a Silo, the Uplink passively gains charge over time. As the charge increases, so does the Uplink’s striking distance:
- Striking distance starts at 0m and increases by ~50 meters per minute.
- Minimum striking distance is 200m (~4 minutes charge time) and it is displayed on the map as an orange circle.
- Current striking distance is displayed as a yellow circle, and the current charge level is indicated by power bars on the Uplink itself.
- Maximum striking distance is 800m (15 minutes charge time).
- Enemies within ~700-800m of the Uplink can see the current striking distance on the map.
Firing an Orbital Strike consumes charge from the Uplink based on the used striking distance. For example, an Orbital Strike within 33% of maximum striking distance will consume 33% of the Uplink’s maximum charge. So if the Uplink is sufficiently charged, it is possible to to call in several close range Orbital Strikes in a row.
Owner of the Uplink or his squad members can equip an Orbital Strike Target Designator from the Uplink’s terminal:
- The Designator fires darts to mark the location for the Orbital Strike. It can shoot only while aiming down sights, and has a short range of ~60m.
- Redeploying or respawning will remove the Designator from your inventory.
- Uplink’s owner always gets credit for kills, regardless who used the Target Designator.
- Uplink has to be powered by a Silo in order to fire.
After a target has been designated, it takes a few seconds for the Orbital Strike to fire. All nearby units, including enemies, are warned about incoming strike via radio message, and can see the strike’s indicator on the minimap.
Orbital Strike deals devastating damage in a relatively small radius of ~40m, killing all units and destroying all constructed items, and then the damage starts tapering off. The damage is applied in a full column, meaning it will destroy targets even at a flight ceiling.
Orbital Strike will also knock back nearby units, especially infantry, often it is the fall damage that kills them.
Infantry inside buildings will be knocked back, and can receive collision damage, but not direct damage from the OS itself.
Damage to friendly units is greatly reduced, to the point that you can call Orbital Strikes at your own Constructed Bases that are being overrun with enemies, and the OS is likely to deal less damage than enemies would.
Destroying an Orbital Strike Uplink
Orbital Strike Uplinks are notoriously hard to destroy due to (now fixed) bugs and lack of understanding of some of the mechanics.
The Orbital Strike Uplink behaves differently depending on whether it is powered by Silo or not.
When powered, the Uplink’s chassis (the antenna spire) becomes invulnerable to all damage. The only way to destroy a powered Uplink is to destroy the core.
However, while powered, the whole Uplink, including the core, gains an invisible layer of shields that absorb quite a lot of damage. You can take the shields down and expose the core for ~10 seconds by shooting anywhere the chassis with any AV weapon.
Exposed core can be damaged even by small arms fire. However, if you don’t destroy the core fast enough, shields will regenerate.
When not powered, the Uplink can be destroyed by directly damaging the chassis by any AV weapon. However, unpowered Uplink doesn’t have a core.
Depending on situation, it may be faster to destroy the Silo, and then kill the Uplink by destroying its chassis.
However, if Silo is well protected and constantly getting repairs, while the Uplink is exposed, and you can sustain damage for a lot of time, you can take down the Uplink’s shields and destroy the core. I believe this circumvents enemy attempts to repair the Uplink as well.
When destroyed, the Uplink deals a large amount of damage to everything nearby.
Note: there have been some indications that Uplink’s chassis being indestructible while powered by a Silo is not intended behavior.
The Flail
Unlock cost: 1500 Certs / 799 DBC
Build cost: 500 Cortium
Cortium Drain Rate: 0 / sec
Exclusion Radius with other Artillery: 0m
Limit per player: 1
Flail is a long range artillery piece; it fires salvos of four anti-vehicle shells on locations painted by a special Dart Device. Only targets outside no-constructed zones can be designated. Flail is mostly useful for attacking other constructed bases, however it is countered by Skywall Shields.
Mechanics
When Flail is powered by a Silo and connected to a Turret AI Module, its owner and their squadmates can access the Dart Device from the Flail.
The Dart Device fires invisible darts that slowly fly on a ballistic trajectory with a lot of projectile drop. It is technically possible to designate targets hundreds of meters away, but the dart can be tricky to hit. Dart Device is lost if player respawns or redeploys.
Flail has a minimum range of 100m, and a maximum range of 600m.
Darts will self-destruct when fired into no-construction zones, but they can be fired from no-construction zones.
There is about a 15 second delay between the dart hitting and shells hitting the target, depending on how much the Flail’s turret has to turn to face the target.
Dart Device has an unlimited supply of darts, but there is a ~15 second cooldown between uses. Weird things can happen if you try to fire two darts back to back. Second barrage may not fire at all, or the second dart can change the location of the first barrage.
Flail fires a salvo of 4 shells that deal splash damage to vehicles and infantry. These shells do not seem to have a direct damage component. Flail’s targeting indicator on the minimap is visible to enemies.
Each shell deals up to 750 damage, which scales down to about 450 damage at 20m or 25m.
Flail’s shells use Damage Type 46. As far as we know, it’s not used by any other weapon, and no units have special resistances to it.
Shells land fairly close to the dart, and in a tight grouping, but there is still a drift of several meters, so targets at the very edge of the splash zone can take damage from one or several shells depending on chance.
A full Blockade Armor Sunderer (6000 health) survives one salvo with about 30% health remaining.
A Deployment Shield Sunderer survives one salvo with very roughly 40% health remaining, and will be destroyed by a second salvo.
It is assumed that a good hit with a Flail’s salvo will “one shot” every other ground vehicle, except maybe for MBTs.
Glaive IPC
Unlock cost: 1500 Certs / 799 DBC
Build cost: 500 Cortium
Cortium Drain Rate: 0 / sec
Limit per player: 1
Exclusion Radius with other Artillery: 0m
Damage Resist Type: 46
Glaive Ionized Particle Cannon is an artillery piece intended to disrupt constructed bases within 1000m range. Glaive requires a Turret AI Module to function.
Glaive fires volleys of three shells with a large spread. Each shell:
- Deals up to 550 damage, including to vehicles.
- Will temporarily disrupt Skywall Shield if the aerial shield is hit.
- Will disrupt shields generated by Structure Shield Module and Vehicle Gates – their shields will start flicking on and off.
Base owner or their squadmates can interact with the Glaive to equip an IPC Targeting Dart, which can designate targets between 100m and 1000m from the Glaive.
Unlike Flail and Orbital Strike, Glaive will keep pounding at a designated area for at least several minutes with multiple salvos. Skywall Shields disrupted by Glaive will automatically regenerate, just in time to be disabled by the next volley.
This means that if a base is protected by a Skywall Shield module, it will cancel each other out with the Glaive. However, if multiple Glaives are used to bombard the same area, or if there is no Skywall Shield in place, then Glaive will be able to damage and disrupt other constructed objects it hits.
Routing Spire
Unlock cost: 500 Certs / 399 DBC
Build cost: 300 Cortium
Cortium Drain Rate: 1 / sec
Limit per player: 1
Exclusion Radius with other Spires: 50m
Routing Spire provides access to a deployable Router Pad, which (for now) can be placed anywhere on the continent to provide a respawn point for allies within 300m of the pad. Router Pad can be deployed in lattice bases, including buildings’ rooftops and underground tunnels.
Pad’s owner is awarded with a small amount of XP for every respawn.
A Router Pad in the right place can make all the difference during attack or defense, but it is also easily destroyed even by small arms fire.
Currently, the Router Pad will remain operation even if the Routing Spire is destroyed or loses power, but this is a bug. Intentional behavior is that Router Pad gets destroyed.
Router Pad occupies the same inventory slot as other purchased constructed objects, and it will disappear from your inventory if you respawn or redeploy.
Pain Spire
Unlock cost: 500 Certs / 399 DBC
Build cost: 300 Cortium
Cortium Drain Rate: 1 / sec
Limit per player: 3
Damage Resist Type: 23
Exclusion Radius with other Spires: 50m
Pain Spires deal 100 damage per second to enemy infantry and MAXes in a 15m radius. Pain Spires seem to be the most useful when constructing all-in-one bases in Sunderer Garages. Vehicle Shields generated by Structure Shield Module will protect modules inside the Garage, while the Pain Spire will keep the enemy infantry out.
- Pain Spire can be destroyed by small arms, and it has about 20 000 effective health against bullets, meaning that 4-5 magazines out of an average rifle will take it out.
- 2x C4 leave Pain Spire with about 20% health left.
Support
- Instead of Nanites, spawning vehicles at constructed vehicle terminals costs Cortium, equal to 2x amount of the usual vehicle’s price in Nanites.
- Terminals can be hacked by enemy infiltrators, but they won’t be able to spawn vehicles.
Light Air Terminal
Unlock cost: 2000 Certs / 1499 DBC
Build cost: 500 Cortium
Cortium Drain Rate: 0 / sec
Limit per player: 1
The Light Air Terminal can be used to spawn ESFs and Valkyrie. The air pad will also resupply ammunition to allied aircraft.
Light Vehicle Terminal
Unlock cost: 2000 Certs / 1499 DBC
Build cost: 500 Cortium
Cortium Drain Rate: 0 / sec
Limit per player: 1
The Light Vehicle Terminal can be used to spawn Flash, Harasser, Sunderer, and Lightning.
Vehicle Ammo Dispenser
Unlock cost: 1000 Certs / 399 DBC
Build cost: 500 Cortium
Cortium Drain Rate: 0.5 / sec
Limit per player: 1
When powered by a nearby silo, Ammo Dispenser will resupply ammo for nearby ground vehicles.
Decoration
Faction Banner
Unlock cost: 299 DBC
Build cost: 700 Cortium
Cortium Drain Rate: 0 / sec
Limit per player: 1
Increases morale of nearby allied units, and incurs a similar penalty to enemies.
Field Tools
All Field Tools and artillery targeting darts are mutually exclusive. Only one can be equipped at a time.
Deconstruction Tool
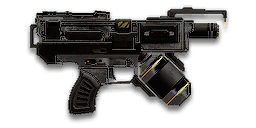
This tool can be used by owner of the Silo to delete unwanted constructed objects within that Silo’s power radius.
Useful Tools
This excel sheet by Ascidon aka SoSaltySalt can quickly calculate costs for different construction objects and the drain rate, as well as how far an OSU can charge with a certain amount of cortium as well as the time it takes.
Credits and Closing
Since the Construction System is so open and modular, players are allowed to build all kinds of different bases for many purposes, and the potential impact of a constructed base will increase exponentially with some teamwork involved.
For example, a constructed base with vehicle terminals can help sustain a vehicle push over an open ground, while providing cover for anti-air units and potentially some artillery support with the Flail.
Any base with an Orbital Strike Uplink can project a lot of firepower into neighboring territories, while a fortified encampment with turrets, walls and bunkers can serve as an effective roadblock, when placed into a tight canyon or near a bridge.
However, all Constructed Bases share an important feature – regardless of how many layers of passive defense you stack up, the base will still easily fall to even one enemy player, if they are determined enough. Every base needs defenders and a constant supply of Cortium to stay operational. Depending on how well they are placed, passive defenses can delay enemies for a variable amount of time, but that’s about it.
Overall, outside of the Orbital Strike shenanigans, the Construction System struggles to find place in the overall meta of the game due to many difficulties associated with Construction, such as the annoyance of farming minerals in a mostly non-combat vehicle, huge cert investments, and the overall time cost it takes to mine Cortium and build something that you can potentially never benefit from, and something that can be undone by a single enemy. So despite huge potential and uniqueness, Construction System is mostly ignored by the community in favor of less complicated gameplay.
Some information in this post is shamelessly stolen from this reddit thread, and Demigan’s posts on forums, as well as this video by Yamiks.
Huge thanks to /u/Dimistros for testing the Cortium drain rate values.








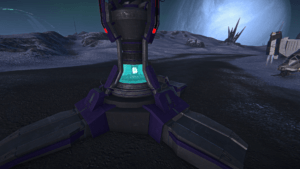
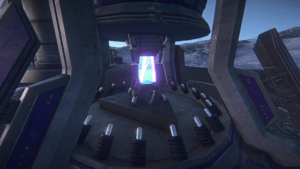
flail is not designed to remove skyshield
ipc is designed to remove it.
Vehicle terminals can be hacked and used contrary to current information, but I think the criteria to spawn vehicles is that the silo needs to have > 20k Cortium in it.
Spawn Tube:
“Note: this functionality is currently broken, and it’s possible to respawn on any Tube from any range.”
Looks like they fixed this, can’t spawn in my own spawn tube from too far without binding.
Reinforcements Module
“If you have a Sunderer deployed in range of this module,”
Its area of effect highlights the Spawntube, so I guess it works with it too. Hard to tell for sure
Destroying an Orbital Strike Uplink
Seems like they finally fixed this, they are rather easy to destroy now, powered by silo or not.
Core’s shield goes down with about 3 Vulcan-H extended magazines. Once the core is destroyed the explosion will happen in 5 seconds. Explosion will destroy an MBT close enough, but barely damages even modules.
Forgot to add, Pain Spire, like Spawn Tube, becomes active the moment it is deployed.
I’m a little tight on the certs side, do you think that Skyguard, turret AI module alone are sufficient enough to sustain a orbital strike on a server in off peak. I don’t want to spend too much and I don’t really want to man the base, probably just drop down a spawn beacon in place as a poor mans ellisium tube and once completed entirely block off access the the outside world protecting whats inside of it.
You confused me there for a minute with “Skyguard”. I assume you meant Skywall. Skygard is an AA flak cannon for the Lightning.
Like I said in Closing, I hold the opinion that passive defenses by themselves can delay the enemy, but not protect your base, even from a single enemy.
If you’re tight on certs, I wouldn’t spend them on anything related to Construction. Just leave your base naked and hope nobody bothers with it.
However, I don’t usually build OS bases myself, so you should ask for more expert opinion on reddit or discord.
“While you can construct objects outside of a Silo’s range, they will decay rapidly and disappear within minutes, even if they don’t require a constant supply of Cortium to function (e.g. a Pillbox).”
Is correct to a point. If you place a repair module INSIDE the silos range and within range of the object OUTSIDE of its range, the module will keep the object from decaying. I build all my PMB’s (compounds) with my structures outside the perimeter of the silo to maintain clear fields of fire within the compound. I place them outside a gate with the entrance facing the gate. I place structure shield modules, repair modules and Pain Spires on the inside of the silo perimeter to block the entrances to those objects from infiltrators. I place a ramp facing the open area of the gate on the INSIDE of the perimeter to prevent access to specialized Sunderers from entering those gates. I leave one gate available for access into and out of the compound. My compound defense is constructed along the silo perimeter (100 meters from the silo) with a Wall, then a Gate, then a Wall, then a Gate and so on. This allows spacing enough to place a pain spire at every Gate. My turrets, ideally are placed with the AV and AA on the OUTSIDE of the perimeter protected by the same repair modules protecting the buildings. The are visible to anybody from afar, whether they are inside or outside of the perimeter anyway so why clutter the inner areas with them. The exception is the Anti Personnel turrets place 50 meters from the silo all around it. I place two Flails and Glaives (a battery) in my compounds. One battery inside and one outside the perimeter but close enough to be repaired by the repair modules and powered by the AI modules. They must face each other on the opposite compass points, 200 meters from each other. I call this PMB structure a Carousel Compound because when you look at it from the air all the structures outside the walls look like a Carousel. You can look at the ideal compound (though not supportable with cortium in most cases) at my facebook page /YankeeBastid in the video section.
”
By default, players can buy: Cortium Silo, AI Turret, Rampart Wall, Bunker and HIVE.” Should be amended to drop “and HIVE.”
Fixed, thanks.
Some minor notes/corrections:
“Cortium is more likely to spawn near warpgates (source, could be outdated)”
Definetly not. There is always a lot of Cortium in some areas that are closer to the center than to one of the corners of the map.
“Siege weaponry: ANT’s mining lasers can be used to deal intense damage to constructed objects.”
Not the default mining laser. Top mounted (I think) and Howler (fact)
ANT Turbo: unlike Harasser/Flash turbo, it doesn’t just give you extra acceleration, it actually propels the ANT. A Harasser on a slide too steep to be climbed will not move despite the turbo, while the ANT will move upwards without the wheels touching the ground.
Controls and Restrictions
Hold LControl to rotate slowly.
Elysium Spawn Tube:
it becomes a spawn option the moment you place it, even before is finished (most probably a bug)
Thanks for your contributions, I will add them to the guide.
On turbo – didn’t the Flash turbo used to work the same way? I vividly recall people pretty much flying with it. Was it changed?
“If the Routing Spire is destroyed or loses power, the Router Pad will be destroyed”
Is incorrect. A router pad will survive even if the silo runs dry or the spire is destroyed.
Hmm, well that’s clearly not intentional, but I’ll add this for the time being. Thanks.
I cannot avoid replication of some of the data used in your excellent article. I can try to paraphrase, but cannot escape the data facts. To save conflict some of your bulleted data may be used in our documents. Is that ok with you?
You’re free to copy paste the whole thing, if you want, as long as you provide credit, and I’d recommend a link to this page in case of future updatesm
As an avid construction engineer, it is true that without a trained support squad an intruder could wreak havoc to your PMB, there are plenty of ways to defeat them now after the changes. The pain spire is an example. Placed appropriately it can deter solo incursions into the compound. Knowing where to place spitfires and personnel mines are also good deterrents. Keeping the interior of the compound free from structural clutter and an open field of fire reduces the impact of Gal drops. Dual Flails within a PMB is an awesome deterrent. AI modules protected with mines and spitfires and AP turrets impedes the insurgent long enough for reinforcement. Placing a router object hidden outside the PMB along with the traditional Spawn tube and squad beacon inside gives defenders more then ample ways to respond. There is more I could add, but we are still learning ways to use all that has changed, and changed for the good.
The maximum range to deploy on a router is 300 meters, not 100. This was confirmed by Drew, and I documented it on video at facebook.com/yankeebastid.
Thanks, fixed!
I have yet to find a range limit on routers. I’ve placed the Spire next to the Warpgate and then flew more than 1km away to place the Pad.