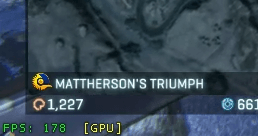
 PlanetSide 2 historically lacks any form of benchmark. Most players rely on anecdotal framerate, provided by in-game FPS counter, which can be enabled by pressing Alt + F or typing /fps in chat.
The benchmarking method that I’m about to describe is still far from perfect, but it’s a big step in the right direction.
FRAPS
FRAPS is a free video capture and benchmarking program. Some of its video recording functionality is locked behind a paywall, but it doesn’t matter for our purposes. We’re going to use FRAPS to collect PlanetSide 2 performance information while you’re playing, notably Average FPS and Frame Time. You can learn about both statistics in this excellent article.
Let’s get started:
(1) Download and install FRAPS.
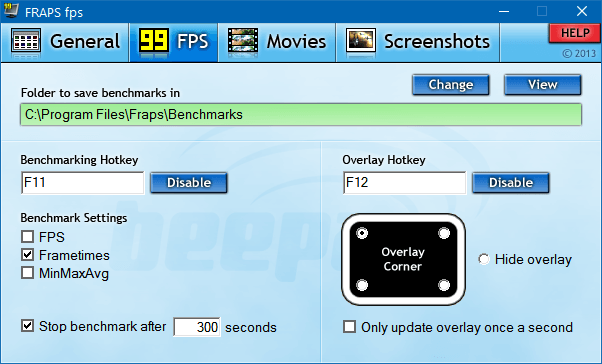
(2) Launch FRAPS and set it up like this:
(3) Log into PlanetSide 2.
(4) Start benchmarking by pressing the FRAPS benchmarking key, F11 by default. You will notice that FPS counter in the corner disappears.
(5) FRAPS will record Frame Times – how much time it took your PC to render each individual frame.
(6) When benchmarking is over, the FPS counter will appear again. You can also manually end benchmarking by pressing F11 again. FRAPS will put recorded Frame Times in a file in the FRAPS benchmarking folder.
To actually analyze the recorded Frame Times, you’re gonna need another program.
FRAFS Bench Viewer
Download and install FRAFS Bench Viewer.
Whenever you launch it, it will automatically open your FRAPS Benchmarking Folder. To analyze a recorded benchmark, simply drag and drop the corresponding “frametimes” file on Bench Viewer’s window.
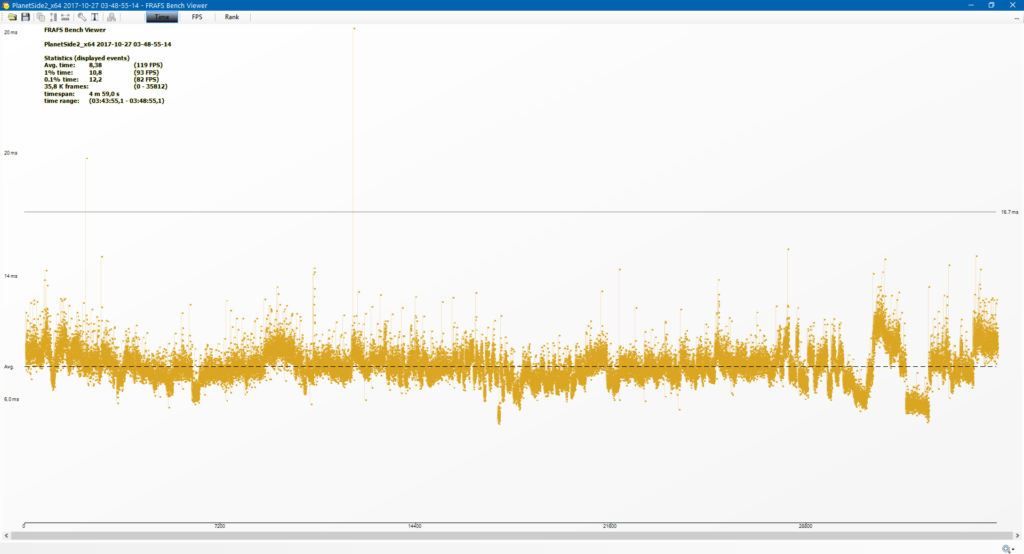
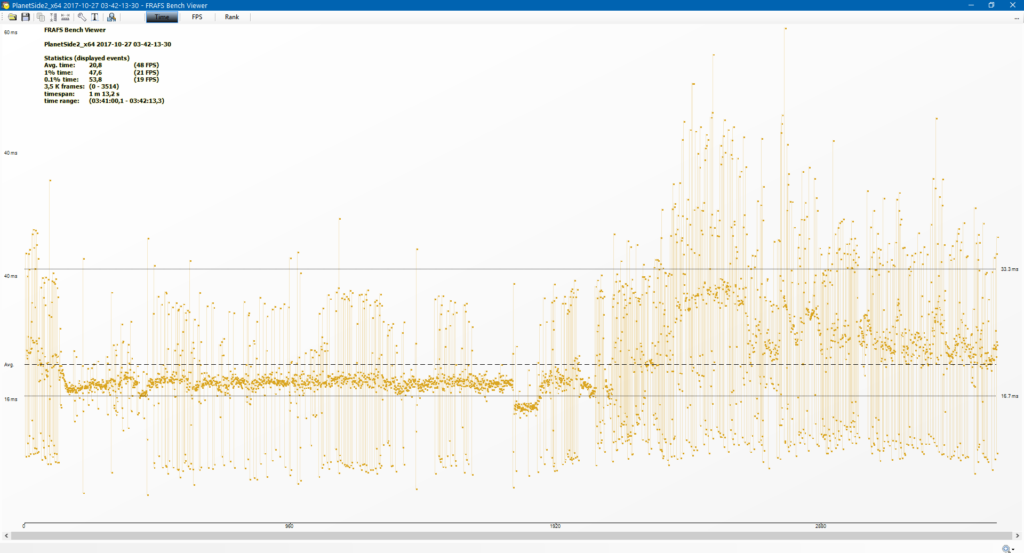
Vertical spikes on the graph represent frames that take abnormally long to render. In-game lags and framerate drops will be shown on this graph as long sequences of frames with long Frame Time.
It’s important to visually analyze Frame Time data, because framerate drops, lags and stuttering will not have a considerable effect on Average FPS, yet there will be a noticeable impact on gaming experience.
Keep in mind that in PlanetSide 2, you will get Frame Time lags whenever you use a terminal or go through a loading screen, and it’s just a part of normal gameplay. Single Frame Time lags can appear even with good hardware, and are imperceptible to human eye. You only should be worried if you see a whole block of spikes:
At the top left, there’s a table with useful statistics:
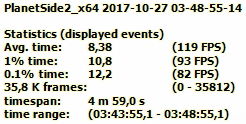
Avg. time refers to overall average Frame Time. It is used to calculate your Average FPS to the right.
1% time refers to average Frame Time of 1% of worst frames. In other words, during this benchmark, the 99% of frames took less than 1% time to render. You can treat it as your meaningful “minimum FPS”, that more or less ignores the occasional imperceptible frame skip.
PlanetSide 2 benchmarking problem
As mentioned, PlanetSide 2 will invariably experience framerate drops whenever you interact with a terminal or go through a loading screen, which often happens whenever you die or use a teleporter. Opening the map or other menus is likely to lower the framerate as well.
This is a problem, because it will pollute your benchmarking results. There are several ways around this.
Short Benchmarking
This method gives you the most clean results, but they will vary from test to test. The basic idea is to go for short benchmarking time, around 1-5 minutes, and avoid:
- Dying
- Interacting with terminals or teleporters
- Opening your map
The easiest way to facilitate that would be to equip Stalker Cloaking and stay crouched and cloaked throughout the whole benchmark.
Find a battle that looks like it’s gonna last longer than for your intended benchmarking time. A large slug fest on open ground between bases would be ideal. Make sure to remember or write down the approximate number of players in that area, e.g. 24-48 vs 24-48.
Watch the battle, but do not actually participate.
The problem with this method is that your framerate will change depending on how much action is going on screen. This method works well if you want to “stress test” your system, and figure out if there are any problems with skipped frames and stutter.
Extended Benchmarking
With this method, you remove any time constraints from FRAPS benchmarking, and simply enable it in the background whenever you play. Ideally, you want to accumulate a few hours of data. It will be polluted by loading terminals and interface interactions, but if you go for a really large sample size, and assuming you play roughly the same every day, this benchmark can potentially give you more accurate Average FPS as an overall performance indicator. Just keep in mind that your actual in-combat FPS is likely to be different from that Average FPS.
Benchmarking + Video Recording
This one is my favorite.
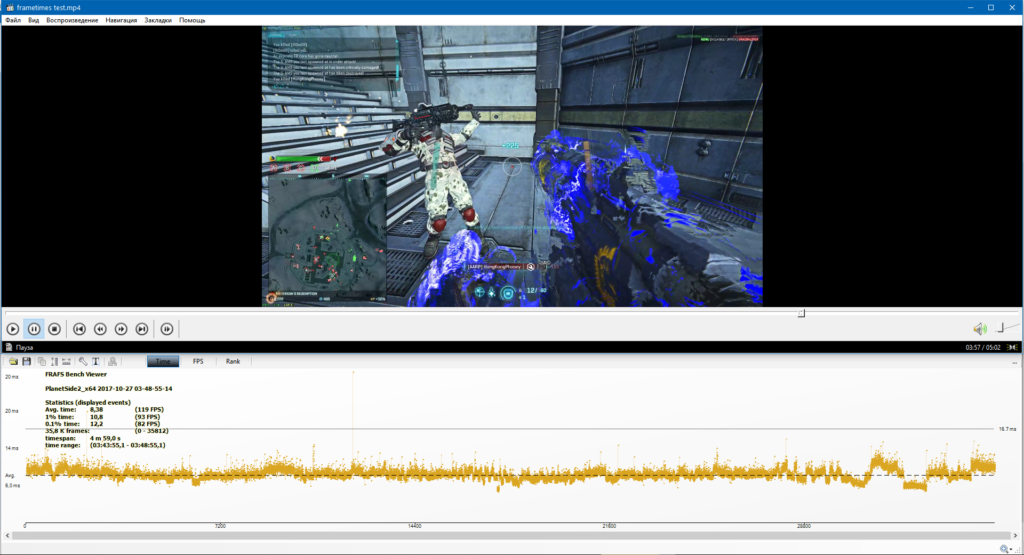
If you usually play with Shadowplay or ReLive enabled, simply enable recording at the same time as you start benchmarking, and end them together as well.
This way you will get an FPS timeline, accompanied by a video, which will tell you how much action was going on screen during this or that FPS, and what happened when you were getting framerate stutter.
- If it happens while you’re interacting with a terminal, then it’s not a problem.
- But if you see stutter during combat, it’s an indication that you need to lower settings or upgrade your hardware.
Closing
Obviously, your performance will vary a lot depending on how much action is going on screen. Benchmarking over extended periods of time will help reduce the variance somewhat, but we all know how much PlanetSide 2 changes from day to day. But it’s still better than trying to infer meaningful information from in-game FPS counter.
Benchmarking this way will allow you to perform more meaningful analysis if you decide to overclock or upgrade your hardware, or compare the performance cost of different graphics settings on your PC specifically.
