One of my recent customers from United States asked for my help with creating a PC Build. They wanted to get the best PC within ~$2250, including a gaming monitor. The case should provide easy access for dusting, and the PC itself should be able to last a long while without any upgrades. Their previous PC lasted a decade, and they wanted the same from their new PC.
You can see the build I suggested in the spoiler above, it was accepted and the happy customer donated $25 as a token of their gratitude for my services. With their permission, I am publishing the build, along with my reasoning why for each specific part was selected.
CPU: Intel Core i7-8700K
This beast of a CPU does not need an extensive introduction. At the moment, this is the best gaming CPU money can buy. Excellent per-core performance will carry the CPU in the present, and 6 cores with Hyper Threading ensure the CPU stays relevant in the future, where hopefully multi-threading becomes more commonplace.
It overclocks well, and we’ll definitely be counting on overclocking to future proof the build.
CPU Cooler: be quiet! DARK ROCK TF
Here I was looking for three things:
1. Airflow directed towards CPU and motherboard. This lets some of the airflow to reach VRM heatsinks on the motherboard, greatly reducing chances of power system failure, and generally increasing system’s lifespan and overclock quality. Relevant article.
2. Hydro / Fluid Bearing of the cooler fans. This type of bearing offers by far the best longevity.
3. Cooling powerful enough to handle 95 Watt TDP of the 8700k + some headroom for overclocking
At first I considered cheaper and less powerful Slimhero, but since budget could handle it, I decided to go with be quiet! DARK ROCK TF, which is a good deal more powerful, and unlike the Slimhero doesn’t block any RAM slots.
Instead, DARK ROCK overlooks the RAM slots, giving them a good portion of the airflow. I made sure there is enough room under the DARK ROCK to fit the suggested RAM modules.
DARK ROCK comes with an unspecified thermal compound, so I decided to also get ARCTIC MX4, which offers both excellent heat conductivity and longevity, with the manufacturer claiming it to be able to last up to 8 years. I still recommended to reapply it after 5 years, though.
Motherboard: MSI Z370 TOMAHAWK ATX
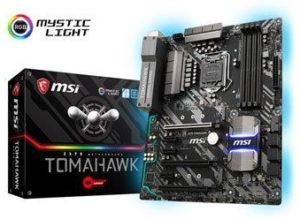
MSI are a great brand overall, they offer many useful features that make overclocking better and easier. OC Genie will automatically overclock the CPU for you, and all MSI Z370 motherboards come with Load Line Calibration (LLC). In short, LLC reduces negative effects of overclocking on system stability and longevity.
The Tomahawk comes with a 10-phase VRM with heatsinks, which also increase system longevity and overclock quality.
This is pretty much the ideal motherboard for this build. The only thing we’re overpaying here for is ATX form factor, which is not really necessary for this build, but there aren’t many good mATX Z370 motherboards to choose from at the moment.
Memory: Patriot Viper 4 (2 x 8GB) DDR4-3400
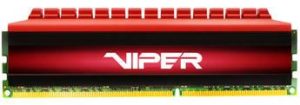
This is a high quality RAM set with good reviews and excellent performance. 16 GB should be enough to last a long while, but I warned the customer that in 5-7 years an upgrade may be necessary.
SSD: MyDigitalSSD BPX 256GB
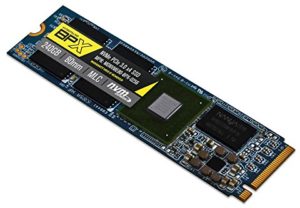
SSDs use several types of Flash memory: SLC, MLC and TLC (single-, multi- and triple- level cells respectively).
They go SLC > eMLC (enterprise MLC) > MLC > TLC in terms of price, speed and durability.
For an average consumer, TLC is usually good enough, but we are building a really durable machine that can last a decade. This is why I recommended against Samsung 960 EVO, which uses mostly TLC memory.
MyDigitalSSD BPX 256 GB uses MLC memory, and offers minblowlingly amazing value for its price. It is by far the most durable and performing consumer-grade SSD on the market, and comes with a 5 year limited warranty – “limited” implies you do not exceed a certain amount of written data.
Ideally, I would really like to go for eMLC or even SLC memory for this build, but SSDs like that are intended for enterprise customers and professional grade server equipment, and their cost is disproportionally higher.
As long as you don’t make a habit of moving large volumes of data in and out of the SSD daily, you are very unlikely to exhaust its resource. If it comes to worst, it can always be replaced with another ~$100 SSD later down the line. It simply doesn’t make economical sense to go for a vastly more expensive SSD just to avoid that one occasion.
HDD: Western Digital Gold 1TB 3.5″
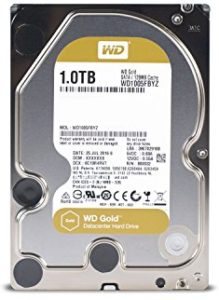
Conventional hard drives have moving parts, so they are more prone to failure than SSDs, and we should pay a premium to ensure durability. We’re looking for something like an entry-level server-grade or data-center HDD.
There were two good choices here, Toshiba MG03ACA and Western Digital Gold WD1005FBYZ. They both have 7200 RPM speed and 1 TB size, and both should have excellent longevity, though WD Gold is more marketed. In the end, I went with WD Gold because of its larger buffer size (128 MB vs 64MB).
Video Card: Aorus GTX 1080 Ti Xtreme Edition 11G
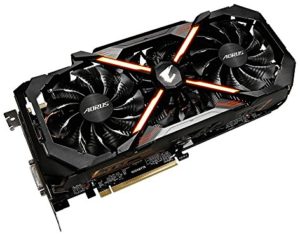
Similarly to 8700k, the GTX 1080 Ti is the best gaming Graphics Card you can buy right now.
I went with the Aorus’ variant over the competition because it has a dedicated heatsink for VRM system, which ensures durability and overclock quality. Heavy heatsink with triple fans ensures it stays quiet under heavy load.
It also has a theoretical power maximum of 375 Watt, so there is a lot of headroom for overclocking.
Case: Phanteks ECLIPSE P400 ATX Mid Tower
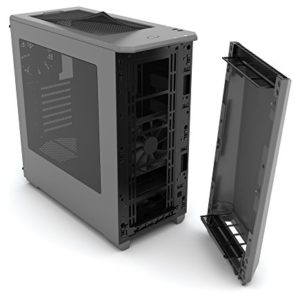
This case offers easy cleaning and good cable management for a modest price. The front panel is easily removed, and so are several dust filters.
I also suggested getting a few aftermarket dust filters to cover the front panel, though they are not included in this build.
There’s definitely a lot of decent cases out there, but most of them are a good deal more expensive than what I’d consider justified.
Power Supply: Corsair RMx 650W
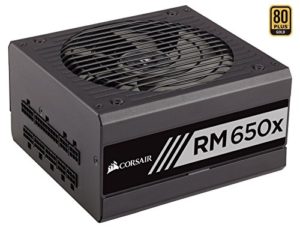
Corsair builds their PSUs to last, which is exactly what we need. The RMx series are built from even higher premium components than usual CX series, and come with a high-end bearing fan, ensuring it will stay quiet and efficient for years.
This particular PSU has a 10-year warranty, and it is also energy efficient. Fully modular cable system means unused cables won’t be left dangling inside the case.
How I arrived at the 650W number:
The 8700k draws up to 180 Watt when overclocked and under load.
Aorus’ GTX 1080 Ti draws up to 375 Watt – that’s the maximum physical limitation of 2x 8 pin power connections + 75 Watt from PCI-Express slot.
180 + 375 = 555 Watt
So we need a Power Supply that can output that many Watts, plus about 50 Watt for other devices, such as SSD, HDD and Motherboard itself.
Might also want to add an extra 50 Watt just to be safe.
This all comes down to 650 Watt.
Case Fan: 2x ARCTIC F14 PWM PST CO
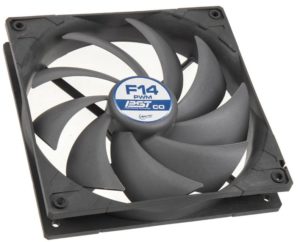
Phanteks Eclipse P400 does come with two 120mm fans included. I wasn’t able to find what kind of fans they are. They are unlikely to use a high-end bearing, and will probably wear out with time and get noisy. Until that moment, however, there is no reason not to use them.
So we will be needing just a couple of extra fans.
The Arctic F14 offers a perfect combination of price, airflow and low noise. I use them myself, actually.
The MSI Tomahawk uses 4-pin PWM connectors for all of its case fans, which means it can be programmed to regulate the speed of case fans, making sure they work at maximum RPM (and maximum noise) only when it’s necessary.
We will engineer the following airflow in the case:
The lower front panel fan will capture the cold air outside the case and direct it towards the Graphics Card. Its triple fans will capture it, push through the heat sink, and disperse hot air all around the graphics card, heating other motherboard components.
The CPU cooler’s double fans will capture air in the case, and also push it towards the motherboard, pumping air through motherboard VRM and RAM heatsinks.
In this case, both Graphics Card and the CPU Cooler do not direct heated air in any particular direction. So instead of focusing on pumping cold air into the case, we’ll focus on directing hot air out of the case.
So our pair of Arctic F14 fans will be installed at the top side of the case, helping hot air escape the case.
Monitor: AOC G2460PQU 24.0″ 1920×1080 144Hz
This is a highly praised and well-reviewed monitor, and it’s more or less a steal for that price. It lacks G-Sync or FreeSync, but high refresh rate should compensate for it. Screen tearing is barely an issue at high framerates, and you will want to have a high framerate in competitive online games anyway. And for a more demanding and cinematic single player games, you can just use V-Sync, since you won’t care about input lag as much. Then again, the PC we’re building is likely to easily handle even heaviest titles at an excellent framerate anyway. In this context, it doesn’t really make sense to pay nearly double for a G-Sync monitor.
The only gripe with this monitor is that it has to be calibrated to properly display all the colors. It’s easy to do using a windows’ built-in calibration tool, but it may get tedious, as this has to be done after every windows reinstall.
Important to note that this monitor still uses 1920 x 1080 resolution, which is slowly but steadily going out of style. However, slightly larger 2560 x 1440, 27-inch monitors are at least twice as expensive and it’s hard to justify a huge display for gaming anyway.
Consider this article a preview of my PC Building Services.

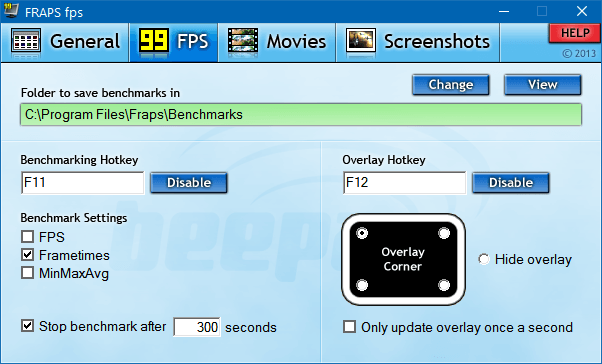
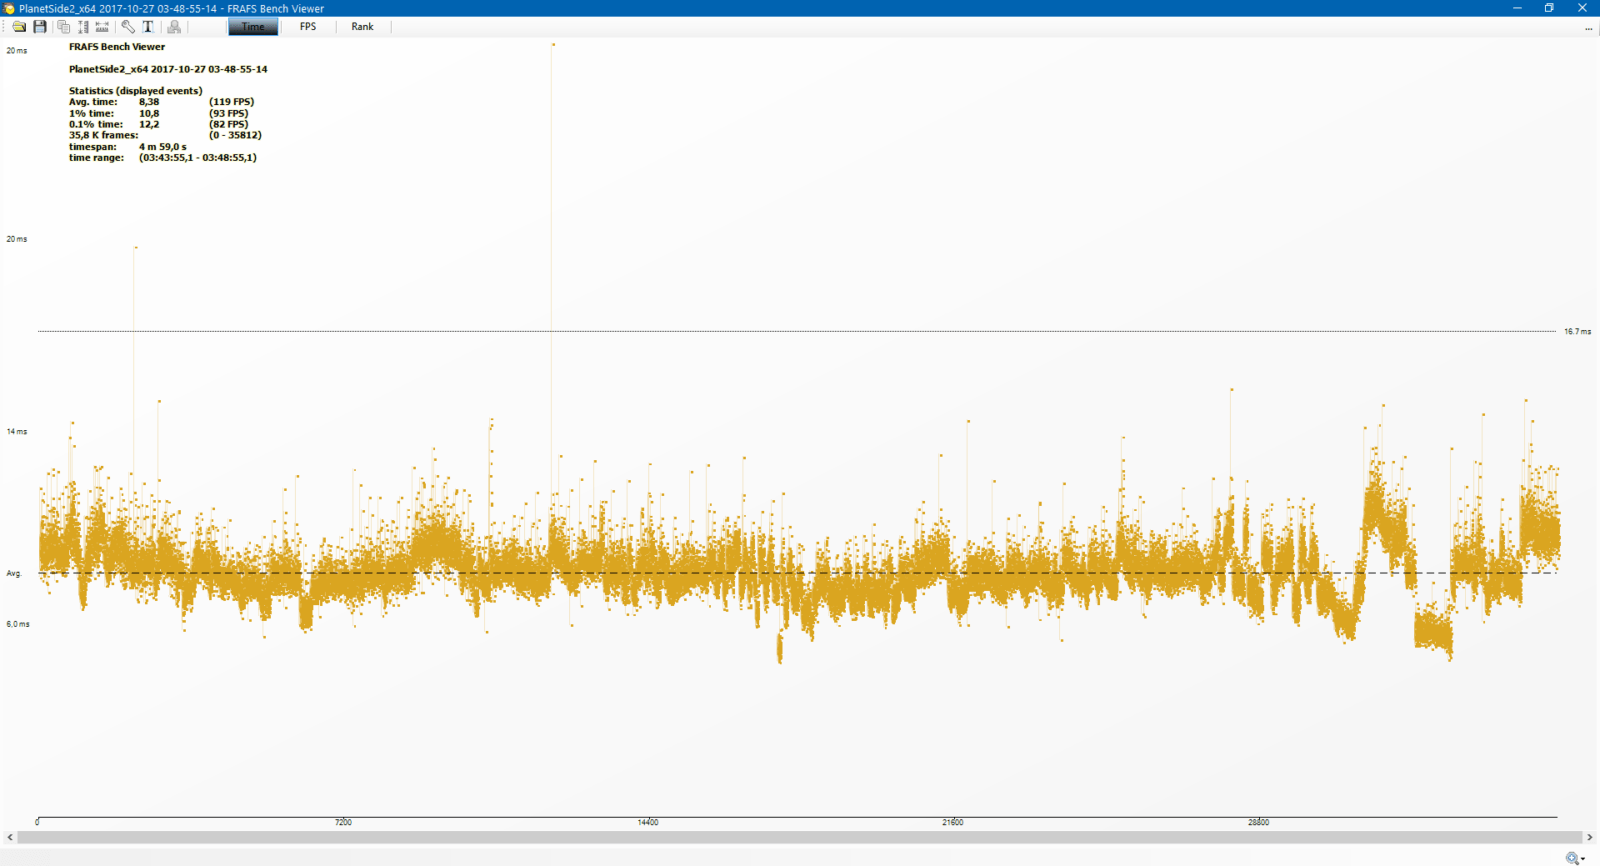
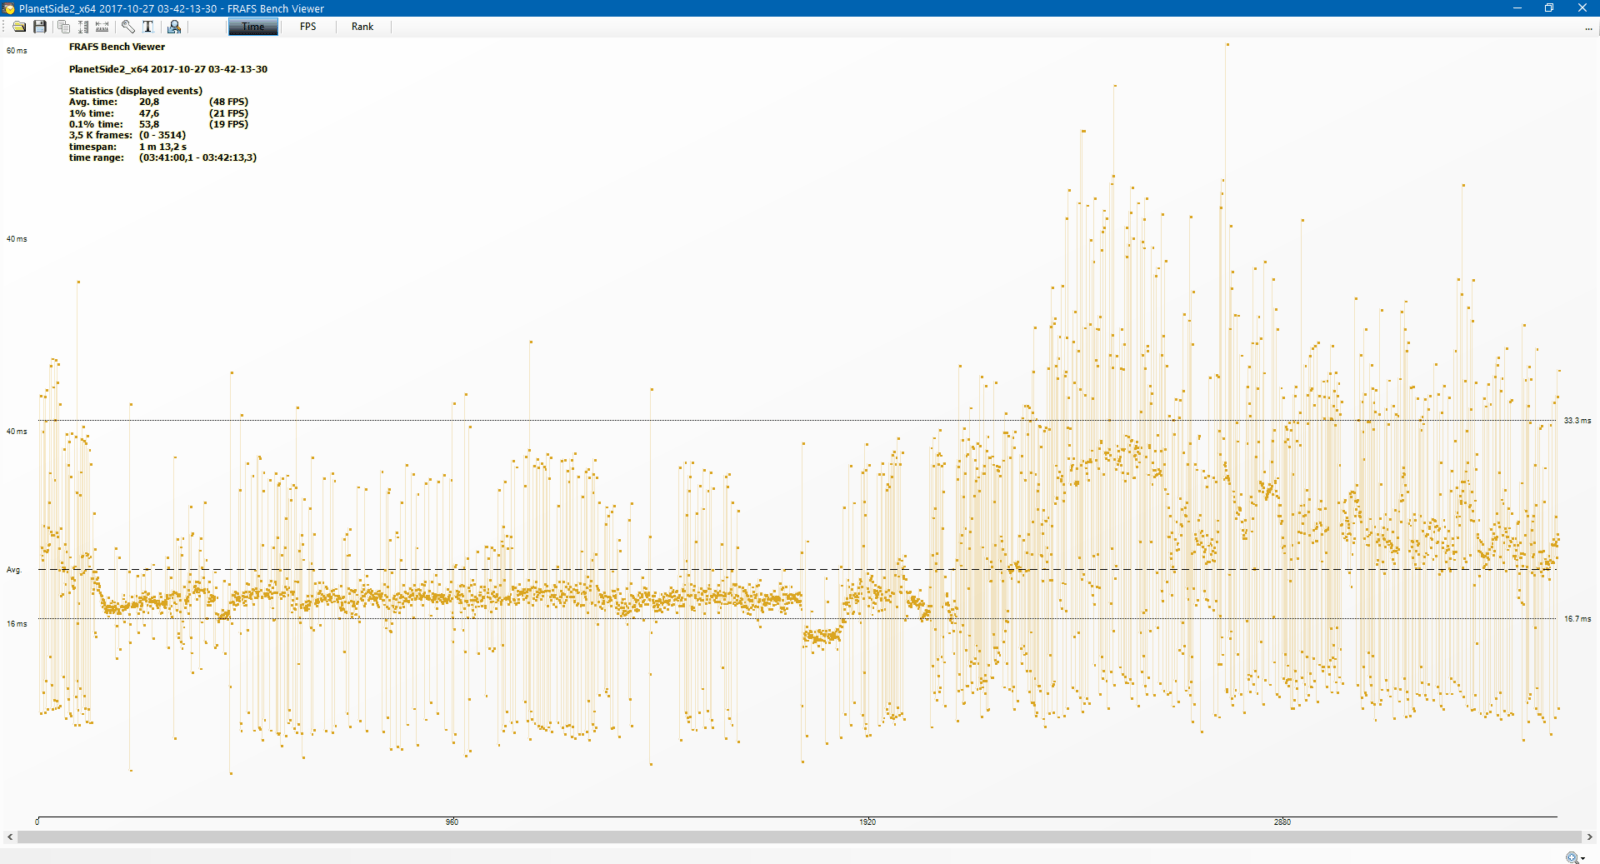
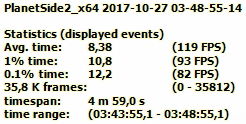
 PlanetSide 2 historically lacks any form of benchmark. Most players rely on anecdotal framerate, provided by in-game FPS counter, which can be enabled by pressing Alt + F or typing /fps in chat.