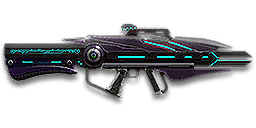
NSX Yumi is an assault rifle, available only to Combat Medic class. It fires in fast and accurate bursts of 5 rounds, but with a short delay before each burst.
Yumi is an excellent weapon for medium and long range combat, and it gives a huge advantage when firing first, more so than any other automatic weapon. But the burst delay makes the weapon a little bad in direct confrontation, especially if the enemy engages you first in close quarters.
Playing with Yumi is like playing with any slow and accurate ranged Assault Rifle – you will have to stick to cover, be ready to disengage if you get shot and avoid rushing head-first.
Using the Yumi is the hard way to teach a player to look for good engagements; the strict requirement on accuracy and firing delay will force the user to always aim down sights and aim properly before opening fire.
On the other hand, Yumi is a weapon that plays itself. Unlike other burst weapons, which are basically automatic weapons in disguise, Yumi doesn’t allow any Cone of Fire management, and barely requires recoil compensation.
Yumi is predominantly a medium+ range support weapon. If you ever wanted a designated marksman rifle for a medic – this is it.
Yumi was released in underpowered state, and was significantly buffed in Apr 27th, 2017 patchand Oct 19th, 2017 patch, and now that this weapon is actually viable, let’s take a deeper look.
Vertical Recoil: 0.22
First Shot Recoil Multiplier: 0x
Recoil Angle: 5 / 5
Horizontal Recoil: 0.12 / 0.12
Horizontal Recoil Tolerance: 0.2 (up to 1 kick)
Refire Time: 250 ms (for the purposes of recoil recovery delay) Recoil Recovery Delay: 50 ms
Recoil Recovery Rate: 16
Mechanics
After you press the trigger, there is a 0.25 second firing delay. Then it takes a 0.24 seconds to fire off a 5 round burst, with 60 ms refire time between shots. For comparison, AF-4 Cyclone has 92 ms refire time.
As with a semi-auto weapon, you can queue the next burst right after you start charging the current burst. Click-release-click-hold until the next burst starts charging. This technique is explained in detail here.
If you press the trigger without Aiming Down Sights, you will not be able to Aim Down Sights until the weapon finishes firing.
Similarly, if you press the trigger while ADSing, you will not be able to leave ADS, even if you jump. This is actually one of the biggest turn-offs of this weapon, because when you click to fire, you essentially commit your next 0.55 seconds to firing, and this can be a problem if you get attacked by another enemy during this time.
Melee Combo
Yumi’s fixed burstfire mode gives it an interesting mechanical quirk. You can click to start charging the burst, and then perform a quick melee attack while the weapon is firing. This makes Yumi surprisingly scary in close quarters, because even if only 4 out of 5 shots hit, a knife strike will still reliably kill standard infantry through nanoweave.
Rate of Fire during a burst: 1000 RPM DPS during a burst: 2783 to 2083 depending on distance.
Overall Rate of Fire: ~545 RPM
Overall DPS: 1516 to 1135, depending on distance.
Yumi fires off the burst at the highest rate of fire among all primary weapons, and therefore has the highest non-shotgun DPS. Burst delay significantly reduces overall rate of fire, reducing overall DPS to be on the level of a 167 @ 550 RPM weapon.
Description
Effective Health
Bullets to Kill
6
7
8
9
10
Default
1000
0 – 10
11 – 55
56+
Nanoweave
1250
0 – 29
30 – 63
64+
With perfect accuracy and bodyshots, Yumi will require two bursts against a full health target. Heavy Assaults will require an extra burst at most. It is possible to one-burst a target if several shots hit the head.
Overall, assuming good, but not perfect accuracy, you should expect 2-3 burst kills against standard enemies, and 3-4 bursts against Heavy Assaults.
Finally, one burst + one quick knife swing will reliably kill standard infantry, though it’s not an easy combo to hit against an aware player.
Recoil
Stock
With Attachment
Vertical Recoil during Burst, per sec
~3.6
~3.1
Compensator
First Shot Multiplier (Recoil)
0x
0x
Average Horizontal Deviation
0.057
0.043
Forward Grip
Maximum Horizontal Deviation
0.12
0.09
Recoil Angle
5
3.75
Recoil Recovery True Delay
0.31
–
Burst Recoil Recovery Time
0.079
0.065
Both
Yumi is the only weapon to feature a zero First Shot Recoil Multiplier, meaning it has no vertical recoil for the first shot. The first shot is still subjected to Horizontal Recoil, though.
Yumi has one of the lowest values for Vertical Recoil, though extremely high rate of fire still creates a noticeable vertical pull during the burst. You can’t start compensating recoil on reaction, because the burst will be over before you can react.
Yumi has very little Horizontal Recoil for its damage profile, and a negligible recoil angle to the right.
Recoil Recovery finishes before you can start the next burst.
Accuracy
ADS CoFs: 0.03 / 0.15 / 0.03 / 0.15 / 0.05
Yumi has very small Cones of Fire in all stances, and reduced Cone of Fire Bloom. Most 167 damage weapons have CoF Bloom of 0.06.
It’s worth noting that Yumi doesn’t get any bonus accuracy for crouching.
Overall, it’s safe to say that Yumi features one of the longest effective ranges among Assault Rifles. And even ranged monsters like Reaper DMR cannot compete with Yumi’s moving accuracy and low Bloom.
Hip CoFs: 2 / 2.25 / 2.5 / 3 / 0.12
Yumi has standard hip fire accuracy for an assault rifle. It can be surprisingly effective in a pinch, but don’t expect any miracles, especially if you use Compensator.
Yumi has access to a variety of reflex scopes from 1x to 3.4x, and HS/NV scope. As always, the choice will depend only on your personal preference.
A low magnification scope makes it feel like the weapon has no recoil at all, and it allows a wider field of view, which can be crucial while you are busy tunnel visioning in one direction and firing off several bursts – Yumi has a long exposure time.
On the other hand, a higher magnification scope gives a clearer sight of the target, allowing for more deliberate accuracy. It can also help identify targets at longer ranges before you even open fire.
When in doubt – start with 2x Reflex, and see whether you need more or less magnification.
Yumi is a rare case of a ranged weapon where Forward Grip is not mandatory. Yumi already has very little horizontal recoil, and at ranges where you would benefit from the Forward Grip, Yumi already gets weaker due to Cone of Fire Bloom and damage degradation.
Yumi’s underbarrel attachments are similar to those of other weapons.
Underbarrel Grenade Launcher offers a great way to increase utility, versatility and firepower. It can damage vehicles, finish off players behind cover, and even OHK if you manage to get a direct hit. UBGL was never a bad attachment to have. It has just two problems: it is usually available on crappy weapons, or weapons that greatly benefit from other rail attachments.
Yumi doesn’t have any of those problems, so it is a prime candidate for using UBGL.
SPA is better within 35m and gives maximum benefit of +1.8% damage at 15m.
HVA is better at 35m+ and gives maximum benefit of +6.4% damage at 90m.
If you’re interested in a more in-depth analysis of ammo types, /u/DrSwov has a reddit post with TTK numbers against different targets.
Recommended Attachments
There are many viable attachment combinations with Yumi. If you know what you’re doing, you should be able to easily figure out the best build for yourself.
If you need some help to get started, here is an example of a cookie-cutter build:
The goal behind this loadout is to give you the most versatility and combat options, without being overly specialized in any particular area.
Gameplay Tips
NSX Yumi is way more versatile than it may seem on the first look. The burst mechanic spices things up a bit, but you quickly get used to it, and for most intents and purposes, you simply get a gun that shoots half the time, and charges up the other half.
Use the burst delay to your advantage, and take aim properly while the gun is charging up.
Yumi has surprisingly decent performance from the hip, but you should still invest in a powerful sidearm for close encounters, and get comfortable with it. If you get engaged while healing or reviving, the sidearm will be your go-to weapon, not the Yumi.
Being unable to fire single shots is definitely limiting, because you can’t tap-fire snipe engies behind turrets or deployables.
Yumi is excellent at range out of the box, without any performance-enhancing attachments, so it can be used with any attachment combination and still be viable.
The burst mechanic certainly gives advantage to firing first, but it’s not like you automatically lose if you get engaged on. Dodging enemy fire and hip firing, or ADSing and going for headshots are both viable ways of fighting back, depending on situation.
Don’t spend too much time firing at targets at super long range, you’re unlikely to kill them before they make it to cover, and every moment you spend outside cover increases the chances of getting sniped.
In extreme close quarters, consider switching to a sidearm, if you’re good with it. You can also “pre charge” a burst as you round the corner, though it requires good timing, and you have to already know where the enemy is.
Conclusion
Yumi is an interesting and worthy addition, both to NSX lineup and Assault Rifles in general. Not everyone will like it, but everyone can use it. Unlike most other NSX weapons, Yumi doesn’t have a steep skill requirement.
Give Yumi to a PS2 newbie with some FPS experience, and he will be able to participate in ranged combat, even though he knows nothing about CoF and recoil management.
Give Yumi to a hardened veteran with excellent accuracy, and most enemies will die before they realize they’re getting damaged.
Yumi is a welcome respite from super-niche weapons, though the delayed burst mechanic seems a little out of place on Medic, and would make more sense on Light Assault or Infiltrator, in my opinion.
If you’re thinking about purchasing the Yumi, it is strongly recommended you trial it, and use it in actual combat for the whole 30 minutes.
Answering critique
The whole premise of Yumi being a “garbage” weapon is based on a 0.25 second burst delay, which is not a big deal, unless you get shot as soon as the engagement starts. This just means Yumi user has to be a little more thoughtful about engagements he’s taking, nothing more.
Ignoring the burst delay, Yumi is basically an incredibly accurate 167 @ 550 AR with nearly no recoil and automatic CoF reset. I wouldn’t say that’s bad.
Adding Yumi into Weapon Simulator
If you want to add NSX Yumi into my Weapon Simulator, add this string to the end of the Stats.csv file, which you can open with Windows Notepad:
Rocket Launchers in PlanetSide 2 can be used by Heavy Assault class, and count as their tool. They deal moderate damage to all targets. There is a large variety of launchers; some of them deal increased damage, others can lock on to ground vehicles or aircraft, or use laser guided or even TV-guided systems.
Most vehicles require quite a few rocket launcher hits to take down.
Launchers deal mediocre damage to vehicles in most situations. Pairing them with another player or damage type works best. Finding these opportunities or working in teams will greatly enhance your effectiveness with whatever launcher you use.
Normally, a single Heavy Assault with a Rocket Launcher is only a nuisance. In order for him to represent any real threat, the vehicle must be already damaged, distracted or otherwise vulnerable, and the Heavy Assault himself requires cover and freedom of movement.
Rocket Launcher Mechanics
Rocket Launchers follow the same Weapon Mechanics as other weapons.
Most Rocket Launchers deal Direct and Indirect Damage. You can think of it as “piercing effect” and “explosive effect”.
Direct Damage
The Direct Damage of all launchers uses the same Damage Resist Type 34 – Infantry Rockets. Therefore, all rocket launchers can be directly compared to each other.
Infantry, MAXes and ground vehicles have no built-in resistances against that Damage Type. Therefore, they will take that damage directly to their Health.
Rockets do not deal increased damage on headshots.
Aircraft, especially ESFs, take bonus damage from this Damage Type.
You can calculate weapon damage to vehicles using the Toolbox.
Indirect Damage
Rocket Launchers that have Indirect Damage, can be split into two groups:
Standard
Rocket Launchers that are primarily intended to be used against ground targets have Indirect Damage Resist Type 6 – Common Explosion. Any rocket hit will produce splash damage in a small area.
Infantry takes full damage from that damage type.
MAXes take 50% less.
All vehicles except Flash are immune to it.
Flash takes 25% reduced damage.
It’s worth noting that compared to mines and frag grenades, rockets deal very little splash damage, and it can be further reduced by first rank of Flak Armor and Ordnance Armor.
Flak Detonation
Lock-on Launchers with dedicated anti-air capability use Indirect Damage Resist Type 12 – Flak Explosion. In-game description will mention this fact.
Rockets from these launchers automatically detonate near enemy aircraft, damaging them with Indirect Damage. Aircraft take bonus damage from Flak. You can use the Toolbox to find out exact resistances.
Flak-type rockets will not produce splash damage in any other circumstances, so it’s highly unlikely for anything but the aircraft to be in range of Flak damage.
Still, ground vehicles and MAXes have immunity to Flak damage.
Infantry has no resistances to it and would take full damage if it managed to be in range of Flak explosion.
For all rocket launchers that deal splash damage, Indirect Damage scales with distance to the explosion – the closer you are to the explosion, the more damage you take. You can judge this by Indirect Damage values listed in game. This is easy and intuitive.
However, M9 SKEP Launcher, AF-22 Crow and Hades VSH4 have an additional, hidden scaling with Rocket Flight Distance – the longer the rocket was flying, the higher its Indirect Damage.
They deal:
50% Indirect Damage within 10m
50% to 100% within 10m to 30m, scaling with distance
100% at 30m+
In other words, they deal less Indirect Damage up close, and more Indirect Damage at range. If you want to splash damage a group of infantry, you want to be 30m+ away from them.
Indirect Damage is applied on direct hits to MAXes and Infantry, so if you want to deal more damage to a MAX or a shielded Heavy Assault, you also want to be further away.
Dumbfire Mechanics
Dumbfired rockets start flying at relatively low Starting Velocity, and then rapidly Accelerate to Maximum Velocity, listed in-game as “Muzzle Velocity”.
Starting Velocity and Acceleration are hidden in-game, and can only be accessed via Census API, and without these values you cannot fully evaluate rocket’s speed.
Rockets dumbfired from Lock-on Launchers do not accelerate, they always fly at their Starting Velocity.
While flying, rockets are affected by Gravity.
The slower the rocket is flying, the more time Gravity has to affect its trajectory, so faster rockets with more Gravity can sometimes have less projectile drop than slower rockets with less Gravity.
If a rocket doesn’t hit anything during its Lifespan, it will self-detonate.
Rocket’s trajectory will be more flat if you’re shooting downwards.
Formulas for Dumbfires
Validity of these formulas has been confirmed by in-game testing. To calculate rocket’s velocity at any given time (remember to respect maximum velocity and lifespan):
Velocity = Starting Velocity + Acceleration * Time
It is harder to calculate the amount of time, necessary to cover a certain distance. First, we have to calculate how long will a rocket take to accelerate to maximum velocity:
This is a quadratic equation. I recommend using this online tool for quickly solving quadratic equations. Choose the positive root.
If the distance we want to calculate for is longer than DistanceAcc, then we will have to solve this in two steps.
We already know DistanceAcc the rocket will cover while accelerating, and TimeMV it would take to do so. Knowing the DistanceAll, we can calculate the DistanceX:
DistanceX = DistanceAll - DistanceAcc
When the rocket fully accelerates, it starts moving at constant velocity, so finding out TimeX is easy:
TimeX = DistanceX / Max Velocity
Then it’s just a matter of adding two times:
TimeAll = TimeX + TimeMV
Example
Let’s calculate maximum flight distance of a rocket from a starting rocket launcher.
Starting Velocity: 35 m/s
Maximum Velocity: 85 m/s
Acceleration: 40 m/s2
Lifespan: 8 sec
Now we know that the rocket will cover 75m while accelerating, and it would take 1.25 seconds to fly. The rest of the Lifespan the rocket will fly at a constant velocity, equal to maximum velocity for this launcher.
TimeX = Lifespan - 1.25 = 6.75 sec
Now we just have to find out what distance the rocket will cover during that time.
DistanceX = TimeX * Maximum Velocity
DistanceX = 6.75 * 85 = 573.75m
DistanceAll = 573.75 + 75 = 648.75
The answer: a rocket from a starting rocket launcher can cover ~650m during 8 seconds of its lifespan.
Unfortunately, we still don’t know how exactly projectile drop is calculated. I’ve done some extensive testing, but haven’t found anything conclusive.
Lock-on Mechanics
Some of the launchers can lock-on to ground vehicles and/or aircraft.
Some of these launchers cannot fire without an established lock (cannot dumbfire).
Both these facts will be mentioned in the launcher’s description.
Rockets dumbfired from lock-on launchers will not accelerate, though they usually have slightly higher Starting Velocity.
To gain a lock, user must hold the enemy vehicle inside Lock-on Angle of the sights for several seconds. Lock-on Time is the same at all ranges and against all targets.
On launchers without dumbfire capabilities, you can hold “fire” key to fire as soon as the lock is established.
There are two statistics related to lock-on distance:
Lock Range – determines the maximum range at which a target can be locked.
Lock Hold Range – some launchers can keep tracking the target with a lock even after it has left the Lock Range.
In other words, launchers that have Lock Hold Range longer than Lock Range can hold a lock at ranges where they can’t establish a lock.
Launchers that can lock on to both air and ground targets will have different lock-on ranges against them.
When target goes outside Lock-on Angle or Lock Hold Range, a launcher can keep the lock for a short amount of time, equal to Lock-on Loss Delay.
However, during that time the lock is still fully functional, and you can take advantage of this by angling your rockets to make sure they don’t hit anything on the way to the target. There is a more extreme example here.
Vehicle Stealth defense slot can increase the lock-on time by 0.25 to 2 seconds, depending on vehicle and Vehicle Stealth rank. You can find specific numbers in in-game descriptions of Vehicle Stealth.
Fire-and-forget: after the rocket has been fired with a lock, it will automatically track the vehicle without the need to maintain the lock.
The rocket will only pursue the target for Lock-on Lifespan amount of time, so theoretically the rockets can be outrun, but it is usually impossible outside of edge cases, like an ESF at maximum lock range, afterburning away.
The “agility” of a locked on rocket is determined by Lock-on Turn Angle. If the vehicle performs evasive maneuvers, the rocket may not be able to adjust trajectory in time, and can miss the vehicle.
If then the angle between rocket’s flight direction and direction to the target becomes greater than Lock-on Lose Angle, the rocket will lose the lock. This means that the mechanic of dodging lock-ons is built into the rockets themselves.
It is currently unclear if locked on rockets are affected by Gravity.
Proximity Seeking
Proximity Seeking rockets are dumbfired as usual, but if they fly near enemy aircraft, they will automatically snap lock-on to them.
Currently the only rocket launcher employing this mechanic is T2 Striker, though similar mechanic is applied to Coyotes and Hyena Rocket Pods.
Lock-on Related Stats in Census API
The Census API contains a lot of information, related to the lock-on behavior. Unfortunately, most of that information is wrong and meaningless. Values that are actually being used by the game are recorded in the part of the API without public access.
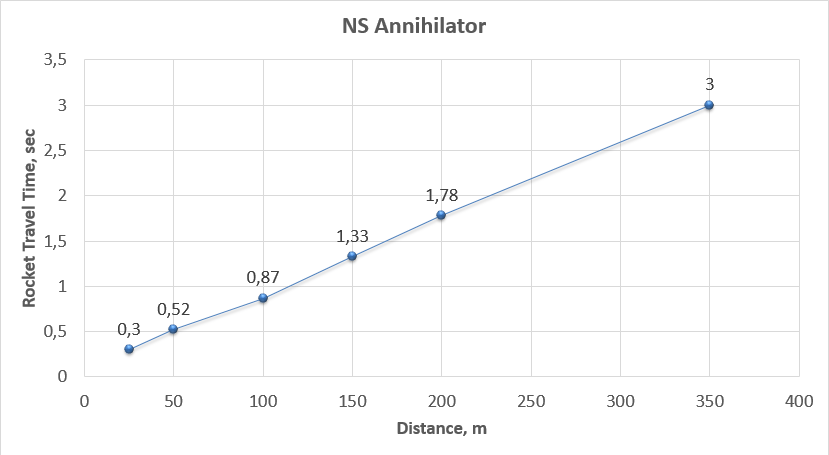
For example, according to Census API, NS Annhilator has:
And here are actual rocket travel times for different distances, acquired by in-game testing, by frame-by-frame watching of 60 FPS Shadowplay recording:
As you can see from the testing, Annihilator rocket covers 350m over 3 seconds, which means average velocity of ~116 m/s, which clearly exceeds supposed “Maximum Velocity” of 100 m/s. It also seems to travel at a constant velocity, despite the fact there is an “acceleration” statistic.
There is naturally some inaccuracy due to measuring method, but not on the scale of 0.5 seconds. I have ran into similar walls with G2G and G2A lock on launchers.
As a conclusion: listed Muzzle Velocity can not be used to judge locked on rocket speed. Same goes for such stats as lock-on range, lock-on time and lock-on loss time.
Rocket Launchers did used to have their lock-on time vary with distance to the target, but it was changed in one of the patches, and now lock-on time is the same at any distance, though it will vary from launcher to launcher.
Some values, like Lock-on Turn Angle and Lock-on Loss Angle cannot be effectively tested. In Rocket Launcher stat sheets below, you will see a red question mark in brackets (?) to highlight stats that are listed in the API, but could easily be wrong.
Lock-on Lifespan is probably correct.
Vehicle Interaction
Vehicle pilots receive a warning when you try to lock-on to their vehicle, and they can see whether the source of that lock is someone on the ground or an air vehicle.
When a rocket is tracking the vehicle, they get continuous warning and they can see flying rockets on the minimap as pulsing red dots.
Establishing and holding a lock will not give away your position.
Decoy Flares and IR Smoke
Air vehicles can use Decoy Flares utility to remove the lock and prevent locking for several seconds. Any lock-on rockets already in flight will automatically miss – veer off skywards and self-destruct.
Ground vehicles can use Smoke Screen to the same effect, though it is much less popular.
Mythbusting
There is a myth that jumping or falling greatly increases hip fire accuracy of dumbfired rockets. Busted.
Misc. Rocket Launcher Mechanics
Sprint Override: after firing a rocket, the player cannot sprint for a certain period of time. Depending on the launcher, this delay ranges from 0.3 to 0.5 seconds.
Terminal Resupply to Instantly Reload: you can double-tap the “use” key (default [E]) on an infantry terminal to instantly reload all your weapons and restock on ammo. This can be a great way of boosting your combat rate of fire while using a launcher.
However, resupplying at a terminal mid-reload will result in your character doing a non-skippable reload animation after the resupply, so before resupplying make sure to switch to something that doesn’t need reloading.
Fire Detect Range of 100m: when fired, all launchers put their user on the minimap of enemies within 100m.
Iron Sight Time: all launchers take 0.35 seconds to ADS, and 0.15 seconds to return from ADS to hip firing.
ADS Movement Speed Multiplier: most rocket launchers have 0.5x multiplier, the only exception is NSX Masamune, which has 0.33x.
Reloading continues in a vehicle: if you enter a vehicle after the reload has started, the reload will continue and complete successfully while you are inside. This works the same for all weapons, but only after they spend all ammo in the mag.
Munitions Pouch Suit Slot allows to carry extra spare ammunition. One extra rocket / magazine / battery per rank, up to 4 ranks.
Dumbfire Launchers
These launchers do not have any sort of laser guidance or heat seeking, but they deal the most damage per rocket.
The ability to instantly fire a highly damaging rocket make them great against MAXes, hovering aircraft and other vehicles at close range.
According to my tests and confirmed by /u/Renuse’s experiences, a rocket dumbfired from the hip while standing moving is guaranteed to hit an infantry-sized target within ~6.5m, as long as you aim exactly at its center mass.
Dumbfire launchers can be used as one-shot “sniper rifle” against camping Infiltrators and Light Assaults, as it’s a guaranteed OHK if the rocket touches the player.
All dumbfire launchers share the same Damage Resist Type, so they can be compared directly.
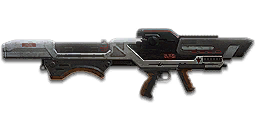
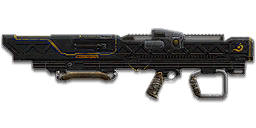
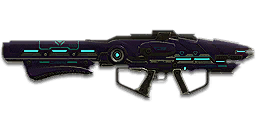
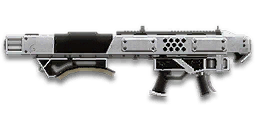
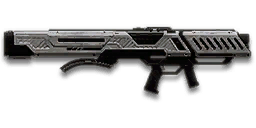
Starting Launchers
Despite looking different, these launchers function exactly the same between factions.
Starting rocket launchers are your basic RPGs, they have good velocity and damage, but hitting mobile or distant targets can be challenging. Iron sights can be especially inconvenient when trying to compensate for projectile drop.
Quick reload lets you keep dealing a solid amount of damage to ground vehicles, especially at close range, but starting launchers aren’t very effective against aircraft. Even if you manage to hit them, you will still need multiple hits to destroy them.
One rocket is almost enough to get an ESF burning. If you do manage to get a hit, you can quickly finish off the ESF with about 20-30 bullets from your primary weapon.
Valkyries require at least 3 rockets hits, and other aircraft even more. At that point, using a lock-on launcher for easy guaranteed hits is likely a better bet.
One rocket deals 32% to 42.5% of MAX‘s health, depending on whether he has Ordnance Armor, and of what rank.
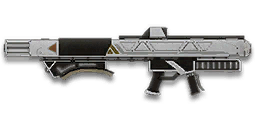
NS Decimator is a heavy RPG. It deals more damage than starting launchers, but reloads longer, carries fewer rockets, and the rocket itself has lower velocity, which makes it more susceptible to Gravity and harder to use against vehicles at range and aircraft.
Compared to starting launchers, Decimator deals ~34% higher damage per shot, and usually requires 1 rocket fewer to kill a vehicle.
Both dumbfire launchers can deal roughly the same damage with the amount of carried ammunition, but starting launchers still deal ~23% more damage per reload time (damage per minute) than Decimator.
However, requiring to fire fewer rockets makes Decimator safer, and higher damage per shot is more desirable against infantry and MAXes at close range:
Decimator deals 57.5% to 43.4% MAX’s health in 1 rocket, depending on Ordnance Armor.
One direct rocket hit will kill full health infantry without Flak Armor 3+.
One rocket will reliably one-shots ESFs without Composite Armor. Such overwhelming power earned the Decimator lots of love and adoration from the community.
Decimator is noticeably harder to use at any meaningful range, so often it is better to stick to starting launchers. After all, it’s better to hit with a weaker missile than miss with a stronger one.
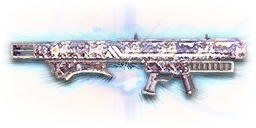
The Kraken
The Kraken is a cosmetic variant of the Decimator, granted for completing the auraxium level of rocket launcher Directives. Kraken has an auraxium shader, and its rocket explosions have noticeable visual and sound effects.
The Directive requires you to earn an auraxium medal (1160+ kills) with five different rocket launchers. Since most rocket launchers are no longer effective against infantry, this directive is very hard to complete for the moment.
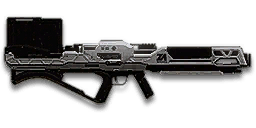
Lock-on Launchers
Empire-specific Ground-to-Air
Despite looking different, these launchers function exactly the same between factions.
These launchers can lock-on to enemy aircraft, but they can still be dumbfired against ground targets, which makes them incredibly versatile. A Heavy Assault armed with one of these will have an option against every target type in the game.
Comparing G2A launchers to default dumbfire launchers:
The good: there’s virtually no performance loss against ground vehicles at close range.
They are also more convenient to use:
Scope doesn’t get in the way like Iron Sights, and it’s great for dumbfiring.
The rocket is slower, but it flies at a constant velocity, so it is more consistent and predictable within ~75m.
It is less affected by Gravity, and doesn’t require as much compensation for drop within 200m. It will have ~50% longer travel time, though.
The bad: default launchers deal more damage to MAXes and Infantry, since rockets from G2A launcher do not produce splash damage when fired at ground targets.
The ugly:
Low velocity and shorter lifespan limit G2A dumbfire range at 250m.
G2A Launchers have much worse hip fire accuracy.
Empire-specific Ground-to-Ground
Despite looking different, these launchers function exactly the same between factions.
These launchers can lock-on to enemy ground vehicles, and they can still be dumbfired against infantry and MAXes, or vehicles at close range.
Interestingly, G2G launchers deal a tiny bit more damage per shot than default dumbfire launchers. That would be enough to let them reliably oneshot infantry without Flak Armor…. if not for hidden indirect damage scaling. Up close, G2G launcher rockets will deal less splash damage. So the rocket will oneshot only at 30m+.
G2G launchers have great accuracy and consistency within their relatively short lock-on range of 200m, as long as the vehicle is in relatively open field and the target cannot just hide into cover to throw off the lock.
Lock-on Range Air: 350m
Lock Hold Range Air: 400m Lock-on Range Ground: 300m
Lock Hold Ground: 300m
Lock-on Time: 1.2 sec
Lock-on Angle: 8 degrees
Lock-on Loss Delay: 0.75 seconds
NS Annihilator cannot dumbfire, but it can lock to both ground and air vehicles. Against ground targets, it has a longer lock-on range than dedicated G2G launcher.
Annihilator deals less damage per shot, but it has faster reload and ~half a second shorter lock-on time, and it also carries more rockets. Overall, Annihilator can deal slightly more damage before having to resupply.
The inability to dumbfire makes Annihilator ineffective against ground vehicles at close range, and useless against infantry and MAXes.
It’s not necessarily such a terrible thing, as it simplifies the decision-making. Removing the option to dumbfire against MAXes and infantry forces the player to rely on firearms, but it also removes the possibility to be flanked and killed while handling the launcher, or missing a crucial rocket. It also makes it nearly impossible to accidentally hit an allied unit. For these reasons, Annihilator is the best launcher you could give to a complete FPS newbie. Which is probably the reasoning behind it being included in the Elite Recruit Bundle.
Rate of Fire: 60 (1 shot per second) Ammo: 3 + 27 Reload Time: 4 sec
Lock-on Range Air: 350m
Lock Hold Range Air: 400m Lock-on Range Ground: 300m
Lock Hold Ground: 300m
Lock-on Time: 1.2 sec
Lock-on Angle: 8 degrees
Lock-on Loss Delay: 0.75 seconds
Lockon Lose Angle: 180 (?)
Gravity: 0.5
According to patch notes, Swarm’s rockets will follow the target for up to 800m, though it’s currently unclear whether that affects only aircraft, or ground targets as well, and if both firemodes are affected.
NS-R3 Swarm is a sidegrade to Annihilator. It too cannot dumbfire, and can lock-on to both ground and air vehicles, with same lock-on ranges and lock-on time.
Swarm is magazine-fed, with 3 rockets per magazine, each rocket dealing slightly more than half of Annihilator’s rocket. Swarm can fire only 1 rocket per second, and requires you to maintain the lock for 2 seconds while firing 3 rockets, while the Annihilator is strictly fire-and-forget.
All in all, Swarm has about ~17% lower damage per minute than Annihilator, but in return it can output the most amount of damage per reload.
Swarm has two firemodes:
In default firemode, it fires fast, but not very agile rockets. They are great at quickly reaching a large or slow-moving vehicle, but can miss a more maneuverable target.
In secondary firemode, Swarm fires slow, but agile rockets. They are nearly impossible to dodge, but they can take a long time to reach the target, and can potentially run into terrain or be outrun.
Empire Specific Rocket Launchers
These rocket launchers embrace the traits of different factions: volume of fire for TR, precise and powerful punch for NC, adaptability and versatility for VS. These launchers are rather unique, and historically have been a hot topic for community, with constant calls for nerfs or buffs, and with whole squads being organized to play around their strengths. Things have been calm and stable lately, though.
All of these launchers are weak on their own, especially outside their element, but – just like everything else – become noticeably stronger when used in greater numbers in coordianated squads.
T2 Striker is a magazine-fed rocket launcher, with a focus on sustained fire and close range anti-air. Striker dumbfires small, fast rockets both when hip firing and when looking through the scope. If a rocket passes within ~15m of an enemy aircraft, it will automatically snap lock-on to it.
Striker can be a great deterrence to aircraft when terrain and proximity interferes with traditional lock-ons, but it’s fairly average against armored ground vehicles.
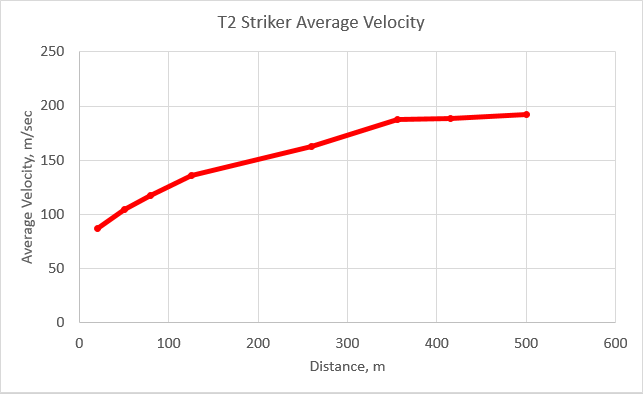
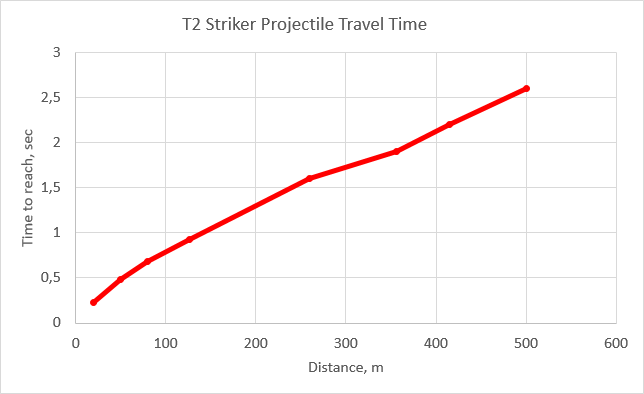
Striker’s velocity does not seem to follow the parameters in the Census API. Here are some results from in-game testing:
Click to enlargeClick to enlarge
Due to high velocity – more than twice as fast as default dumbfires – individual hits are easy to score, so the Striker can sustain fire on distant targets without any trouble.
Striker is a versatile launcher that can engage both air and ground targets, but noticeably lacks in alpha damage, and exposes the user while firing.
When dealing with distant targets, starting Cone of Fire becomes a real issue, and has to be managed by staying still. Striker also has a little bit of CoF Bloom, but it’s no big deal and can be ignored, for the most part
Striker has maximum range of about 445 meters.
Tip: Striker is fully automatic, you don’t have to click for each shot, you can just hold “fire”.
Striker is ineffective against MAXes, requiring 14+ rockets to kill one.
Phoenix fires slow TV-guided missiles, almost as damaging as Decimator’s.
While the rocket is in flight, the player uses his first person camera to steer to rocket.
During that time, the player character is forced to stand and becomes immobile; vulnerable to enemy fire.
The rocket is slow, emits distinctive blue flames and a screeching sound effect, and can be shot down.
The reloading process only starts after the user exits the steering mode.
The rocket can fly maximum 295m away from the user. Flying further will force a detonation. While steering the rocket, players can monitor the distance to their body in the upper right corner.
Phoenix cannot fire from the hip.
Phoenix users have accumulated a lot of tactical and mechanical quirks to help them:
In prolonged hunkered-down fights, dug-in NC will pull out the Phoenixes. You don’t need to coordinate with them. Pull yours out, and wait for them to fire theirs. Fire yours right away. You should be able to follow where the first NC rocket is going, and most Phoenix users know to do this trick of following the first rocket. It leads to coordinated spikes of damage without actually coordinating.
The Phoenix packs a serious punch and has the incredibly useful trait of not needing line of sight to engage. The best time I’ve found to use this weapon is in support of a friendly armor push: position yourself closely behind, out of enemy line of sight, and fire your Phoenix over cover towards the fight. Focus on an enemy that is being engaged by your allies. This technique is just brutal when you combine it with friendly Vanguards. They cause enemy tanks to seek cover, and you follow the burning tank into cover with your Phoenix and blow it up. You’ll want a vehicle of some sort so you can keep up with the friendly push, and keep the enemy in your range of 295 meters.
Solo Phoenix is amazing against inexperienced and distracted tanks from a flanking position, and can quickly kill even an MBT. Engaging veteran tanks that are not distracted will result in them killing, evading or outrepairing you, so its best to avoid.
Against aircraft, Phoenix can sometimes get good surprise alpha damage. ESFs take especially high damage, almost enough to be one-shot. But you won’t be able to reliably hit evading aircraft. Hovering Galaxies and Liberators are fairly easy to hit, if they are in range, however.
Pressing the “Change Camera” key (default “T”) after the shot switches the first person rocket view to third person, allowing for a much wider Field of View, which really helps with finding and tracking targets.
Alternatively, you can press the “Hide HUD” key (default Ctrl + F10) after the shot to remove the scope overlay.
Unfortunately, in both cases you lose the distance tracking.
You cannot fire the Phoenix while crouching, even when using crouch toggle. Firing the rocket will force you into standing once you enter the camera mode.
It’s something to keep in mind if want to avoid exposing yourself as sniper bait.
You can prematurely end the steering process by pressing the “Exit vehicle” key (default “E”). The rocket will continue flying, but with a heavy drop downwards. It will still deal damage if it hits something. You can use this technique to shave off a few milliseconds between shots by “exiting” the rocket when it is about to hit something. You can also use this to pseudo dumbfire the Phoenix at close range targets.
If you have a fancy gaming mouse, it can be convenient to have a thumb button that would increase mouse’s sensitivity while steering the rocket, so you can easier make sharper turns.
You can use the keyboard to steer the rocket. The rocket will respond to Aircraft Controls for Pitching Up and Down, and Rolling Left and Right. Arrow keys by default. You can also change rocket’s speed to make sharper turns.
Phoenix one-shots Engineers’ MANA Turrets, and kills the Engineer in the process, unless they bail before impact. This is the main reason I use the Phoenix, because a well placed MANA Turret can pin down a whole squad.
Lancer is not a traditional rocket launcher, it’s more of a charge up anti-materiel plasma rifle. Lancer’s battery holds 9 plasma cells. By default, Lancer fires weak bolts of plasma that deal minor damage and consume 1 plasma cell. But the user can hold down the trigger to fire more powerful bolts:
Lancer has no projectile drop and pinpoint accurate while aiming down sights.
Charged shots are more ammo-efficient, so normally Lancer is used in charged mode. It is a common tactic to charge the shot from the hip, and fire it in ADS mode. That way, you can move faster while charging.
There are several ways to cancel the charging process, should you need to:
Due to highest in class projectile velocity, Lancer is easy to use at range. It can even be used to snipe ESFs. Low scope magnification can be a nuisance at extreme ranges, though. Lancer has a considerable damage degradation after 150m, so it’s not very effective at 200m+.
More than any other ESRL, Lancer is known for being used en-masse in organized squads. However, its main allure was that once a certain critical mass of Lancers was reached, the squad could delete any enemy vehicle within render distance. Now that Lancer has considerable damage degradation, it’s less effective in that role. It’s still does a good job of consistently inflicting damage to vehicles at great distances, but the necessary critical mass to instakill a vehicle is now at around ~20 Lancers.
With Lancer, VS heavies can engage any vehicle on the battlefield at basically any range. The charge feature lets you choose how to distribute the damage. Instead of always charging (which does yield the highest percentage of damage), use the appropriate charge for the situation:
Two fully charged shots take ~6.5 seconds to empty a battery and will deal 1400 base damage. The enemy pilot will have ~3.5 seconds between shots to react to incoming damage.
Alternatively, you can start with one fully charged shot, then follow up with a lvl 2 charged shot, and then finish with an uncharged shot. It will take ~5.8 seconds, giving the enemy only a couple seconds to react and dealing 1150 base damage.
The key to the Lancer is to focus fire on targets that are already being engaged. Since you can choose how to distribute the damage, you often can easily steal the kill. For this, I like to use Flashes to get in flanking positions of big tank battles.
Don’t try to solo a veteran tank crew, unless they are already engaged or otherwise distracted. If they can’t kill you, they will just disengage or outrepair your damage.
The Lancer shines against light vehicles. Once you get enough practice, hitting a cruising harasser is pretty easy.
Lancer is great for sniping MAXes. Unless running Ordnance Armor 3+, they will die to 3 charged shots within 150m. Note: Lancer doesn’t deal bonus headshot damage.
However, Lancer is horrible against infantry and MAXes at close range. Its lack of burst damage makes it useless on the front lines.
NSX Masamune is a quad-barrel rocket launcher, and a part of the unique Nanite Systems Exports weapons lineup. It has some interesting mechanics.
In hip fire mode, it fires all barrels at the same time like a shotgun. Crouching and staying still will increase hip fire accuracy.
In ADS mode, it fires all rockets one by one over 0.75 seconds. The player can use the scope to steer the rockets, similarly to Engineer’s AV Mana Turret. A reload can be started 1 second after the final rocket is fired.
Rockets do not follow the crosshair exactly. They start flying noticeably below the crosshair, so usually you have to aim above the target for rockets to hit.
When leading a moving target, it is better to overlead and then drag rockets backwards, rather than trying to drag rockets forwards. Overleading fast moving targets may require an extreme body turn, though.
Rockets accelerate much slower in ADS mode.
Masamune always fires and reloads all 4 barrels, so it can be treated as a pseudo single shot launcher.
Keep in mind that you are exposed and vulnerable while steering the rockets, and you are not reloading while doing so. Masamune also has reduced ADS Movement Speed Multiplier – you can only move at 1/3rd of your normal movement speed while ADSing.
Masamune can be hard to use properly, but it’s a powerful and versatile launcher, capable of close range MAX and infantry takedowns, accurate long-range hits on ground vehicles, and effective air deterrence out to medium range.
Masamune is also okay for anti-infantry purposes; it can one shot infantry without Flak Armor, if all 4 rockets hit. A full salvo will damage an ESF without Composite Armor into a burning state.
Masamune can do a lot more than most launchers, but it also takes a lot of skill to use at range, and can often deliver lower than optimal performance.
Tips and Tactics
Quickscoping
When engaging enemy vehicles at “medium range” of 50-100m, it’s a common tactic to “quickscope” a rocket launcher. You use your hip fire crosshair to aim, then start Aiming Down Sights and fire the rocket during Aiming Down Sights animation, before you actually see Iron Sights align.
For rocket launchers, it takes 0.35 seconds to transition to Iron Sights, but only ~0.15 seconds for Cone of Fire to shrink to ADS state.
So as long as you fire ~0.15 seconds after you pressed the ADS key, your shot will have the same accuracy.
The point of this tactic is to be more efficient with your time, and spend less time being exposed while aiming. Staying still at the moment of the shot will increase accuracy as well.
Ballistic Crosshair Overlay
Hitting distant targets requires compensating for projectile drop, which can be tricky to do, since iron sights will be obscuring the target. While massive amounts of practice can help, there are a couple of completely legal tricks you can employ.
Download link to a .zip archive with all 4 crosshairs
Enable “Centered image” option.
There are 4 red bars, each serves as a crosshair for 100m, 200m, 300m and 400m. These crosshairs are scaled based on 1920 x 1080 resolution and 74 degree Vertical FoV. If you play at a different resolution or FoV, you will have to scale the crosshairs accordingly.
At 100m+, rockets have so much drop that your target will be obscured by iron sights. You can avoid this by hiding your weapon model, default Ctrl + F11. Obviously, it helps to rebind it to something more convenient. You cannot shoot while the model is hidden, so you will need some quick finger work.
You can bind Toggle Weapon Visibility in-game and Toggle Crosshair Overlay in RTST to the same keybind, and then you will be able to toggle between aiming and firing with one button. You will need a secondary keybind for Toggle Weapon Visibility so you can synchronize these things when you first log in.
If you have a gaming mouse, you could create a macro for a thumb mouse button that would hide the weapon while you’re holding the button, and show it when you release the button. Effectively, you would have a “hold to hide weapon for aiming” key. You could also rig that macro to fire as soon as the weapon is shown.
Rocket Jousting
It is a common tactic for a Heavy Assault to turn the corner with a Rocket Launcher ready and surprise the enemy with a point blank rocket shot. This tactic is especially effective due to Internet Delayadvantage.
Keep in mind this is only really effective against infantry if you use NSX Masamune or NS Decimator, as other launchers are incapable of reliably killing infantry without Flak Armor.
There are a couple of ways you can improve this trick:
Firing the rocket while jumping will allow you to preserve sprint-level speed.
If you activate overshield after your feet leave the ground, you can also gain overshield’s protection from enemy fire and your own splash damage without receiving movement speed penalty until you land.
If you deactivate overshield before your feet touch the ground, you will not suffer overshield’s penalty at all.
Immediately after the rocket shot, you can switch to something else, like a sidearm, med kit or even C4, depending on what you want to do next. Switching to LMG is usually a bad idea, as it will take much longer.
Naturally, these improvements require some quick finger work, and require a lot of skill to pull off in combat scenarios. But it is deadly effective against infantry and MAXes, and allows to do a ton of damage while still being very mobile.
There used to be a special trick you could do: deploy C4 on enemy vehicle, and then use Rocket Launcher’s splash damage to detonate it, saving a bit of time required to detonate C4 manually. However, now that Rocket Launchers deal little splash damage, this combo is no longer possible.
Calculating Launchers’ Damage
You can use the Toolbox to calculate Rocket Launchers’ damage to different vehicles with different defensive certifications.
Credits
This guide wouldn’t be possible without generous contributions of other community members that have answered my call for help with this guide. Every response in this thread is appreciated. Especially helpful people:


 A low magnification scope makes it feel like the weapon has no recoil at all, and it allows a wider field of view, which can be crucial while you are busy tunnel visioning in one direction and firing off several bursts – Yumi has a long exposure time.
  On the other hand, a higher magnification scope gives a clearer sight of the target, allowing for more deliberate accuracy. It can also help identify targets at longer ranges before you even open fire.


