Combat Medic Loadout: Swiss Army Knife

In this guide you will find color-coded references to other guides and materials: 

Introduction

Combat Medics are a staple of PlanetSide 2 organized gameplay. They are always universally useful and welcome into any squad composition. PlanetSide 2 is a constant battle, and in every battle there are killed and wounded. The more medics there are, the easier it is to keep the push alive. Everyone knows that. 

Combat Medics – along with Engineer – are the most often recommended class for newbies to play. Everyone always talks about how easy it is for medics to make copious amounts of certs simply by healing and reviving their more competent comrades.

However, no one ever talks about medic’s versatility and firepower, and new players often mistakenly assume that healing and reviving is the only thing they can do, and the only thing that’s expected of them.

The two-dimensional “revivebot”, “med tool primary” playstyle is easy to enter, but doesn’t leave much room for improvement, and does not force the player to improve by learning situational awareness, weapon handling, picking proper engagements and working with the team to accomplish objectives. 

By explaining the idea behind this loadout, I hope to illustrate that even a single medic can be much more than just a revive bot – a competitive and powerful fighting unit. 

The Loadout

The overall idea behind this loadout is to provide you with maximum versatility, so you can be a “one man army inside a bigger army”. You’re very capable by yourself, but in the end PlanetSide 2 is a team game, and you get vastly more powerful by fighting alongside your allies, and accomplishing objectives together.

The best part is – most of this loadout is either provided for free, cheap to get, or something that you’re gonna enjoy using on other classes as well.

Primary Weapon

The default Assault Rifle

 T1 Cycler
T1 Cycler

NC1 Gauss Rifle
NC1 Gauss Rifle

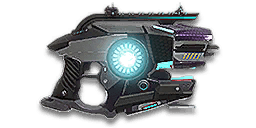
Pulsar VS1
Pulsar VS1

This shouldn’t be surprising. These rifles are well known for their versatility, for never being the worst choice for any situation. They offer a perfect balance between accuracy and firepower. They can win headshot duels with HAs at any range, and they can hip fire spray enemies in close quarters. These are the weapons that bring Assault Rifles the fame of being the best weapon class. 

These weapons are faction specific, so they will play a bit differently. Cycler with its high DPS and large mag favors aggressive pushing and can sometimes kill several enemies before needing to reload. In contrast, Gauss Rifle favors a more cautious ranged approach, though in close quarters it can ensure very quick kills with headshots. Pulsar VS1 plays as something between these two, favoring quick reloads between engagements. 

Recommended attachments: 1x or 2x scope, Forward Grip, Flash Suppressor (low priority). 

These weapons are generally not effective at ranges that would warrant higher magnification. In other words, if the target is too small to be comfortably shot with a 1x scope, it’s probably out of your range anyway. Forward Grip serves to improve weapon’s ranged accuracy. Even the Gauss Rifle, that has great horizontal recoil in stock form, benefits from it greatly.

It will also help your headshot accuracy, and you definitely want to go for headshots when you can easily get them at close range duels, and when going against tough targets such as Heavy Assaults. It’s the only way to beat good players. 

Sidearm

A thoughtful sidearm choice is important for a Combat Medic, as this will be your go-to weapon when you get engaged while reviving or reloading. Re-equipping your Assault Rifle with a Forward Grip will take a full second, whereas a sidearm can be equipped twice as fast. 
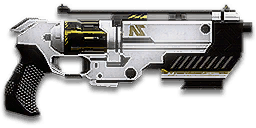
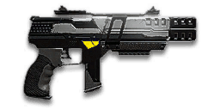
NS-44 Commissioner

NS-44 Commissioner – this weapon doesn’t need much introduction. Commissioner is universally known as the best sidearm in PlanetSide 2 and there’s a good reason for it: overwhelming damage. Commissioner can kill a shielded Heavy Assault with double tap headshots in 0.35 seconds. 

It is effective to the point that when running with a low DPS primary, I’ve started bringing out Commissioner when going into close quarters. It is that good. However, Commissioner requires good accuracy, and especially rewards headshots. If you find yourself completely incapable of hitting headshots, or if you don’t want to challenge yourself, you can always fall back on your faction-specific burst pistol:

TX1 Repeater
TX1 Repeater

LA3 Desperado
LA3 Desperado

Spiker
Spiker

These can get relatively easy kills by simply spamming them in general direction of the enemy. Within certain range, they can even go for headshots. 

Med Tool

Eventually, you want to upgrade this to maximum rank. It does take a fair amount of certs, but you’re expected to do this anyway, as long as you have any intention of playing Combat Medic somewhat seriously. Upgrading increases healing and reviving speed, as well as the amount of health that MAXes have after reviving.

I recommend you check out the Med Tool’s ground rules in Czern’s Combat Medic Guide. 

Even if you’re being completely selfish, reviving fallen allies gives you an extra meat shield, more targets for enemies to shoot at. This is the Medic’s way of gaining a combat advantage when compared to HA. 

Ability

Nano-Regen Device

Nano Regen Device. Having an on-demand AOE heal is a big part of what makes you a swiss army knife. It leaves your utility slot open for C4, and both your implant slots for something more useful than Regeneration. You can also heal nearby allies better, as Med Tool takes a long time even when fully upgraded.

Upgrading the NRD is cheap, but not necessary, as you only get a minor boost to energy regeneration. 

Shield Recharging Field can potentially provide powerful combat advantages, but they kinda tether you to a specific area, and in this way limit your mobility. With NRD you’re free to always been on your feet, and mobility is a big part of versatility.

Suit Slot

Nanoweave Armor. It gives you more breathing room in infantry combat, and a necessary advantage against Heavy Assaults. It is perfectly fine to sit on Rank 4, which only takes 211 certs. 

Grenade

Frag Grenade. It’s not very effective, but it’s free, straightforward to use and versatile: it can be used to damage infantry behind cover, force enemies to relocate, and even snipe deployables.

If you wish, you can choose to use Revive Grenades. They can potentially be very powerful, and certainly bring more certs than Frags, but they’re also more situational. 

Utility

C-4

C-4. Again, a bit part of being a Swiss Army Knife. With this you can deal serious damage to Sunderers, and help destroy them as part of a team effort, and you can also oneshot tanks,  Harassers, MAXes and infantry. Very powerful stuff.

It does require close range, and as a Medic you won’t have a lot of success in chasing vehicles on your two feet, but the important part is that you will be able to do something when an opportunity presents itself.

Melee

Power Knife (low priority) or standard knife. The reason I recommend a power knife is that it’s almost as good at quick-knifing, but also provides a very powerful wielded option. It is hard to use, especially without habit, and situational at the same time. However, you can’t ignore the power of killing infantry by touching their toe. 

Implants

Battle Hardened. This is the only “mandatory” implant. Medics are often fighting face to face, and they’re often right in the thick of things, including in positions being bombarded by screen-shaking explosives. 

You’re free to use anything else in your second slot. There are almost no wrong choices there. 

The Playstyle

Combat Medic is a very interesting class to play. It’s probably the only class that delves into every aspect of skilled gameplay to such a high extent. You have to master everything:

Weapon Mechanics and Gunplay in order to succeed in firefights, especially against superior enemies, such as Heavy Assaults. This includes Situational Awareness, so you can avoid getting ambushed by more mobile or stealthy enemies, such as Light Assaults and Infiltrators.

Teamwork and Battle Flow, so you can work with your allies and keep each other alive and accomplish the objective.

Combat Medics don’t have the best firepower nor mobility, so you have to compensate with wits and skill. However, you’re not entirely at a disadvantage. You get a reliable and braindeadly effective Assault Rifle, and a meat wall of allies to absorb enemy fire. 

The gist of the playstyle is the cycle of:

  1. Spawn at a location. 
  2. Find a group of allies to follow.
  3. Stay behind someone’s back or be ready to retreat if you take point.
  4. When you see enemies – engage if you can, retreat when you have to. Always keep C4 in mind, it’s an effective tool when you can sneak up on tanks or MAXes. Against Sunderers – it’s better to push up together with the team. 
  5. When your allies go down or need healing, revive or heal if it’s safe to do so. Don’t be a resbot, and take responsibility. Refresh on the Czern’s Med Tool Rules, if you have to.
  6. If you get entrenched for too long, don’t be afraid to lurk around for a flank, you can do a lot of damage on your own, and worst case – you die and have to walk from the Sunderer. 
  7. Keep fighting and pushing together until you accomplish whatever you came for, or get hopelessly wiped, or just decide to go elsewhere. In any case, return to point 1.

Have no bad feelings about abandoning a hopeless fight. It is not rare for an ally to place a Sunderer so poorly that you will just get repeatedly farmed without ever having a chance of success. This usually happens when the enemy spawn room is between your Sunderer and the objective.
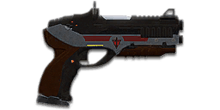
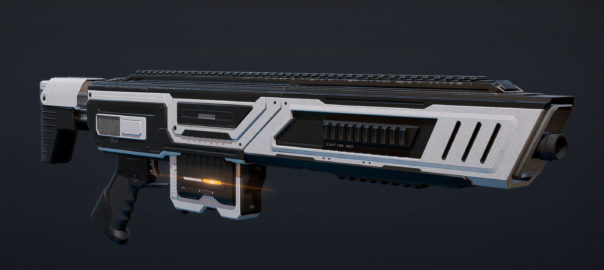
NSX Yumi

NSX Yumi: Highly Technical Weapon Guide

NSX Yumi is an assault rifle, available only to Combat Medic class. It fires in fast and accurate bursts of 5 rounds, but with a short delay before each burst.

Yumi is an excellent weapon for medium and long range combat, and it gives a huge advantage when firing first, more so than any other automatic weapon. But the burst delay makes the weapon a little bad in direct confrontation, especially if the enemy engages you first in close quarters. 

Playing with Yumi is like playing with any slow and accurate ranged Assault Rifle – you will have to stick to cover, be ready to disengage if you get shot and avoid rushing head-first.

Using the Yumi is the hard way to teach a player to look for good engagements; the strict requirement on accuracy and firing delay will force the user to always aim down sights and aim properly before opening fire. 

On the other hand, Yumi is a weapon that plays itself. Unlike other burst weapons, which are basically automatic weapons in disguise, Yumi doesn’t allow any Cone of Fire management, and barely requires recoil compensation. 

Yumi is predominantly a medium+ range support weapon. If you ever wanted a designated marksman rifle for a medic – this is it. 

Yumi was released in underpowered state, and was significantly buffed in Apr 27th, 2017 patch and Oct 19th, 2017 patch, and now that this weapon is actually viable, let’s take a deeper look. 

Stats

NSX Yumi

Mechanics

After you press the trigger, there is a 0.25 second firing delay. Then it takes a 0.24 seconds to fire off a 5 round burst, with 60 ms refire time between shots. For comparison, AF-4 Cyclone has 92 ms refire time. 

NSX Yumi timeline

As with a semi-auto weapon, you can queue the next burst right after you start charging the current burst. Click-release-click-hold until the next burst starts charging. This technique is explained in detail here

If you press the trigger without Aiming Down Sights, you will not be able to Aim Down Sights until the weapon finishes firing.

Similarly, if you press the trigger while ADSing, you will not be able to leave ADS, even if you jump. This is actually one of the biggest turn-offs of this weapon, because when you click to fire, you essentially commit your next 0.55 seconds to firing, and this can be a problem if you get attacked by another enemy during this time. 

Melee Combo

Yumi’s fixed burstfire mode gives it an interesting mechanical quirk. You can click to start charging the burst, and then perform a quick melee attack while the weapon is firing. This makes Yumi surprisingly scary in close quarters, because even if only 4 out of 5 shots hit, a knife strike will still reliably kill standard infantry through nanoweave. 

Learn more here.

Damage

NSX Yumi Damage
Click to enlarge

Rate of Fire during a burst: 1000 RPM
DPS during a burst: 2783 to 2083 depending on distance.

Overall Rate of Fire: ~545 RPM
Overall DPS:
1516 to 1135, depending on distance.

Yumi fires off the burst at the highest rate of fire among all primary weapons, and therefore has the highest non-shotgun DPS. Burst delay significantly reduces overall rate of fire, reducing overall DPS to be on the level of a 167 @ 550 RPM weapon. 

Description Effective Health Bullets to Kill
6 7 8 9 10
Default   1000 0 – 10 11 – 55  56+    
Nanoweave  1250     0 – 29 30 – 63  64+


With perfect accuracy and bodyshots, Yumi will require two bursts against a full health target. Heavy Assaults will require an extra burst at most. It is possible to one-burst a target if several shots hit the head.

Overall, assuming good, but not perfect accuracy, you should expect 2-3 burst kills against standard enemies, and 3-4 bursts against Heavy Assaults.

Finally, one burst + one quick knife swing will reliably kill standard infantry, though it’s not an easy combo to hit against an aware player. 

Recoil

  Stock With Attachment  
Vertical Recoil during Burst, per sec ~3.6 ~3.1 Compensator
First Shot Multiplier (Recoil) 0x 0x  
Average Horizontal Deviation 0.057 0.043 Forward Grip
Maximum Horizontal Deviation 0.12 0.09
Recoil Angle 5 3.75
Recoil Recovery True Delay 0.31
Burst Recoil Recovery Time 0.079 0.065 Both


Yumi is the only weapon to feature a zero First Shot Recoil Multiplier, meaning it has no vertical recoil for the first shot. The first shot is still subjected to Horizontal Recoil, though. 

Yumi has one of the lowest values for Vertical Recoil, though extremely high rate of fire still creates a noticeable vertical pull during the burst. You can’t start compensating recoil on reaction, because the burst will be over before you can react.

Yumi has very little Horizontal Recoil for its damage profile, and a negligible recoil angle to the right. 

Recoil Recovery finishes before you can start the next burst. 

Accuracy

ADS CoFs: 0.03 / 0.15 / 0.03 / 0.15 / 0.05

Yumi has very small Cones of Fire in all stances, and reduced Cone of Fire Bloom. Most 167 damage weapons have CoF Bloom of 0.06. 

It’s worth noting that Yumi doesn’t get any bonus accuracy for crouching.

Overall, it’s safe to say that Yumi features one of the longest effective ranges among Assault Rifles. And even ranged monsters like Reaper DMR cannot compete with Yumi’s moving accuracy and low Bloom.

Hip CoFs: 2 / 2.25 / 2.5 / 3 / 0.12

Yumi has standard hip fire accuracy for an assault rifle. It can be surprisingly effective in a pinch, but don’t expect any miracles, especially if you use Compensator. 

Attachments

Optics

Yumi has access to a variety of reflex scopes from 1x to 3.4x, and HS/NV scope. As always, the choice will depend only on your personal preference.

A low magnification scope makes it feel like the weapon has no recoil at all, and it allows a wider field of view, which can be crucial while you are busy tunnel visioning in one direction and firing off several bursts – Yumi has a long exposure time. 
On the other hand, a higher magnification scope gives a clearer sight of the target, allowing for more deliberate accuracy. It can also help identify targets at longer ranges before you even open fire. 
When in doubt – start with 2x Reflex, and see whether you need more or less magnification.

Barrel

Yumi has access to Flash Suppressor and Compensator. Both are viable, depending on playstyle and intended application.

  • Flash Suppressor will make you less noticeable, which is crucial in ranged combat. 
  • Compensator will increase ranged accuracy and make it easier to get headshots. 

Rail

Yumi has access to Extended Mags (+5 rounds), Forward Grip, Darklight Flashlight and Underbarrel Smoke and Grenade Launchers.

Yumi is a rare case of a ranged weapon where Forward Grip is not mandatory. Yumi already has very little horizontal recoil, and at ranges where you would benefit from the Forward Grip, Yumi already gets weaker due to Cone of Fire Bloom and damage degradation.

Yumi’s underbarrel attachments are similar to those of other weapons.

Underbarrel Grenade Launcher offers a great way to increase utility, versatility and firepower. It can damage vehicles, finish off players behind cover, and even OHK if you manage to get a direct hit. UBGL was never a bad attachment to have. It has just two problems: it is usually available on crappy weapons, or weapons that greatly benefit from other rail attachments.

Yumi doesn’t have any of those problems, so it is a prime candidate for using UBGL. 

Ammo

Yumi has access to SPA and HVA

SPA is better within 35m and gives maximum benefit of +1.8% damage at 15m.

HVA is better at 35m+ and gives maximum benefit of +6.4% damage at 90m. 

If you’re interested in a more in-depth analysis of ammo types, /u/DrSwov has a reddit post with TTK numbers against different targets.

Recommended Attachments

There are many viable attachment combinations with Yumi. If you know what you’re doing, you should be able to easily figure out the best build for yourself. 

If you need some help to get started, here is an example of a cookie-cutter build:

  • 2x Reflex
  • Flash Suppressor
  • High Velocity Ammo
  • Underbarrel Grenade Launcher
  • Battle Hardened Implant

The goal behind this loadout is to give you the most versatility and combat options, without being overly specialized in any particular area.

Gameplay Tips

NSX Yumi is way more versatile than it may seem on the first look. The burst mechanic spices things up a bit, but you quickly get used to it, and for most intents and purposes, you simply get a gun that shoots half the time, and charges up the other half. 

Use the burst delay to your advantage, and take aim properly while the gun is charging up. 

Yumi has surprisingly decent performance from the hip, but you should still invest in a powerful sidearm for close encounters, and get comfortable with it. If you get engaged while healing or reviving, the sidearm will be your go-to weapon, not the Yumi.

Being unable to fire single shots is definitely limiting, because you can’t tap-fire snipe engies behind turrets or deployables. 

Yumi is excellent at range out of the box, without any performance-enhancing attachments, so it can be used with any attachment combination and still be viable.

The burst mechanic certainly gives advantage to firing first, but it’s not like you automatically lose if you get engaged on. Dodging enemy fire and hip firing, or ADSing and going for headshots are both viable ways of fighting back, depending on situation. 

Don’t spend too much time firing at targets at super long range, you’re unlikely to kill them before they make it to cover, and every moment you spend outside cover increases the chances of getting sniped. 

In extreme close quarters, consider switching to a sidearm, if you’re good with it. You can also “pre charge” a burst as you round the corner, though it requires good timing, and you have to already know where the enemy is. 

Conclusion

Yumi is an interesting and worthy addition, both to NSX lineup and Assault Rifles in general. Not everyone will like it, but everyone can use it. Unlike most other NSX weapons, Yumi doesn’t have a steep skill requirement.

  • Give Yumi to a PS2 newbie with some FPS experience, and he will be able to participate in ranged combat, even though he knows nothing about CoF and recoil management.
  • Give Yumi to a hardened veteran with excellent accuracy, and most enemies will die before they realize they’re getting damaged. 

Yumi is a welcome respite from super-niche weapons, though the delayed burst mechanic   seems a little out of place on Medic, and would make more sense on Light Assault or Infiltrator, in my opinion.

If you’re thinking about purchasing the Yumi, it is strongly recommended you trial it, and use it in actual combat for the whole 30 minutes. 

Answering critique

The whole premise of Yumi being a “garbage” weapon is based on a 0.25 second burst delay, which is not a big deal, unless you get shot as soon as the engagement starts. This just means Yumi user has to be a little more thoughtful about engagements he’s taking, nothing more.

Ignoring the burst delay, Yumi is basically an incredibly accurate 167 @ 550 AR with nearly no recoil and automatic CoF reset. I wouldn’t say that’s bad.

Adding Yumi into Weapon Simulator

If you want to add NSX Yumi into my Weapon Simulator, add this string to the end of the Stats.csv file, which you can open with Windows Notepad:

804246,NSX Yumi,NS,Assault Rifle,167,10,125,90,1,60,1,0.48s / 0.56s / 0.56s,580,-,30,210,3550,2755,0.5,0.12,0.05,2,1.5,2.5,5,2,0.03,0.03,0.15,0.15,5,5,0.29,0.12,0.12,0.4,0,16,Auto,0
804246,NSX Yumi SPA,NS,Assault Rifle,167,15,125,90,1,60,1,0.48s / 0.56s / 0.56s,551,-,30,210,3550,2755,0.5,0.12,0.05,2,1.5,2.5,5,2,0.03,0.03,0.15,0.15,5,5,0.29,0.12,0.12,0.4,0,16,Auto,0
804246,NSX Yumi HVA,NS,Assault Rifle,167,8,125,110,1,60,1,0.48s / 0.56s / 0.56s,609,-,30,210,3550,2755,0.5,0.12,0.05,2,1.5,2.5,5,2,0.03,0.03,0.15,0.15,5,5,0.29,0.12,0.12,0.4,0,16,Auto,0

Keep in mind that it won’t properly simulate Yumi’s burst mechanics.