Recently I was contacted by a UK resident, asking for some help building a gaming PC. They did not set a specific budget, but instead provided me with a sample build and asked for my input. That build had good intentions, but lacked any direction, to put it mildly.
So instead I suggested a build with a similar price, but with more focus on gaming performance and overclocking. Meet the Balanced Gaming Build.
CPU: Core i3-8350K
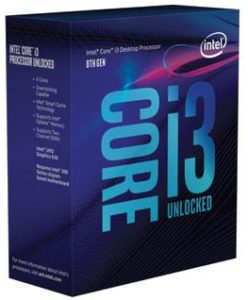
This is a recently released mid-tier Intel CPU. Intel CPUs are known for their excellent per-core performance, and this CPU can be overclocked.
Overclocking makes the CPU work at a higher frequency (making it more powerful), at the cost of drawing more power and producing more heat. Maintaining a stable and effective overclock requires that other components, such as Motherboard, Cooling and RAM, be of higher quality as well. So pretty much the whole build is centered around overclocking.
When pushed far enough, overclocking will also reduce CPU’s lifespan, but PC components usually go morally obsolete long before reaching the end of their lifespan.
This i3 is the cheapest “decent” CPU you can get. It is still fairly expensive, but it offers excellent performance / cost ratio, and overall makes for an economical choice right now.
For example, a 6-core i5 8600k costs £90 more, but with equal clock frequency it has only slightly better performance in games.
Another example: 6-core i5 8400. It has maximum Turbo Boost frequency of 4.0 GHz, same as stock 8350k. They also cost about the same, with i5 8400 being marginally more expensive.
However, i5 8400 cannot be overclocked, and in most games will lose to overclocked 8350k.
Six cores might be more relevant in the future, where we could potentially see more multi-threaded games, but it doesn’t make sense to pay extra now just so you could maybe have better performance in a few years. At that point, it would be It would be better just to upgrade to another CPU.
Currently, all motherboards that can work with Coffee Lake CPUs have Z370 chipsets. They allow to overclock “k” CPUs by multiplier. Motherboards with cheaper B- and H-series chipsets are not available yet.
When they do become available, i5 8400 might become a more competitive choice, because going for a non-overclocking build would significantly reduce overall cost.
But right now, you’re paying a premium for a motherboard that can overclock regardless of whether you actually intend to overclock or not. In these circumstances, it doesn’t make sense to go for i5 8400.
CPU Cooler: ARCTIC Freezer 7 Pro Rev.2
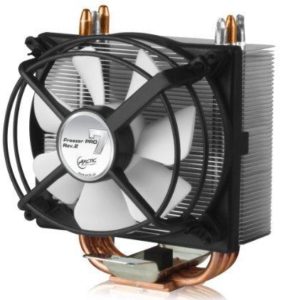
This inexpensive cooler is powerful enough to easily handle overclocked i3 8350k. It comes with a high quality MX2 thermal compound, and the fan uses a Fluid Dynamic bearing, which makes it very durable. Comes with 6 year warranty.
Motherboard: MSI Z370 SLI PLUS ATX
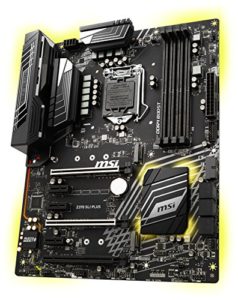
This motherboard is a bit unorthodox choice for this build, because clearly we’re not going for SLI. Moreover, SLI is not something I’d recommend to anyone outside of some very specific circumstances.
However, even if we are overpaying for unnecessary SLI capability, this motherboard still makes a great pick. It is fairly inexpensive, and its 10 phase power delivery system will ensure stable and powerful CPU overclock. Heatsinks on the VRM system further improve overclock quality and system longevity.
MSI motherboards come with loads of useful performance-enhancing features, and they can automatically overclock the CPU in one click, so it will be super easy even for those who’ve never overclocked before.
Memory: Patriot Viper Elite 8GB (2 x 4GB) DDR4-3000
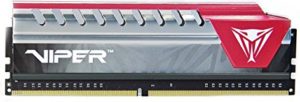
This is a high quality, high speed memory that will ensure the 4-core CPU will not become (as much) of a bottleneck in highly-threaded applications.
8 GB might not be as comfortable as 16 GB would, but it should be enough for the next few years. We are more or less trying to stay in a budget, after all.
SSD: Samsung 850 EVO 250GB M.2-2280

This is the cheapest decent SSD available at the time and place, costing as much as MyDigitalSSD BPX 128 GB.
850 EVO’s 250 GB is enough to house operating system and other programs, and a couple of games, but the rest of the storage will have to be handled by a hard drive.
Storing the Operating System and programs on an SSD significantly improves performance and load times, that’s why having at least some form of SSD is highly recommended.
However, if you don’t care about load times at all, you can in fact save a lot of money by not getting any SSD at all, though this approach becomes less and less popular.
HDD: Toshiba 1TB 3.5″
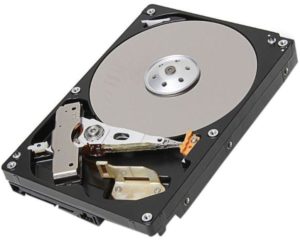
Toshiba makes the most reliable HDDs at the moment, with excellent quality to cost ratio. A perfect choice for any mainstream build.
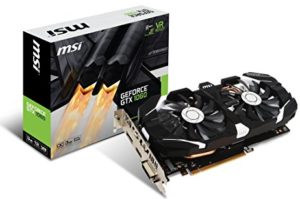
Video Card: MSI GeForce GTX 1060 3GB GT OC
AMD and nVidia often bump heads at this price point, depending on GPU performance and the amount of available VRAM.
VRAM is a weird beast. You either have enough or you don’t. If you have enough, adding more RAM won’t do anything for you. If you don’t have enough, gaming performance will plummet.
However, it is always possible to reduce certain settings to reduce VRAM consumption. Resolution, anti-aliasing and texture quality are the biggest VRAM eaters.
First up is GTX 1060 3GB variants. The GTX 1060 itself offers excellent performance, and 3 GB of VRAM is enough to play vast majority of current titles at good settings at 1080p resolution.
Right around the same price point, there is RX 570 4 GB. It performs slightly worse than GTX 1060, but some extra VRAM may come in handy later down the road.
Then there is RX 580 4 GB. It is as powerful as GTX 1060, but ~10% more expensive than GTX 1060 3 GB.
Finally, there is ~28% more expensive GTX 1060 6 GB version, which also has about 5% better performance than a slightly cut down chip of the GTX 1060 3 GB.
If you don’t plan on using resolution higher than 1920 x 1080, and you’re fine with occasionally turning down a few specific settings, GTX 1060 3 GB makes for a really economical choice.
It’s not as future proof as it could be, but even if you are faced with VRAM issues in a few years, it would make more sense to sell your GTX 1060 3 GB then, and get another Graphics Card, which should both offer better performance and come with more VRAM.
Otherwise, RX 570 and RX 580 seem like good “in between” solutions. GTX 1060 6 GB seems hard to justify.
MSI GTX 1060 3GB GT OC in particular offers good clocks and cooling for its price, though I wish it had a dedicated heatsink for the VRM system.
Case: BitFenix Nova ATX Mid Tower
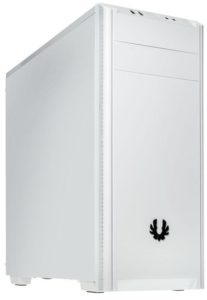
This a really cheap case. There is nothing particularly wrong with it; it does what a case is supposed to do, but it’s not necessarily the most convenient in terms of assembling and maintenance.
If you don’t mind spending some extra time fiddling with cables and crawling around with a screwdriver, then this case is perfectly fine. Otherwise, I suggest something more expensive, like Zalman Z3.
In addition to more convenient assembly and cable management, more expensive cases are more likely to have higher quality ports on the front panel, and they often come with nice extras, such as fans, dust filters and removable carriages for HDDs and SSDs.
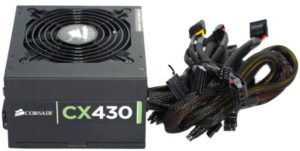
Power Supply: Corsair Builder 430W
Corsair makes excellent, reliable and durable power supplies, though this is one of their cheapest products.
430 Watt may seem unusually small, but GTX 1060 is not particularly power-hungry, so it should be more than enough to power overclocked CPU and GPU, and have plenty of juice left for other components.
Comments and Considerations
This is definitely a fine gaming build, but I am not as happy with it as I was with the previous $2200 “Make your dreams come true” build.
Things that I would consider changing:
Getting a better case or at least an extra case fan. The BitFenix Nova comes with only one case fan at rear exhaust. I would like to add one intake fan to the front panel to supply some fresh air to the Graphics Card.
Getting an extra cooler for Motherboard’s VRM system to ensure stability and longevity of the overclock. It is highly likely an unnecessary overkill, as 10 phases and heatsinks should already provide more than enough durability, but better safe than sorry. What’s a $10 fan and a couple of paper clips compared to peace of mind?
Normally I would just pick a CPU Cooler that directs some airflow towards the Motherboard, as I did with the previous $2200 Build, but in this time and place there were no coolers available that would be able to handle an overclocked 95 Watt TDP CPU and still fetch a modest price.
Getting a higher grade Power Supply. While there is no reason to doubt Corsair in this regard, I would feel a bit more comfortable with a 500 or even 550 Watt PSU. It would also somewhat “future proof” the Power Supply itself, making it more relevant in future builds, which could be potentially more power-hungry.
Power Supplies are also usually more efficient at load that is significantly below maximum.
Getting a GPU with more VRAM. Enough said about it in the GPU section.
This build is not as efficient as it could be. While overclocked i3 8350k offers excellent performance, it has no Turbo Boost, so it runs at higher frequency ALL the time, drawing more power and deteriorating faster than it should.
There is a way around this problem: MSI motherboard software allows the user to create some keybinds to change the CPU Multiplier. So while doing some light office work, you can switch the CPU into lower frequency mode, and crank it up while gaming.
This build is not as “future proof” as it could be either. Bare minimum of RAM and VRAM, 4-thread CPU, bare minimum power supply, no VRM heatsinks on the GPU. There’s no airflow through Motherboard’s VRM either, though it’s the smallest problem, and even then it could be easily corrected.
However, not every build has to be “future proof”. In fact, “future proof” builds are hard to justify economically. Overclocked i3 8350k is enough to tear through vast majority of current and upcoming titles. So is GTX 1060 3GB – with a few concessions.
It will be ultimately cheaper and better to upgrade specific components when it becomes necessary, swapping them out with the next generation of mainstream components with good value.
This closes this build. If you’d like for me to make a PC Build for you, check out my PC Building Services.
