Rocket Launchers in PlanetSide 2 can be used by Heavy Assault class, and count as their tool. They deal moderate damage to all targets. There is a large variety of launchers; some of them deal increased damage, others can lock on to ground vehicles or aircraft, or use laser guided or even TV-guided systems.
Most vehicles require quite a few rocket launcher hits to take down.
Launchers deal mediocre damage to vehicles in most situations. Pairing them with another player or damage type works best. Finding these opportunities or working in teams will greatly enhance your effectiveness with whatever launcher you use.
Normally, a single Heavy Assault with a Rocket Launcher is only a nuisance. In order for him to represent any real threat, the vehicle must be already damaged, distracted or otherwise vulnerable, and the Heavy Assault himself requires cover and freedom of movement.
Rocket Launcher Mechanics
Rocket Launchers follow the same Weapon Mechanics as other weapons.
Most Rocket Launchers deal Direct and Indirect Damage. You can think of it as “piercing effect” and “explosive effect”.
Direct Damage
The Direct Damage of all launchers uses the same Damage Resist Type 34 – Infantry Rockets. Therefore, all rocket launchers can be directly compared to each other.
Infantry, MAXes and ground vehicles have no built-in resistances against that Damage Type. Therefore, they will take that damage directly to their Health.
Rockets do not deal increased damage on headshots.
Aircraft, especially ESFs, take bonus damage from this Damage Type.
You can calculate weapon damage to vehicles using the Toolbox.
Indirect Damage
Rocket Launchers that have Indirect Damage, can be split into two groups:
Standard
Rocket Launchers that are primarily intended to be used against ground targets have Indirect Damage Resist Type 6 – Common Explosion. Any rocket hit will produce splash damage in a small area.
Infantry takes full damage from that damage type.
MAXes take 50% less.
All vehicles except Flash are immune to it.
Flash takes 25% reduced damage.
It’s worth noting that compared to mines and frag grenades, rockets deal very little splash damage, and it can be further reduced by first rank of Flak Armor and Ordnance Armor.
Flak Detonation
Lock-on Launchers with dedicated anti-air capability use Indirect Damage Resist Type 12 – Flak Explosion. In-game description will mention this fact.
Rockets from these launchers automatically detonate near enemy aircraft, damaging them with Indirect Damage. Aircraft take bonus damage from Flak. You can use the Toolbox to find out exact resistances.
Flak-type rockets will not produce splash damage in any other circumstances, so it’s highly unlikely for anything but the aircraft to be in range of Flak damage.
Still, ground vehicles and MAXes have immunity to Flak damage.
Infantry has no resistances to it and would take full damage if it managed to be in range of Flak explosion.
For all rocket launchers that deal splash damage, Indirect Damage scales with distance to the explosion – the closer you are to the explosion, the more damage you take. You can judge this by Indirect Damage values listed in game. This is easy and intuitive.
However, M9 SKEP Launcher, AF-22 Crow and Hades VSH4 have an additional, hidden scaling with Rocket Flight Distance – the longer the rocket was flying, the higher its Indirect Damage.
They deal:
50% Indirect Damage within 10m
50% to 100% within 10m to 30m, scaling with distance
100% at 30m+
In other words, they deal less Indirect Damage up close, and more Indirect Damage at range. If you want to splash damage a group of infantry, you want to be 30m+ away from them.
Indirect Damage is applied on direct hits to MAXes and Infantry, so if you want to deal more damage to a MAX or a shielded Heavy Assault, you also want to be further away.
Dumbfire Mechanics
Dumbfired rockets start flying at relatively low Starting Velocity, and then rapidly Accelerate to Maximum Velocity, listed in-game as “Muzzle Velocity”.
Starting Velocity and Acceleration are hidden in-game, and can only be accessed via Census API, and without these values you cannot fully evaluate rocket’s speed.
Rockets dumbfired from Lock-on Launchers do not accelerate, they always fly at their Starting Velocity.
While flying, rockets are affected by Gravity.
The slower the rocket is flying, the more time Gravity has to affect its trajectory, so faster rockets with more Gravity can sometimes have less projectile drop than slower rockets with less Gravity.
If a rocket doesn’t hit anything during its Lifespan, it will self-detonate.
Rocket’s trajectory will be more flat if you’re shooting downwards.
Formulas for Dumbfires
Validity of these formulas has been confirmed by in-game testing. To calculate rocket’s velocity at any given time (remember to respect maximum velocity and lifespan):
Velocity = Starting Velocity + Acceleration * Time
It is harder to calculate the amount of time, necessary to cover a certain distance. First, we have to calculate how long will a rocket take to accelerate to maximum velocity:
This is a quadratic equation. I recommend using this online tool for quickly solving quadratic equations. Choose the positive root.
If the distance we want to calculate for is longer than DistanceAcc, then we will have to solve this in two steps.
We already know DistanceAcc the rocket will cover while accelerating, and TimeMV it would take to do so. Knowing the DistanceAll, we can calculate the DistanceX:
DistanceX = DistanceAll - DistanceAcc
When the rocket fully accelerates, it starts moving at constant velocity, so finding out TimeX is easy:
TimeX = DistanceX / Max Velocity
Then it’s just a matter of adding two times:
TimeAll = TimeX + TimeMV
Example
Let’s calculate maximum flight distance of a rocket from a starting rocket launcher.
Starting Velocity: 35 m/s
Maximum Velocity: 85 m/s
Acceleration: 40 m/s2
Lifespan: 8 sec
Now we know that the rocket will cover 75m while accelerating, and it would take 1.25 seconds to fly. The rest of the Lifespan the rocket will fly at a constant velocity, equal to maximum velocity for this launcher.
TimeX = Lifespan - 1.25 = 6.75 sec
Now we just have to find out what distance the rocket will cover during that time.
DistanceX = TimeX * Maximum Velocity
DistanceX = 6.75 * 85 = 573.75m
DistanceAll = 573.75 + 75 = 648.75
The answer: a rocket from a starting rocket launcher can cover ~650m during 8 seconds of its lifespan.
Unfortunately, we still don’t know how exactly projectile drop is calculated. I’ve done some extensive testing, but haven’t found anything conclusive.
Lock-on Mechanics
Some of the launchers can lock-on to ground vehicles and/or aircraft.
Some of these launchers cannot fire without an established lock (cannot dumbfire).
Both these facts will be mentioned in the launcher’s description.
Rockets dumbfired from lock-on launchers will not accelerate, though they usually have slightly higher Starting Velocity.
To gain a lock, user must hold the enemy vehicle inside Lock-on Angle of the sights for several seconds. Lock-on Time is the same at all ranges and against all targets.
On launchers without dumbfire capabilities, you can hold “fire” key to fire as soon as the lock is established.
There are two statistics related to lock-on distance:
Lock Range – determines the maximum range at which a target can be locked.
Lock Hold Range – some launchers can keep tracking the target with a lock even after it has left the Lock Range.
In other words, launchers that have Lock Hold Range longer than Lock Range can hold a lock at ranges where they can’t establish a lock.
Launchers that can lock on to both air and ground targets will have different lock-on ranges against them.
When target goes outside Lock-on Angle or Lock Hold Range, a launcher can keep the lock for a short amount of time, equal to Lock-on Loss Delay.
However, during that time the lock is still fully functional, and you can take advantage of this by angling your rockets to make sure they don’t hit anything on the way to the target. There is a more extreme example here.
Vehicle Stealth defense slot can increase the lock-on time by 0.25 to 2 seconds, depending on vehicle and Vehicle Stealth rank. You can find specific numbers in in-game descriptions of Vehicle Stealth.
Fire-and-forget: after the rocket has been fired with a lock, it will automatically track the vehicle without the need to maintain the lock.
The rocket will only pursue the target for Lock-on Lifespan amount of time, so theoretically the rockets can be outrun, but it is usually impossible outside of edge cases, like an ESF at maximum lock range, afterburning away.
The “agility” of a locked on rocket is determined by Lock-on Turn Angle. If the vehicle performs evasive maneuvers, the rocket may not be able to adjust trajectory in time, and can miss the vehicle.
If then the angle between rocket’s flight direction and direction to the target becomes greater than Lock-on Lose Angle, the rocket will lose the lock. This means that the mechanic of dodging lock-ons is built into the rockets themselves.
It is currently unclear if locked on rockets are affected by Gravity.
Proximity Seeking
Proximity Seeking rockets are dumbfired as usual, but if they fly near enemy aircraft, they will automatically snap lock-on to them.
Currently the only rocket launcher employing this mechanic is T2 Striker, though similar mechanic is applied to Coyotes and Hyena Rocket Pods.
Lock-on Related Stats in Census API
The Census API contains a lot of information, related to the lock-on behavior. Unfortunately, most of that information is wrong and meaningless. Values that are actually being used by the game are recorded in the part of the API without public access.
For example, according to Census API, NS Annhilator has:
And here are actual rocket travel times for different distances, acquired by in-game testing, by frame-by-frame watching of 60 FPS Shadowplay recording:
As you can see from the testing, Annihilator rocket covers 350m over 3 seconds, which means average velocity of ~116 m/s, which clearly exceeds supposed “Maximum Velocity” of 100 m/s. It also seems to travel at a constant velocity, despite the fact there is an “acceleration” statistic.
There is naturally some inaccuracy due to measuring method, but not on the scale of 0.5 seconds. I have ran into similar walls with G2G and G2A lock on launchers.
As a conclusion: listed Muzzle Velocity can not be used to judge locked on rocket speed. Same goes for such stats as lock-on range, lock-on time and lock-on loss time.
Rocket Launchers did used to have their lock-on time vary with distance to the target, but it was changed in one of the patches, and now lock-on time is the same at any distance, though it will vary from launcher to launcher.
Some values, like Lock-on Turn Angle and Lock-on Loss Angle cannot be effectively tested. In Rocket Launcher stat sheets below, you will see a red question mark in brackets (?) to highlight stats that are listed in the API, but could easily be wrong.
Lock-on Lifespan is probably correct.
Vehicle Interaction
Vehicle pilots receive a warning when you try to lock-on to their vehicle, and they can see whether the source of that lock is someone on the ground or an air vehicle.
When a rocket is tracking the vehicle, they get continuous warning and they can see flying rockets on the minimap as pulsing red dots.
Establishing and holding a lock will not give away your position.
Decoy Flares and IR Smoke
Air vehicles can use Decoy Flares utility to remove the lock and prevent locking for several seconds. Any lock-on rockets already in flight will automatically miss – veer off skywards and self-destruct.
Ground vehicles can use Smoke Screen to the same effect, though it is much less popular.
Mythbusting
There is a myth that jumping or falling greatly increases hip fire accuracy of dumbfired rockets. Busted.
Misc. Rocket Launcher Mechanics
Sprint Override: after firing a rocket, the player cannot sprint for a certain period of time. Depending on the launcher, this delay ranges from 0.3 to 0.5 seconds.
Terminal Resupply to Instantly Reload: you can double-tap the “use” key (default [E]) on an infantry terminal to instantly reload all your weapons and restock on ammo. This can be a great way of boosting your combat rate of fire while using a launcher.
However, resupplying at a terminal mid-reload will result in your character doing a non-skippable reload animation after the resupply, so before resupplying make sure to switch to something that doesn’t need reloading.
Fire Detect Range of 100m: when fired, all launchers put their user on the minimap of enemies within 100m.
Iron Sight Time: all launchers take 0.35 seconds to ADS, and 0.15 seconds to return from ADS to hip firing.
ADS Movement Speed Multiplier: most rocket launchers have 0.5x multiplier, the only exception is NSX Masamune, which has 0.33x.
Reloading continues in a vehicle: if you enter a vehicle after the reload has started, the reload will continue and complete successfully while you are inside. This works the same for all weapons, but only after they spend all ammo in the mag.
Munitions Pouch Suit Slot allows to carry extra spare ammunition. One extra rocket / magazine / battery per rank, up to 4 ranks.
Dumbfire Launchers
These launchers do not have any sort of laser guidance or heat seeking, but they deal the most damage per rocket.
The ability to instantly fire a highly damaging rocket make them great against MAXes, hovering aircraft and other vehicles at close range.
According to my tests and confirmed by /u/Renuse’s experiences, a rocket dumbfired from the hip while standing moving is guaranteed to hit an infantry-sized target within ~6.5m, as long as you aim exactly at its center mass.
Dumbfire launchers can be used as one-shot “sniper rifle” against camping Infiltrators and Light Assaults, as it’s a guaranteed OHK if the rocket touches the player.
All dumbfire launchers share the same Damage Resist Type, so they can be compared directly.
Starting Launchers
Despite looking different, these launchers function exactly the same between factions.
Starting rocket launchers are your basic RPGs, they have good velocity and damage, but hitting mobile or distant targets can be challenging. Iron sights can be especially inconvenient when trying to compensate for projectile drop.
Quick reload lets you keep dealing a solid amount of damage to ground vehicles, especially at close range, but starting launchers aren’t very effective against aircraft. Even if you manage to hit them, you will still need multiple hits to destroy them.
One rocket is almost enough to get an ESF burning. If you do manage to get a hit, you can quickly finish off the ESF with about 20-30 bullets from your primary weapon.
Valkyries require at least 3 rockets hits, and other aircraft even more. At that point, using a lock-on launcher for easy guaranteed hits is likely a better bet.
One rocket deals 32% to 42.5% of MAX‘s health, depending on whether he has Ordnance Armor, and of what rank.
NS Decimator is a heavy RPG. It deals more damage than starting launchers, but reloads longer, carries fewer rockets, and the rocket itself has lower velocity, which makes it more susceptible to Gravity and harder to use against vehicles at range and aircraft.
Compared to starting launchers, Decimator deals ~34% higher damage per shot, and usually requires 1 rocket fewer to kill a vehicle.
Both dumbfire launchers can deal roughly the same damage with the amount of carried ammunition, but starting launchers still deal ~23% more damage per reload time (damage per minute) than Decimator.
However, requiring to fire fewer rockets makes Decimator safer, and higher damage per shot is more desirable against infantry and MAXes at close range:
Decimator deals 57.5% to 43.4% MAX’s health in 1 rocket, depending on Ordnance Armor.
One direct rocket hit will kill full health infantry without Flak Armor 3+.
One rocket will reliably one-shots ESFs without Composite Armor. Such overwhelming power earned the Decimator lots of love and adoration from the community.
Decimator is noticeably harder to use at any meaningful range, so often it is better to stick to starting launchers. After all, it’s better to hit with a weaker missile than miss with a stronger one.
The Kraken
The Kraken is a cosmetic variant of the Decimator, granted for completing the auraxium level of rocket launcher Directives. Kraken has an auraxium shader, and its rocket explosions have noticeable visual and sound effects.
The Directive requires you to earn an auraxium medal (1160+ kills) with five different rocket launchers. Since most rocket launchers are no longer effective against infantry, this directive is very hard to complete for the moment.
Lock-on Launchers
Empire-specific Ground-to-Air
Despite looking different, these launchers function exactly the same between factions.
These launchers can lock-on to enemy aircraft, but they can still be dumbfired against ground targets, which makes them incredibly versatile. A Heavy Assault armed with one of these will have an option against every target type in the game.
Comparing G2A launchers to default dumbfire launchers:
The good: there’s virtually no performance loss against ground vehicles at close range.
They are also more convenient to use:
Scope doesn’t get in the way like Iron Sights, and it’s great for dumbfiring.
The rocket is slower, but it flies at a constant velocity, so it is more consistent and predictable within ~75m.
It is less affected by Gravity, and doesn’t require as much compensation for drop within 200m. It will have ~50% longer travel time, though.
The bad: default launchers deal more damage to MAXes and Infantry, since rockets from G2A launcher do not produce splash damage when fired at ground targets.
The ugly:
Low velocity and shorter lifespan limit G2A dumbfire range at 250m.
G2A Launchers have much worse hip fire accuracy.
Empire-specific Ground-to-Ground
Despite looking different, these launchers function exactly the same between factions.
These launchers can lock-on to enemy ground vehicles, and they can still be dumbfired against infantry and MAXes, or vehicles at close range.
Interestingly, G2G launchers deal a tiny bit more damage per shot than default dumbfire launchers. That would be enough to let them reliably oneshot infantry without Flak Armor…. if not for hidden indirect damage scaling. Up close, G2G launcher rockets will deal less splash damage. So the rocket will oneshot only at 30m+.
G2G launchers have great accuracy and consistency within their relatively short lock-on range of 200m, as long as the vehicle is in relatively open field and the target cannot just hide into cover to throw off the lock.
Lock-on Range Air: 350m
Lock Hold Range Air: 400m Lock-on Range Ground: 300m
Lock Hold Ground: 300m
Lock-on Time: 1.2 sec
Lock-on Angle: 8 degrees
Lock-on Loss Delay: 0.75 seconds
NS Annihilator cannot dumbfire, but it can lock to both ground and air vehicles. Against ground targets, it has a longer lock-on range than dedicated G2G launcher.
Annihilator deals less damage per shot, but it has faster reload and ~half a second shorter lock-on time, and it also carries more rockets. Overall, Annihilator can deal slightly more damage before having to resupply.
The inability to dumbfire makes Annihilator ineffective against ground vehicles at close range, and useless against infantry and MAXes.
It’s not necessarily such a terrible thing, as it simplifies the decision-making. Removing the option to dumbfire against MAXes and infantry forces the player to rely on firearms, but it also removes the possibility to be flanked and killed while handling the launcher, or missing a crucial rocket. It also makes it nearly impossible to accidentally hit an allied unit. For these reasons, Annihilator is the best launcher you could give to a complete FPS newbie. Which is probably the reasoning behind it being included in the Elite Recruit Bundle.
Rate of Fire: 60 (1 shot per second) Ammo: 3 + 27 Reload Time: 4 sec
Lock-on Range Air: 350m
Lock Hold Range Air: 400m Lock-on Range Ground: 300m
Lock Hold Ground: 300m
Lock-on Time: 1.2 sec
Lock-on Angle: 8 degrees
Lock-on Loss Delay: 0.75 seconds
Lockon Lose Angle: 180 (?)
Gravity: 0.5
According to patch notes, Swarm’s rockets will follow the target for up to 800m, though it’s currently unclear whether that affects only aircraft, or ground targets as well, and if both firemodes are affected.
NS-R3 Swarm is a sidegrade to Annihilator. It too cannot dumbfire, and can lock-on to both ground and air vehicles, with same lock-on ranges and lock-on time.
Swarm is magazine-fed, with 3 rockets per magazine, each rocket dealing slightly more than half of Annihilator’s rocket. Swarm can fire only 1 rocket per second, and requires you to maintain the lock for 2 seconds while firing 3 rockets, while the Annihilator is strictly fire-and-forget.
All in all, Swarm has about ~17% lower damage per minute than Annihilator, but in return it can output the most amount of damage per reload.
Swarm has two firemodes:
In default firemode, it fires fast, but not very agile rockets. They are great at quickly reaching a large or slow-moving vehicle, but can miss a more maneuverable target.
In secondary firemode, Swarm fires slow, but agile rockets. They are nearly impossible to dodge, but they can take a long time to reach the target, and can potentially run into terrain or be outrun.
Empire Specific Rocket Launchers
These rocket launchers embrace the traits of different factions: volume of fire for TR, precise and powerful punch for NC, adaptability and versatility for VS. These launchers are rather unique, and historically have been a hot topic for community, with constant calls for nerfs or buffs, and with whole squads being organized to play around their strengths. Things have been calm and stable lately, though.
All of these launchers are weak on their own, especially outside their element, but – just like everything else – become noticeably stronger when used in greater numbers in coordianated squads.
T2 Striker is a magazine-fed rocket launcher, with a focus on sustained fire and close range anti-air. Striker dumbfires small, fast rockets both when hip firing and when looking through the scope. If a rocket passes within ~15m of an enemy aircraft, it will automatically snap lock-on to it.
Striker can be a great deterrence to aircraft when terrain and proximity interferes with traditional lock-ons, but it’s fairly average against armored ground vehicles.
Striker’s velocity does not seem to follow the parameters in the Census API. Here are some results from in-game testing:
Click to enlargeClick to enlarge
Due to high velocity – more than twice as fast as default dumbfires – individual hits are easy to score, so the Striker can sustain fire on distant targets without any trouble.
Striker is a versatile launcher that can engage both air and ground targets, but noticeably lacks in alpha damage, and exposes the user while firing.
When dealing with distant targets, starting Cone of Fire becomes a real issue, and has to be managed by staying still. Striker also has a little bit of CoF Bloom, but it’s no big deal and can be ignored, for the most part
Striker has maximum range of about 445 meters.
Tip: Striker is fully automatic, you don’t have to click for each shot, you can just hold “fire”.
Striker is ineffective against MAXes, requiring 14+ rockets to kill one.
Phoenix fires slow TV-guided missiles, almost as damaging as Decimator’s.
While the rocket is in flight, the player uses his first person camera to steer to rocket.
During that time, the player character is forced to stand and becomes immobile; vulnerable to enemy fire.
The rocket is slow, emits distinctive blue flames and a screeching sound effect, and can be shot down.
The reloading process only starts after the user exits the steering mode.
The rocket can fly maximum 295m away from the user. Flying further will force a detonation. While steering the rocket, players can monitor the distance to their body in the upper right corner.
Phoenix cannot fire from the hip.
Phoenix users have accumulated a lot of tactical and mechanical quirks to help them:
In prolonged hunkered-down fights, dug-in NC will pull out the Phoenixes. You don’t need to coordinate with them. Pull yours out, and wait for them to fire theirs. Fire yours right away. You should be able to follow where the first NC rocket is going, and most Phoenix users know to do this trick of following the first rocket. It leads to coordinated spikes of damage without actually coordinating.
The Phoenix packs a serious punch and has the incredibly useful trait of not needing line of sight to engage. The best time I’ve found to use this weapon is in support of a friendly armor push: position yourself closely behind, out of enemy line of sight, and fire your Phoenix over cover towards the fight. Focus on an enemy that is being engaged by your allies. This technique is just brutal when you combine it with friendly Vanguards. They cause enemy tanks to seek cover, and you follow the burning tank into cover with your Phoenix and blow it up. You’ll want a vehicle of some sort so you can keep up with the friendly push, and keep the enemy in your range of 295 meters.
Solo Phoenix is amazing against inexperienced and distracted tanks from a flanking position, and can quickly kill even an MBT. Engaging veteran tanks that are not distracted will result in them killing, evading or outrepairing you, so its best to avoid.
Against aircraft, Phoenix can sometimes get good surprise alpha damage. ESFs take especially high damage, almost enough to be one-shot. But you won’t be able to reliably hit evading aircraft. Hovering Galaxies and Liberators are fairly easy to hit, if they are in range, however.
Pressing the “Change Camera” key (default “T”) after the shot switches the first person rocket view to third person, allowing for a much wider Field of View, which really helps with finding and tracking targets.
Alternatively, you can press the “Hide HUD” key (default Ctrl + F10) after the shot to remove the scope overlay.
Unfortunately, in both cases you lose the distance tracking.
You cannot fire the Phoenix while crouching, even when using crouch toggle. Firing the rocket will force you into standing once you enter the camera mode.
It’s something to keep in mind if want to avoid exposing yourself as sniper bait.
You can prematurely end the steering process by pressing the “Exit vehicle” key (default “E”). The rocket will continue flying, but with a heavy drop downwards. It will still deal damage if it hits something. You can use this technique to shave off a few milliseconds between shots by “exiting” the rocket when it is about to hit something. You can also use this to pseudo dumbfire the Phoenix at close range targets.
If you have a fancy gaming mouse, it can be convenient to have a thumb button that would increase mouse’s sensitivity while steering the rocket, so you can easier make sharper turns.
You can use the keyboard to steer the rocket. The rocket will respond to Aircraft Controls for Pitching Up and Down, and Rolling Left and Right. Arrow keys by default. You can also change rocket’s speed to make sharper turns.
Phoenix one-shots Engineers’ MANA Turrets, and kills the Engineer in the process, unless they bail before impact. This is the main reason I use the Phoenix, because a well placed MANA Turret can pin down a whole squad.
Lancer is not a traditional rocket launcher, it’s more of a charge up anti-materiel plasma rifle. Lancer’s battery holds 9 plasma cells. By default, Lancer fires weak bolts of plasma that deal minor damage and consume 1 plasma cell. But the user can hold down the trigger to fire more powerful bolts:
Lancer has no projectile drop and pinpoint accurate while aiming down sights.
Charged shots are more ammo-efficient, so normally Lancer is used in charged mode. It is a common tactic to charge the shot from the hip, and fire it in ADS mode. That way, you can move faster while charging.
There are several ways to cancel the charging process, should you need to:
Due to highest in class projectile velocity, Lancer is easy to use at range. It can even be used to snipe ESFs. Low scope magnification can be a nuisance at extreme ranges, though. Lancer has a considerable damage degradation after 150m, so it’s not very effective at 200m+.
More than any other ESRL, Lancer is known for being used en-masse in organized squads. However, its main allure was that once a certain critical mass of Lancers was reached, the squad could delete any enemy vehicle within render distance. Now that Lancer has considerable damage degradation, it’s less effective in that role. It’s still does a good job of consistently inflicting damage to vehicles at great distances, but the necessary critical mass to instakill a vehicle is now at around ~20 Lancers.
With Lancer, VS heavies can engage any vehicle on the battlefield at basically any range. The charge feature lets you choose how to distribute the damage. Instead of always charging (which does yield the highest percentage of damage), use the appropriate charge for the situation:
Two fully charged shots take ~6.5 seconds to empty a battery and will deal 1400 base damage. The enemy pilot will have ~3.5 seconds between shots to react to incoming damage.
Alternatively, you can start with one fully charged shot, then follow up with a lvl 2 charged shot, and then finish with an uncharged shot. It will take ~5.8 seconds, giving the enemy only a couple seconds to react and dealing 1150 base damage.
The key to the Lancer is to focus fire on targets that are already being engaged. Since you can choose how to distribute the damage, you often can easily steal the kill. For this, I like to use Flashes to get in flanking positions of big tank battles.
Don’t try to solo a veteran tank crew, unless they are already engaged or otherwise distracted. If they can’t kill you, they will just disengage or outrepair your damage.
The Lancer shines against light vehicles. Once you get enough practice, hitting a cruising harasser is pretty easy.
Lancer is great for sniping MAXes. Unless running Ordnance Armor 3+, they will die to 3 charged shots within 150m. Note: Lancer doesn’t deal bonus headshot damage.
However, Lancer is horrible against infantry and MAXes at close range. Its lack of burst damage makes it useless on the front lines.
NSX Masamune is a quad-barrel rocket launcher, and a part of the unique Nanite Systems Exports weapons lineup. It has some interesting mechanics.
In hip fire mode, it fires all barrels at the same time like a shotgun. Crouching and staying still will increase hip fire accuracy.
In ADS mode, it fires all rockets one by one over 0.75 seconds. The player can use the scope to steer the rockets, similarly to Engineer’s AV Mana Turret. A reload can be started 1 second after the final rocket is fired.
Rockets do not follow the crosshair exactly. They start flying noticeably below the crosshair, so usually you have to aim above the target for rockets to hit.
When leading a moving target, it is better to overlead and then drag rockets backwards, rather than trying to drag rockets forwards. Overleading fast moving targets may require an extreme body turn, though.
Rockets accelerate much slower in ADS mode.
Masamune always fires and reloads all 4 barrels, so it can be treated as a pseudo single shot launcher.
Keep in mind that you are exposed and vulnerable while steering the rockets, and you are not reloading while doing so. Masamune also has reduced ADS Movement Speed Multiplier – you can only move at 1/3rd of your normal movement speed while ADSing.
Masamune can be hard to use properly, but it’s a powerful and versatile launcher, capable of close range MAX and infantry takedowns, accurate long-range hits on ground vehicles, and effective air deterrence out to medium range.
Masamune is also okay for anti-infantry purposes; it can one shot infantry without Flak Armor, if all 4 rockets hit. A full salvo will damage an ESF without Composite Armor into a burning state.
Masamune can do a lot more than most launchers, but it also takes a lot of skill to use at range, and can often deliver lower than optimal performance.
Tips and Tactics
Quickscoping
When engaging enemy vehicles at “medium range” of 50-100m, it’s a common tactic to “quickscope” a rocket launcher. You use your hip fire crosshair to aim, then start Aiming Down Sights and fire the rocket during Aiming Down Sights animation, before you actually see Iron Sights align.
For rocket launchers, it takes 0.35 seconds to transition to Iron Sights, but only ~0.15 seconds for Cone of Fire to shrink to ADS state.
So as long as you fire ~0.15 seconds after you pressed the ADS key, your shot will have the same accuracy.
The point of this tactic is to be more efficient with your time, and spend less time being exposed while aiming. Staying still at the moment of the shot will increase accuracy as well.
Ballistic Crosshair Overlay
Hitting distant targets requires compensating for projectile drop, which can be tricky to do, since iron sights will be obscuring the target. While massive amounts of practice can help, there are a couple of completely legal tricks you can employ.
Download link to a .zip archive with all 4 crosshairs
Enable “Centered image” option.
There are 4 red bars, each serves as a crosshair for 100m, 200m, 300m and 400m. These crosshairs are scaled based on 1920 x 1080 resolution and 74 degree Vertical FoV. If you play at a different resolution or FoV, you will have to scale the crosshairs accordingly.
At 100m+, rockets have so much drop that your target will be obscured by iron sights. You can avoid this by hiding your weapon model, default Ctrl + F11. Obviously, it helps to rebind it to something more convenient. You cannot shoot while the model is hidden, so you will need some quick finger work.
You can bind Toggle Weapon Visibility in-game and Toggle Crosshair Overlay in RTST to the same keybind, and then you will be able to toggle between aiming and firing with one button. You will need a secondary keybind for Toggle Weapon Visibility so you can synchronize these things when you first log in.
If you have a gaming mouse, you could create a macro for a thumb mouse button that would hide the weapon while you’re holding the button, and show it when you release the button. Effectively, you would have a “hold to hide weapon for aiming” key. You could also rig that macro to fire as soon as the weapon is shown.
Rocket Jousting
It is a common tactic for a Heavy Assault to turn the corner with a Rocket Launcher ready and surprise the enemy with a point blank rocket shot. This tactic is especially effective due to Internet Delayadvantage.
Keep in mind this is only really effective against infantry if you use NSX Masamune or NS Decimator, as other launchers are incapable of reliably killing infantry without Flak Armor.
There are a couple of ways you can improve this trick:
Firing the rocket while jumping will allow you to preserve sprint-level speed.
If you activate overshield after your feet leave the ground, you can also gain overshield’s protection from enemy fire and your own splash damage without receiving movement speed penalty until you land.
If you deactivate overshield before your feet touch the ground, you will not suffer overshield’s penalty at all.
Immediately after the rocket shot, you can switch to something else, like a sidearm, med kit or even C4, depending on what you want to do next. Switching to LMG is usually a bad idea, as it will take much longer.
Naturally, these improvements require some quick finger work, and require a lot of skill to pull off in combat scenarios. But it is deadly effective against infantry and MAXes, and allows to do a ton of damage while still being very mobile.
There used to be a special trick you could do: deploy C4 on enemy vehicle, and then use Rocket Launcher’s splash damage to detonate it, saving a bit of time required to detonate C4 manually. However, now that Rocket Launchers deal little splash damage, this combo is no longer possible.
Calculating Launchers’ Damage
You can use the Toolbox to calculate Rocket Launchers’ damage to different vehicles with different defensive certifications.
Credits
This guide wouldn’t be possible without generous contributions of other community members that have answered my call for help with this guide. Every response in this thread is appreciated. Especially helpful people:
Grey italic text with an orange border on the left are quotes by CuteBeaver, an expert Stalker and PlanetSide 2 veteran.
Subclass Overview
Stalker Infiltrators use Stalker Cloaking ability, which can recharge energy even when cloaked, as long as the user remains stationary, and at the cost of giving up the primary weapon slot.
Some people call Stalkers weak and underpowered to the point of being a joke. Other people consider the whole concept of permanent cloaking to be annoying and nearly overpowered.
Both groups have reasons to their opinions. I think Stalkers are balanced in infantry combat, but unfortunately limited against vehicles, and almost entirely separated from the vehicle play, as vehicles can’t do anything about Stalkers either. But you still can impact the combined arms aspect by hacking turrets to attack enemy vehicles, and hacking terminals to pull vehicles of your own.
Playing Stalker Infiltrator can be both exhilarating and fun, and extremely frustrating. It’s certainly not for everyone. For best results, it requires:
Experience and intelligence, in order to outsmart and outplay your opponents.
Mechanical execution, such as quick reflexes and the ability to press a lot of buttons in correct order and short amount of time.
A competent Stalker player needs to be able to switch gears from careful planning and sneaking to adrenaline rushed execution in a heartbeat, and its the contrast that makes Stalker so enjoyable.
Equipment
Lack of access to primary weapons limits Stalker’s options in face-to-face combat, but the rest of their kit is well suited to sabotage and diversion, and the firepower of secondary weapons is generally enough to pull off an ambush.
Hunter Crossbow was released at the same time as Stalker Cloak itself. They are destined for each other. Crossbow’s sheer power and versatility cannot be overstated.
Stealth
When firing the crossbow, you won’t appear on the minimap of enemies outside 10m. Bolts have barely noticeable tracers, and obviously there is no muzzle flash. Crossbow’s sound is unique and recognizable, but not very loud.
Crossbow’s stealth helps offset the low rate of fire, since it usually takes enemies a while to figure out where they’re getting shot from.
Having a stealthy weapon as a stalker increases your life expectancy and makes it easier to chain ambushes.
High damage per shot and long effective range
Crossbow is very consistent at what it can do:
Two bodyshots reliably kill enemies within 40m even through Nanoweave.
Crossbow is the only weapon that works with bodyshots as a baseline. Other sidearms have to rely on headshots more often.
One bodyshot reliably kills after after an EMP grenade. It’s also likely to finish off the enemy if he survived a partial hit by AP Mine.
Quick melee attack will reliably kill after a crossbow bodyshot, even through Nanoweave. This combo can be hard to execute properly, but kills nearly instantly, making the crossbow very scary in close quarters.
Crossbow can one-hit-kill Infiltrators within 45m on a headshot, making it a great anti-sniper weapon.
One shot destroys deployables, such as Motion Spotters.
High damage per shot lets the Crossbow pretty much ignore Nanoweave, which is a big hurdle for other sidearms.
Crossbow’s long effective range makes you able to act on more targets of passing opportunity; targets that would stop being vulnerable by the time you close the distance to attack with another sidearm. And many sidearms become nearly useless at 20m already.
Crossbow also carries a ton of spare ammo, which allows to forego using Ammo Printer or Ammo Belt.
Having a weapon that deals damage in strong, infrequent bursts is generally useful during ambushes, as it makes it easier to conceal your position. It’s much easier to react to a continuous stream of bullets rather than to plink -> pause – where the shot came from!? -> plink -> dead.
Often you can outright oneshot already wounded enemies. Stalkers are all about analyzing information and acting on it, like KNOWING you can kill an enemy with a bodyshot after you saw him lose shields to your ally. Crossbow’s consistency lets you focus on quality of your ambushes rather than weapon handling.
Overcoming difficulties
Hunter Crossbow has two major drawbacks:
(1) Slow projectiles with a lot of drop make shots difficult to hit, especially against moving targets at range.
Indeed, this is a problem, no way to sugar coat it. Using the crossbow is hard and takes experience.
Remember that as a stalker with the crossbow, you’re not supposed to engage in conditions of “hit this shot or die”, unless something goes horribly wrong. Stalkers are all about engaging on their terms, and this helps to deal with this drawback.
(2) It’s probably the worst weapon in a direct confrontation due to long time-to-kill and low rate of fire.
While obviously you should avoid such confrontations as a stalker, sometimes it just happens, and then the crossbow is likely to get you killed, unless you can melee combo the enemy.
Other options
However great the Crossbow is, it’s not your only option, and may not even be the best option for you. The best weapon is always the weapon youare most effective with, and you should feel free to use any weapon you like.
Stalkers should be able to start an engagement on their terms, and that makes any sidearm viable, as long as you adjust your playstyle to its strengths and weaknesses.
Primary weapons typically have faster time to kill and larger magazines, which allows them to deal more damage before having to reload.
They can afford to miss, or spray everything that moves. You cannot. If they get caught in a reload, they can switch to their secondary. You cannot.
Since as a Stalker Infiltrator you are using a weaker secondary weapon, not only must you fire first, but you also want to stack extra advantages.
Your weapon is up to the task of killing enemies, but you need to have a good sense of timing and work harder for your kills.
Excelling with a secondary weapon is a requirement for Stalkers. Ideally, you should find a weapon that works best for you. This is going to come down to your own playstyle and personal skills.
I could recommend you to use the crossbow, but that may not be a good fit for you. Try out all sidearms in VR Training. Follow your instincts. If you fall in love with a weapon – do not put it down. Use the weapon that you enjoy the most.
Before unlocking the weapon, use the 30 minute trial button below the “unlock” button, and test the weapon against live enemies.
Keep in mind that you cannot trial attachments, specifically the reflex sights that would make it easier to get a Headshot Opener. Once you have a grasp on which weapon you like the most, look up facts about the weapon. Know its effective range, how many headshots it takes to drop a target.
Learn to push your weapons to its limits. Tailor your loadout to complement your weapon, and player skills. Do your best to make up for any shortcomings you discover.
When I started using my crossbow, everyone told me it was a garbage secondary weapon and that I should stop. However, if you are passionate about your weapon you are going to find ways to make it work. Fast forward years later… Having a crossbow (to me) feels more powerful than holding an SMG. It was a hell of a learning curve to get to this point, however.
Do not expect instant success, it will take time to develop confidence in your weapon. Never hesitate to try new combinations, and push the meta forward. Be open to other suggestions, but recognize that opinions of other people may not work for you specifically.
Failure and mistakes are just part of the learning process. Each death teaches you something new.
What makes infiltrators great is the depth and variation between playstyles. We don’t think or operate the same. You will never find two identical infiltrators.
Motion Spotters have great synergy with Stalkers, and they should be your default choice:
As a stalker, you can cover limited distance before you have to stop and let cloak energy recharge, so in a sense you are tethered to a certain area of operations, and the Motion Spotter gives you intel on moving enemies in that area.
Motion Spotters can be used as bait.
Having real-time information on enemy movement and facing direction at close range can increase the success rate of your ambushes.
Stalkers tend to take more time to accomplish things, and Motion Spotters have much longer overall uptime than Recon Darts.
Recon Device is not entirely without use. It can be great for Perching and in any ranged loadout in general. Recon Darts tend to attract enemy attention to a certain area without giving away your real position, giving you the opportunity to take out enemies with your ranged sidearm, when they come to investigate.
You’re granted the first rank of the ability for free, and it is enough to give Stalker a try, but for comfortable and effective play, it is strongly recommended to max out this ability, if you’re serious about playing Stalker. Upgrading significantly reduces the downtime when trying to get from point A to point B.
Stalker cloak is the stealthiest cloak in PlanetSide 2. It allows you to get into position and remain undetected until the perfect moment. This makes killing possible and viable even without a primary weapon, and provides invaluable tactical advantages in teamplay setting, helping to keep your squad alive and on point.
Cloaking sound is the single worst drawback when it comes to stealth play. Cloaking is so loud it can be heard roughly 300 meters away.
Other types of cloak cannot remain concealed for long periods of time. Only Stalker Cloak gives you control as to exactly when you wish cloak and uncloak. This allows for a better timing and pacing between decloak sounds, adding additional ambiguity to your last known position.
When sneaking up behind enemies from extended distance, other cloak types often force their user to choose between two bad options:
1) Cloak and decloak several times along the way, but that would make too much noise, which is generally not helpful when flanking.
2) Try to avoid making noise, and don’t use the cloak at all, but then risk being seen.
Stalker Cloaking doesn’t force the user to make that choice, and can keep you cloaked the whole way.
You cannot recharge your personal shields and benefit from healing affects while cloaked. As a Stalker you can mitigate this drawback by finding safe spots to hide and heal yourself.
Your Suit Slot choice will mostly depend on your playstyle and other equipment choice.
Adrenaline Pump has great synergy with Stalker Infiltrator, as it increases the distance you can cover while cloaked before you have to sit down and recharge. It is also very favorable for melee combat, so you can chase enemies better, and close the distance during melee combat.
Ammo Belt– in contrast, if you wish to keep your distance and kill enemies with your Sidearm, you’re likely to quickly run out of ammo, unless you’re using Inquisitor. NS sidearms, including the Crossbow, also tend to have plenty of reserve ammo.
Grenade Bandoleer– since you have to sacrifice your primary weapon slot, it does make sense to compensate and increase your total carried firepower with extra grenades or throwing knives.
You can use other suit slots if you wish, but these three are the most powerful, depending on what you want to focus on: melee kills, sidearm kills or overall impact. Honorable mention:
Nanoweave Armor can be useful for aggressive close quarters playstyles, though it is a crutch more than anything else, and you should learn to operate without it, once you’re more comfortable with the Stalker.
Grenade
EMP grenadeshould be the default choice for Stalkers, especially when not using Bandoleer. In addition to its unrivaled utility of clearing off enemy Motion Spotters and other deployables, it can be a great equalizer for your weapons. Notably, Crossbow and melee weapons need only 1 hit on a fully EMP’d target to kill.
Frag Grenades are generally not worth using, with the exception of using Bandoleer in overpopulated fights, where you can flank a choke point packed with enemies, and bombard their position with Frags.
NSX Fujin throwing knife isn’t as versatile as EMPs, but its ability to OHK on a headshot shouldn’t be dismissed casually. It’s not easy to use, but gives you an extra tool for quick and silent kills.
Utility
Med Kits are a great choice for farming melee or sidearm kills, and sustaining you in the field if you choose not to run Regeneration Implant.
Due to instant healing, Med Kits can be great at helping you escape if you get caught. This property can be especially helpful when running a specialized short range weapon, like Mag-Scatter, so that if someone does spots you while moving to engage, you can eat Med Kits and escape. Since the Mag Scatter is a very specialized short range weapon, it doesn’t allow you to return fire in most cases, and running becomes the only option.
If movement and being killed on route is a problem for you, then do equip medkits until you become more comfortable with bases and know good pathways and hiding spots. Its a good crutch to use while learning layouts or even getting familiar with your weapon.
Anti-Personnel Mines will increase your potential impact. This is where faction choice will matter.
VSProximity Mines and NC Bouncing Betties deal AOE damage around them, they often wound, but rarely kill a full health enemy, so they are great at finishing off fleeing enemies or against groups of players, if you can sneak up on them.
TR Claymores deal lethal damage in 90 degree cone in 2m in front of them. They don’t often get to do damage, but when they do – they usually kill. They can be useful in protecting your flanks and doorways.
Melee weapons are great for ambushing, because they:
Bypass nanoweave and in most cases can kill faster than most sidearms.
Frontload a lot of damage.
More silent than firearms.
Stalkers often can safely close distance with the enemy, making them the premiere class for killing enemies with melee, with Light Assault being a distant second. Any enterprising Stalker should learn how to use melee weapons properly.
Standard Knife versus Power Knife
Standard knives are a good starting point, as they are fast and easy to hit with.
However, ultimately, Power Knives are just better. The ability to instantly kill any enemy, including a shielded Heavy Assault (on a headshot), cannot be overstated.
That said, Power Knives are noticeably harder to use:
You need to manually activate it, which can be tough if you’re trying to: sprint up, decloak, equip the knife, activate it, strike – all at the same time.
Hits are harder to score.
Longer delay between swings. You really need to hit that first swing.
Despite the added difficulty, power knives are well worth using, and you should transition to a power knife once you have enough experience and certs.
Stalker Infiltrators have a plethora of amazingly strong implant choices, but most of them are rare and expensive to upgrade. If you don’t have access to them, it is perfectly fine to go with these two common implants:
Regeneration is great way to sustain yourself in the field, if you’re not using Med Kits.
Ammo Printer is perfect for Stalkers, as it allows to replenish Motion Spotters and Sidearm ammunition in the field. This is great for loadouts that rely on getting kills with sidearms, especially non-NS sidearms, as they usually have little reserve ammo.
Of course, Ammo Printer is only useful if you actually live long enough to need that extra ammunition. And now that you can restore ammunition from Ammo Packs while cloaked, including enemy Ammo Packs, the Ammo Printer is far from mandatory.
It is great for perching playstyle, supplying sidearm ammo even without Ammo Belt.
Luxury Implants
Catlike is an amazing choice for Stalkers. It increases your crouch speed, which has many obvious benefits for a Stalker, and at maximum rank, it will also increase your jump height, significantly improving your parkour capabilities.
Sensor Shield reduces the detection range of enemy Motion Detection tools against you, making you more stealthy.
Nightmare special cloaks you for 1-2 seconds after a wielded melee kill, or when killing an enemy at close range. In special cloak you can keep attacking, tearing through enemy lines. Or you can use special cloak as a safety margin to escape after a close range ambush.
Honorable mentions
Target Focus can help identify targets and focus on wounded enemies. Just be very careful about spotting enemies yourself, and remember that displayed health bar doesn’t take shields into account.
Sweeper HUD can be a useful slot filler to warn you about mines that enemies might have left to protect their flanks.
Safe Landing may be required to perform some of the crazier Parkour maneuvers, though CuteBeaver doesn’t use it.
Vampire looks attractive on the first glance, but it involves a lot of risk to benefit from, and it needs to be upgraded to the maximum rank, which can get expensive. For most stalkers, it is likely to be inferior to Regeneration, as you should try and be at full health before an ambush.
Basic Rules
Allies don’t give a damn about you. While you are crouching in deep cloak, they will use you for cover, attract enemy attention and bullets to you. When you go in for a melee kill, they will shoot your target and you too. Don’t be mad at them – you can’t expect others to bend to your playstyle. Just keep a safe distance.
Use your allies as a distraction. An enemy is easier to kill while he’s busy shooting your ally. Or busy getting shot by your ally. Or busy cowering in cover after getting shot by your ally. You get the idea. Despite often being a liability, your allies are your best asset in getting good ambushes.
That’s why it can be so hard to ambush people in small battles – there’s not enough distraction going around.
90% of players have terrible awareness. Vast majority of players will ignore it when you decloak behind their back with a roaring power knife. They won’t care when you slice the throat of their nearby friend, unless it happens in their direct line of sight.
They will not notice you if you sprint cloak in their field of vision, unless you’re very close. They will ignore the minimap. Sometimes they will not even react when you decloak behind their back and stab them, and just keep going about their business like nothing happened.
You are never invisible. In contrast with previous point, the remaining ~10% of players will pay attention, and they will see you through cloak and react to minimap and sound cues. In some exceptional cases, producing even one cloaking sound, or even one minimap blip can give enough information to someone to go and hound you.
Check your surrounding before decloaking to engage. Just take a quick look around and make sure nobody is looking in your direction, especially from your back and sides. Stalkers in deep cloak are not immediately punished for bad positioning, and it is up to you to make sure you’re safe to engage.
Enemy awareness and reaction speed fades as distance to the front lines increases. The further behind enemy lines you go, the more relaxed enemies will be, but there will be fewer things to distract them as well.
Have a moral code. Have mercy on the experience of your fellow players – even if they play for a different faction. Ultimately, we’re all people here, and we all play to have fun. As a stalker, you are inherently a bit cheap and cheesy. There is no need to slump into pits of absolutely terrible gameplay, like camping or mining spawns and terminals.
You are not versatile. Some bases and some fights just don’t favor Stalker Infiltrator. If the fight is overcrowded, sneaking around and ambushing lone, weakened targets becomes increasingly difficult. Indar and Esamir in particular can be very frustrating. Be ready to adjust your loadout, switch classes, or even leave the fight altogether.
General Strategy
Stalker Infiltrators are all about balancing Risk versus Reward.
Low risk – low reward. Sitting in deep cloak away from combat is very safe, but you will never accomplish anything if that’s all you do.
High risk – high reward. Sprint cloaking into a pack of enemies with a Power Knife will get you killed most of the time, but there is a small chance you’d be able to cut them all down and survive.
Naturally, you want to minimize the risk and maximize the reward. The best part about Stalker Infiltrator is potentially infinite cloak energy, which means potentially infinite time.
Playing stalker is all about finding or creating moments of opportunity that let you minimize the risk and maximize the reward.
The general goal of your movement is to put you in a position that:
Gives you an opportunity to attack enemies from a direction they don’t expect an attack from. In broad terms, this is any direction that is not “towards the front lines”.
Players often consider the direction to their spawn the safest. And indeed, attacking from the spawn direction is usually a bad idea, because you risk getting engaged in the back by approaching enemy reinforcements.
But if you keep your ambushes short, and have a good escape route, it can be a viable option.
Gives you an escape route to restealth. Preferably, several to choose from. You have limited firepower, you can’t stand your ground like a Heavy Assault could. You need to restealth between engagements and strike when the enemy is weak, at the moment of your choosing.
Distractions make movement easier and safer. Anything can be a distraction – explosions, your allies drawing fire – they all attract enemy attention to a specific direction.
In this video, I used the burning Sunderer to cover my attack, and then used a traffic accident to cross open space. Drivers were focused on getting untangled, and if other enemies glanced back – they would be focused on the accident and not me.
Deep Cloak
If the enemy doesn’t know about you, sitting in deep cloak makes you effectively invisible, unless the enemy is physically bumping into you.
But if the enemy knows for a fact that a cloaked infiltrator is in a certain area, it’s only a matter of time before you are found and killed. In some lighting and background conditions, you may be seen as far as ~10m away.
While you’re sitting still, your character will still make idle animations, like breathing and slightly waving his weapon around. To stay almost completely still you can Aim Down Sights.
Known bug: sometimes player’s head or weapon’s magazine has a different cloaking state than body. To prevent from being affected by this bug, do not sit still in Deep Cloak for too long, make tiny crouchwalking steps from time to time.
Crouch Walking
Crouch walking is almost always completely safe, unless an enemy is staring in your direction at close range. When in doubt – crouch walk. In general, crouchwalking is very underused. All infiltrators should crouchwalk more.
Cloak Sprinting
But even as a Stalker, nothing is stopping you from hauling ass when the time is right. You don’t need to move slowly all the time. Sometimes its preferable to move quickly and reposition and use cover for your escape, or seize the initiative and attack.
It is not time-efficient to slowly and patiently crouch walk on every enemy, and most enemies will not stay in one place for so long anyway. There is also an overall time limit on any given battle, and if you go too slowly, you risk never having a chance to accomplish anything before the battle is over.
So you will have to cut corners and sprint cloak, sometimes even through enemy’s field of vision – but only do that if they are clearly distracted by something else. There is no punishment for death in PlanetSide 2, so let the enemy teach you what is acceptable, and what isn’t.
Respect Motion Spotters, and try to clear them with EMP grenade or a weapon before sprinting through the area.
When moving to engage, be wary of your cloak energy. If it runs out shortly before you press the ability key to decloak, it may actually recloak you instead, fumbling your attack.
Sprint cloaking is less visible:
In the darkness of the night.
Against bright snow, sand and sky.
Be careful when approaching corners, there is always a risk of running into a face of a Heavy Assault, even if the area seems clear. A generous use of Motion Spotters is often enough to mitigate that risk.
Maximum distance you can cover while cloaked can be calculated, because we know infantry movement speed and cloak duration. For maximum rank of the ability, it is roughly 100m.
Field of Vision
In real life, humans have about ~180 degree field of vision. But common gaming monitors are much smaller, and do not span the entire field of vision, so in game characters will not be able to see what happens at their sides.
It is possible to increase in-game Field of Vision past 74 degrees of Vertical FoV, but almost nobody does that. In vast majority of cases, you can expect enemies to not notice what happens to their sides.
Keeping off the ground and out of predictable locations is often enough to keep you safe. Hiding at an elevated position, like on top of a rock or a shelf, will fool a lot of Darklight users, who are not going to go to super great lengths to find you.
Another method is to get outside. Its easy to search a tiny room, much harder to search a forest.
You can consider killing the Darklight user. However that isn’t always an option in crowded fights. It’s usually better to find a way to avoid the beam and re-position. Once enemies finish their sweep and think they are safe, it can be profitable to double back and take advantage of their relaxed attitudes. Do try and remember the player who pulled it out though. There is something incredibly rewarding about killing them after they cause you such trouble.
Darklight effect has a short range of ~11m, so if all else fails – just keep your distance.
Parkour
Stalker Infiltrator heavily relies on flanking, but unlike the Light Assault, you don’t have any extra mobility, besides the ability to safely move in enemy field of view.
You will have to creatively use your environment in order to freely move around. It is strongly recommended to watch CuteBeaver’s Parkour videos and study her Parkour Guide.
Videos
Example #1
In this example, an experienced enemy Light Assault caught glimpse of me sprinting in cloak. Instead of engaging right away, he closed the distance first. I wasn’t quite sure if he actually seen me, or just decided to move in my direction, so I deep cloaked and ADSed to remain as still as possible, only to discover he was closing the distance for his shotgun and to see me more clearly before engaging.
Vulnerable Targets
Targets of Passing Opportunity
They are vulnerable for the moment, but you don’t have much time to decide whether you want to engage or not. Roughly ranked from safest to engage to most dangerous:
An enemy that is running away and being shot by your allies. If you’re not greedy for the kill, and the enemy has nowhere to go, you may choose not to engage at all.
An enemy that is standing on top of an explosive that you can detonate with bullets or EMP.
An enemy that has lost his shields to enemy fire or EMP grenade.
An enemy that was wounded a few seconds ego, and his shields have just started regenerating. You can tell by a shimmer pulse over his body.
A cloaked infiltrator.
An enemy that is occupied with reloading or using a tool.
Heavy Assaults using Anti Air rocket launchers are usually less aware and wiggly than Anti Tank launcher users. – CuteBeaver
An enemy that is tunnel visioning and ADS shooting at someone else.
An enemy that is sitting in cover and getting ready to engage someone else.
An enemy that is aware of you, and actively looking for you, but in the wrong place.
Engaging a target of opportunity almost guarantees success in killing that target, but you will have limited time to act, so you can’t be picky about engaging in perfect conditions.
For example, you may not be able to close the distance for your weapon, or ensure that you have a safe escape route, or even do a quick look around to make sure you’re safe to decloak and there is no random enemy behind your back.
Sprinting enemies deserve a special hierarchy:
An enemy that is sprinting below you.
An enemy that is sprinting away from you.
An enemy that is sprinting perpendicular to you.
An enemy that is sprinting towards you.
Sprinting puts at least a 0.3 second delay before the enemy can deal damage to you, and that can be enough for you to deal enough damage to make the engagement swing into your favor. Especially if you engage from behind or from above, that will significantly increase enemy’s reaction time.
Another honorable mention:
An enemy is far away, and you have lots of space and cover to maneuver around.
This situation makes it highly unlikely that anyone will come looking for you, and even if they do – they will probably not find you, because you will have crouchwalked away and hidden in deep cloak in plain field.
So you can attempt engagement for days. However, you are unlikely to actually kill the enemy, unless he’s already very wounded or you’re using Hunter Crossbow or the Blackhand.
Videos
Example #1 - Chaining ambushes
This example starts with me being critically wounded. I see a medic that intends to heal me, and I let him do his job. I intend to return to battle and go up the stairs, but I’m forced to engage a shielded HA face to face. Fortunately, I am able to push through with Repeater’s DPS. I move forward and meet another HA face to face. I decide not to tempt fate the second time, and disengage and go up another stairs.
I see and take out a Target of Passing Opportunity – a medic that has just started recharging shields and isn’t looking my way, and swiftly destroy enemy spawn beacon, and move away to restealth, as I’ve been targeted by a Spitfire.
Moving away and going through a building and a window should be enough to cover my tracks from most enemies that could have been chasing me. I take a moment to look around, and knife another Target of Passing Opportunity – a medic that is shooting in a direction away from me.
It should have been a good and easy engagement, despite me being out in the open, because after the engagement I could’ve taken a couple of steps to restealth through the building again. But the medic moved, and engagement went sloppy, and a Heavy Assault sees and engages me.
I escape through a window, and see that Heavy Assault as another Target of Passing Opportunity – he has just started regenerating his shields, and he’s looking for me in a wrong place. I use the sidearm to take him out, because I didn’t want to take an additional risk by going for melee.
Example #2 - Dumb luck runs out
In this example I go upstairs behind enemy lines. I take a moment to look around, and decide to give priority to enemy Spawn Beacon. I destroy it and quickly move away to restealth, but realize I cloak sprinted right into enemy’s face.
I decide to quickly kill that guy before he has a chance to do anything, and then use the nearby building to hide from enemy fire. I sprint through the building in hopes of shaking off the tail, but sprint into even more enemies, and decide to turn around and take my chances against whoever was following me.
Turns out it was just an engineer, and I am able to take him out face to face in a sloppy manner. While reloading, I take a look at the other doorway, to check who is coming to fight me. I get lucky, the first guy through the doorway gets killed by an unseen ally, and I am able to hide behind a shelf and use a Med Kit.
In my mind, another enemy could have been already coming through the doorway, so again, I decide to take my chances and try to clientside him. Turns out he was holding out back, and with the help of an unseen ally, I’m able to kill him with headshots.
I check out the back, and see no more aware enemies, for the moment. Soon, a Target of Passing Opportunity presents itself – a shieldless medic with a med tool in hands.
I move up to see what’s outside the fence, and there is another Target of Passing Opportunity – an engineer that’s sprinting towards me. Confident in my aim and in Repeater’s DPS, I take him out.
However, I didn’t take a moment to look around, and got shot from another direction. I quickly disengage, and in this case going behind a box was enough to give the enemy medic that shot me a higher priority action – he wanted to res the medic that I killed earlier.
I go in for a greedy knife kill, and find myself in front of half a squad of NC, with the predictable outcome.
This streak is the perfect demonstration that dumb luck eventually runs out.
Example #3 - Melee advantage
This example starts with me sitting in deep cloak at 0:07. I see an approaching cloaked infiltrator and pull out the knife, getting ready for a melee ambush, but see another enemy and hold off, and let them pass.
I don’t chase right away, and make sure there are no more enemies where they came from.
As I move down, I see a Target of Passing Opportunity – an enemy infiltrator, engaging someone with Tomoe in the opposite direction. I go down to engage, and as I move down I see another infiltrator in cloak, and a Light Assault coming up.
I keep them in mind, as I stab the first infiltrator in the back. The momentum of my downhill slide pushes me in front the infiltrator, and I finish him off with another swing, and immediately jump out to engage the Light Assault, who has a cloaked Infiltrator behind him.
I swiftly shank the LA, and move behind the back of the Infiltrator, and kill him as well. During the course of this engagement, that cloaked infiltrator could have been potentially aware of me, and he could mess up my ambush, but I was lucky in this regard.
This is a good demonstration of what can be accomplished by melee, and unlikely to be accomplished by a sidearm – quietly and swiftly taking out 3 enemies in a row without even producing a faction-identifying sound – with the exception of the cloak, of course.
After engaging I recloak and move away from the area to shake off any potential tail. I look around to make sure nobody is out to get me, and look for more targets. Soon, a VS sniper shot sound gives me a direction to an enemy, and snipers are always good targets.
I move down to engage the cloaked infiltrator, and see another enemy – a medic that’s moving away. I keep him in mind, but for now I move to kill the infiltrator. He is moving in cloak, but I am able to see him. The medic got chased off or killed by my allies, and I am free to restealth.
Example #4 - Crossbow in close quarters
This example starts with me approaching a capture point building. I am approaching from the direction of the enemy AMS Sunderer, so this direction should be deemed safe by the enemies, and gives me a good chance to flank the enemies that are currently flipping the capture point.
I see a Target of Passing Opportunity at range – an enemy that is tunnel vision ADSing perpendicular to me. I go for a headshot opener. A crossbow headshot isn’t enough to kill a full health enemy, but if he survived the shot or I missed, I had the option to disengage and restealth.
That enemy is killed by the headshot, and I move in. I see another Target of Passing Opportunity – a Light Assault with his back to me. I go for another headshot opener, but the target is moving, and I miss my remaining two shots. I say “screw this” and go for a wielded melee kill.
A bit unpredictably, he decides to camp near the doorway and turns towards me and shoots me. Fortunately, and probably due to the surprise effect, he misses his shots and gets killed.
If I knew he had an autoshotgun, I would probably still chase him, but that would be obviously unnecessarily dangerous.
Clearly there are still enemies around, and after unintentionally cancelling reload animation of the Crossbow, I drop a Motion Spotter to get more intel, and get ready to defend the capture point.
Sounds of combat bring my attention to the right, and I get a quick shot at the exposed back of the enemy Light Assault. I can see his health while he’s spotted, which means he has no shields, and he is guaranteed to die from a crossbow bolt, and so he does.
A hip fired bolt at that range isn’t guaranteed to hit, but I wasn’t sure if I had time to ADS.
The motion spotter gives me intel on approaching enemies, and I get ready to engage whoever comes through a doorway. Due to Internet Delay, it’s a bad idea to let enemies charge you, but I didn’t have time to prepare a counter breach, as the Motion Spotter switched to real time mode too late.
Unfortunately, the first enemy through the door is a Heavy Assault. I tried and failed to do a crossbow melee combo with a headshot opener – the bolt hit the body. By sheer dumb luck, I survived long enough to kill him with a second quick knife strike.
That wouldn’t be enough to kill a full health Resist Shield HA, or if he was using Nanoweave with NMG / Adrenaline, so I get lucky in that regard as well.
Groups of medics near a choke point, they keep healing and reviving each other, but only a few of them are actually ready to defend themselves.
You have to kill every single medic, or you hard work will be for naught.
When going for a medic ball, it’s usually a great idea to cover them all with an EMP first.
Group Psychology
It is often easier to sneak up on a group of enemies, because people feel safer in a group, and they often assume that others are watching their back, when in reality they all tunnel vision in the same direction. Others might not even react if you kill one of them, as long as they don’t see you.
Movement is also easier in general, since they don’t assume you’re nearby.
Competency Display
Sometimes, you can immediately identify an enemy as more dangerous by his behavior. A skilled, experienced player will almost never stand still. For example, a medic that is actively moving around while reviving is more likely to react to your ambush.
Rules of Engagement
Once again, you’ll be managing risk vs reward, and what type of kills you’re going for. But one rule will always remain: fire first or don’t fire at all.
Never engage from a direction that enemies already expect danger from. If the enemy is already looking your way with a weapon ready to shoot someone, decloaking in his field of view equals getting shot instantly.
Spotting and Voice Callouts
Stalkers and all stealthy players need to be very careful about spotting, because it gives away your position, and can and will attract enemy attention to your position. In case of spotting, better to be safe than sorry, and not to spot enemies unless you’re in the middle of a bunch of allies or the enemy already knows your position.
You can purposefully give away your position to an enemy by spotting, and then rapidly move away and ambush him if he comes to investigate.
You can manipulate enemies by using in-game voice callouts. Bait enemies out of turrets without hacking them. Entice a medic to come to your location and stab them silly. Ask for ammo from enemy engineers. Spotting can also work. Just be careful about how often you give away your position.
Melee
There are several ways you can use a knife as a stalker, and each way has certain advantages and disadvantages.
Crossbow Melee Combo
A combination of Crossbow body shot and a quick knife attack nearly instantly kills any enemy, even through full nanoweave, with the exception of shielded Heavy Assaults.
This was the main way of engaging in melee until the melee weapons were buffed some time ago.
When to use
Crossbow Combo is great in two cases:
Against lone stationary enemies.
Interception combo against oncoming enemies, when you can crouch still in deep cloak, let the enemy come to you, and decloak and melee combo as they run by you, or even through you. Flawless timing is required.
Against targets that need to be killed quickly.
When done properly, crossbow combo is very quick, you spend very little time engaging the enemy. You pop out for a moment, kill, and then escape in cloak before anyone realizes what happened. It also denies the enemy a chance to do significant damage to you.
Crossbow combo is very bad against shielded Heavy Assaults, but if you catch an oblivious HA without active overshield, you can potentially kill them before they have a chance to activate the overshield.
Another example where kill speed is the key: a vehicle pilot, repairing his nearby vehicle. If you fail to kill him instantly, he will just enter his vehicle, making him unreachable, and putting you in jeopardy.
When going for a Crossbow Combo, you’re still holding a ranged weapon in your hands, and you can respond to different threats should they arise. When you’re EMP breaching a room, you can bolt one enemy, and quick knife another one with minimal delay, and the first enemy can be at range. Or you can bolt + knife a full health enemy that somehow avoided the EMP.
Clunky and Punishing
While crossbow combo is very lethal, it is also easy to mess up. Missing the crossbow shot or the knife swing is extremely punishing, as there will be a 0.95+ second delay before you can do another quick knife swing or ~1.5 seconds before your Crossbow is ready to fire again.
There is also a 0.3 second Sprint Recovery delay before you can shoot the crossbow out of sprint, so the crossbow combo isn’t very good for chasing, and due to long delay between combos, it’s not great for engaging multiple enemies at once.
Avoid trying to melee combo moving enemies, especially if they’re not moving in a straight line. There’s a very high chance you’ll mess up the combo and die.
Trying to melee combo skilled Heavy Assaults is also futile, unless they are wounded anddistracted.
Melee Combo with another sidearm
Melee finishers after a few sidearm shots are great, because they conserve ammunition and reduce Time-to-Kill. However, in most cases, you shouldn’t intentionally go for a sidearm melee combo:
If you can sneak up into melee range, wielding the knife is usually better.
If you can’t sneak up close and forced to engage at range, it’s usually better to just shoot the guy to death.
Use sidearm melee combo when you are already engaging the enemy with a sidearm at close range, and you and the enemy close the distance, and you feel that enemy will die from a melee strike.
Once again, avoid trying to melee combo Heavy Assaults, because it’s very hard to predict when the knife strike will be lethal against them.
Wielded Melee
Besides farming melee kills, there are several legitimate reasons to use wielded melee as a stalker:
Frontloads a lot of damage.
Can be used out of sprint.
Surprises the enemy – very few people use melee.
Less noisy than a firearm
Conserves ammunition and doesn’t run out of ammo itself. You can potentially cut more people that you would be able to kill with any sidearm.
Can be surprisingly effective against shielded Heavy Assaults at close range, if you can hit headshot strikes.
Looks cool and feels exhilarating.
The first two bolded points are the main advantages, and they let you play on Internet Delay. Basically, you may round the corner and stab an enemy in the eye before he gets a chance to see you.
This can be especially effective when you know there is an enemy behind cover, but you don’t have direct line of sight to kill him with a sidearm. Or when solo breaching small rooms with 1-2 enemies.
Engaging in melee is generally countered by simply moving around, so it’s preferable to engage enemies near a wall, perpendicular to that wall:
This way, you ensure that at least the first enemy you engage will not be able to kite you, and in general it limits enemy options.
Wielding a standard knife
Wielding a standard knife and spamming attacks at the enemy can often kill them before they have a chance to react properly. It’s a bad habit, but it works.
Wielded knife damage is consistent and lethal, as it goes through nanoweave and kills standard enemies in just two strikes. An exceptions: enemies with Auxiliary Shield – usually newbies – will require 3 body strikes.
To counter the potential Auxiliary Shield advantage, try to always score a headshot with the first strike. If the enemy is already wounded, you have a high chance of instantly killing them.
Heavy Assaults with NMG and Adrenaline overshield will be always killed in two headshots, but Resist Shield users may require an additional swing, if they started at full health.
0.4 second TTK against most targets and the ability to perform melee attacks out of sprint make wielding standard knives really powerful.
You never run out of ammo, so running into a crowd and just knifing left and right can be surprisingly effective. If you can score a good EMP grenade hit, any enemy will be killed in one body strike.
Wielding a power knife
If you have picked up the bad habit of randomly spamming the wielded knife in general direction of the enemy when you were using the standard knife, you will have to relearn, because misses are especially punishing with the power knife, and you should need only one swing anyway.
Power knives are also great at chasing enemies, you can sprint slam yourself into them when they stop for a moment, and swing out of sprint, nearly guaranteeing a kill.
Interception melee charges can be effective – pull out the knife an advance and wait in deep cloak as the enemy approaches, then sprint at the enemy while decloaking and activating the knife and stab them in the face.
In contrast, this trick is much more likely to fail when using a standard knife, which often leads to completely unpredictable results.
After the first stab, a newbie might keep running like nothing happened, while a veteran may jump forward and do a 180 noscope instakill with a Commissioner, or just suddenly turn around. In that case, PS2 Movement Prediction is likely to screw with you, and it will look like enemy ran behind your back with far too much speed.
Power knives are louder and produce faction-specific noises, so you need to account for the attention you might draw from other aware enemies. You don’t have to activate the knife for every kill, though.
Disadvantages of Melee Engagements
Easier to fail. Cloak isn’t as effective up close, and for a melee engagement you have to close the distance each time. Enemy might turn around and see your approach. Or you may be noticed by someone else.
They make you tunnel vision as you approach the target, so you might miss other nearby enemies until it’s too late.
When they fail, they fail hard. Any engagement can sometimes go wrong. But a failed melee engagement often leads to death.
Being close to enemies is dangerous. You may be hit by friendly fire that was intended for the enemy.
Even if you kill the enemy you were going for, you may suddenly realize there are more enemies than you expected, and now you have no way to break contact.
You can’t control actions of allies and enemies, so you can never guarantee a perfect melee engage, regardless of your skill and equipment. Melee engagements are often more risky than they’re worth, and just because you can go melee doesn’t mean you should.
In general, you want to engage the same Vulnerable targets or Targets of Passing Opportunity. Your sidearm and attachment choice will have a heavy influence on what and how you can engage.
Keep your sidearm’s strengths and weaknesses in mind, and adjust your playstyle accordingly.
Using a Suppressed sidearm or the Crossbow will make you more stealthy, and give you an option for a stealth engage: when you decloak from a deep cloak, but keep sitting still, and concentrate on shooting the enemy, while he is trying to figure out where he is getting shot from. Lack of a muzzle flash can make it challenging, and tracers don’t render very well at close range.
This engagement style is viable even with an unsuppressed sidearm, if you’re engaging from above or from behind, but naturally it will broadcast your position to nearby enemies, and you will have to rapidly move away and restealth after the kill.
Vanish Attack: At longer distances you will be unable to fire both crossbow bolts before a target can react to being hit, due to the low projectile speed. By the time the first bolt hits them and the second is airborne, the enemy will already have wiggled out of harms way.
Consider firing once, and then re-cloaking to fire your second shot later on. This way, bolt’s long travel time will play into your hands – by the time the enemy receives damage from the bolt, you will be already in cloak.
You can try predicting where the enemy will take cover. This happens a lot with heavies. They get shot, their shield goes up, they face the directional hit-markers… However since you cloaked they don’t see anything…. After a couple seconds they go about their business. Usually they drop their over-shield and that is your hint to fire the second shot.
Sniper Hunting: Stalker cloak is almost criminal for killing enemy snipers. You know where they will be, and they have to stand still while taking their shots. Aim for the juicy headshot instant kill (within 45m).
EMP Combo: combined with EMPs, the Crossbow becomes exceptionally great at clearing rooms, as a single body shot will be lethal against any EMP’d enemy. You can potentially kill up to 4 people before having to reload, and it’s easier to do than with any other sidearm. As you need only one shot to kill, you can fire off a shot and immediately switch to another target, while any other sidearm would require you to focus on hitting several shots, and this could make you tunnel vision and lose awareness of other enemies and your surroundings.
Crossbow allows you to quickly switch gears and focus on killing the next enemy in a high stress situation. This allows more time for planning and less tunnel vision. It also means less exposure when popping in and out of cover.
Grenades
EMP Grenades: be mindful of their detonation delay of ~1 second.
Normally, the detonation delay is a nuisance, but when using the Crossbow, you can take advantage of it. With proper timing, it is possible to “OHK” the enemy by shooting him with the Crossbow the exact instant the EMP detonates.
Tactical EMPs: when there is an enemy on your tail, you can round a corner, and throw an EMP behind you, prepping the enemy for an easy counterattack kill. You may even EMP yourself for this. Kinda sloppy but it can help to recover from a bad situation.
EMPs are also great at making enemy mines work against them. Often one EMP thrown into enemy controlled building can result in a few kills from enemy AP mines.
Cover Your Tail: drop mines if an enemy is chasing you. Even if the mine won’t kill, it can weaken the enemy or convince them to stop chasing.
Explosive Spotter: Use your Motion Spotter as a trap with mines. Corners work well for this, as they force enemies to move around the wall in order to get line of sight on the spotter. Most players will take corners quickly, without regard for any possible mines at their feet.
Explosive Corpses: You can try hiding a mine near enemy corpse. This is helpful when medics rush in to revive a group of enemies you have just killed. Or even a single enemy, if you know a medic is nearby.
Alternatively, you can just hide right next to the body and try and stab them. This can backfire if the medic is smart and pulls out a Darklight, which is why I have taken a liking to explosive corpses over standing around dead bodies. Less risk involved and you can still finish the medic from range with a sidearm if they are wearing flak.
You can do this to prep enemies before you take a corner or ambush them. It’s basically a tactical EMP with more teeth, because it can kill instead of just weakening.
Claymores aren’t nearly as great in mentioned “pizza delivery” tactic, but they can be potentially more powerful when used as actual mines to protect your flanks and doorways.
Heavy Assaults
Heavy Assaults are always popular, and their overshield makes ambushing them considerably harder. Learn to distinguish Heavy Assaults from other classes, because in most cases they need a different approach.
You must inflict as much damage as possible before the HA can react to your ambush. This doesn’t give you a whole lot of time to work with. In most cases, you’re looking at less than half a second worth of free damage. After that time expires, expect their shield to come up.
Just try and look at this like a challenge. Ultimately these HAs are teaching you to make better, cleaner ambushes.
Shield Recharging Fields
Shield Recharging Fields are deployed by medics. They allow enemies to recharge shields even while they are being damaged, so these fields can and will mess up your engagement with weapons that rely on dealing a very specific amount of damage.
For example, an enemy that would normally die to 2 standard knife swings will require 3 swings when under effects of the recharging field. Same goes for 2x shot Crossbow kill, or Crossbow melee combo.
Additional Tactics and Playstyles
Shadowing
This style focuses on cautiously following your targets, and attacking with your secondary weapon.
Shadowing is all about mitigating the risks by engaging on your terms, in circumstances that favor your weapon and give you a way to safely escape afterwards.
Shadowing relies on Headshot Openers (HSO) to cut down Time to Kill and make the attack more successful. Having good aim to score headshots before the target can react helps to avoid taking unnecessary damage and conserve ammunition. This style is risky and mobile, and requires you to be very creative, because enemies will often hunt you.
It is critical to learn how to counter or trick enemies who come looking for you. The more sneaky you are, the longer your life expectancy will be. Picking off distracted targets one at a time is ideal. Alternatively, having good threat assessment skills will allow you to pick off multiple targets during a single attack.
When chasing an enemy, make sure there is nobody behind you before you engage.
Ideally, you want to have a bit of distance between you and the enemy. Positioning next to an escape route or a cover object helps to stay alive after you have opened on an enemy.
A piece of cover that obscures a part of your body may help shield you from some of the returning fire. Once the enemy dies you can use the cover object to escape from anyone who witnessed your attack.
A wide variety of weapons can be used for Shadowing. Unless you have excellent aim, select faster firing weapons, like the Beamer, which will assist you when killing mobile targets.
Going for Headshot Opener is critical even for spammy weapons, because the faster you kill an enemy, the less damage you will take from return fire, and the less risk you face from enemies who witness the attack.
Shadowing allows for a choice between silenced weapons, and louder weapons, however, your movement and how you go about countering enemies will change based on your selection. The effective range of each pistol will dictate how far you can safely operate. If you are too far away, kills will be expensive and you will be exposed to enemy fire for dangerous lengths of time. Learning the balance of risk vs reward, in combination with headshots allows you to push the weapon to its fullest.
Medkits may also become more lucrative than Mines, as they free your implant slots for other options.
Perching is taking a long range overwatch approach to stalking, using weapons like Blackhand or the Crossbow to take down targets at range.
This is the easiest playstyle to pick up as a new stalker. Having some distance between you and enemies increases survivability and gives you a higher chance of escaping when being shot at.
The extra distance also makes cloak concealment more effective and gives you additional space to disengage and hide from enemies if they come searching. Perching keeps you out of reach of Darklight Flashlight users.
Despite being easy to pick up, the skill ceiling for Perching is rather high and there is considerable depth to the playstyle.
You will also have fun discovering spots to “snipe” enemies in the middle of crowded fights, where a Hunter Cloak Sniper would be unable to operate.
Your creativity is expressed in finding vantage points that are off limits to other classes, and you may find yourself purchasing camo to better blend into backgrounds. Those with deadly fashion sense should apply 🙂
Air Drops
It’s a common tactic to use an expendable Valkyrie or Ejection Seat ESF to strategically insert yourself in a specific position. Usually there is no need to run any additional upgrades on the jet, like Stealth.
Denying Vehicle Spawning
In coordinated teamplay setting, it is sometimes justified for a stalker to camp a Vehicle Terminal, and kill anyone who tries to pull a vehicle.
A certain Game Update made it possible to bypass the Vehicle Terminal, and spawn a vehicle directly from the Map. However, the base must be uncontested, and have a functioning Vehicle Terminal. So in order to fully deny vehicle spawning from a certain base, it is better to hack the terminal and flip a point than camp the terminal in person.
Mastering Stalker
Step 1. Learn how to get good ambushes, how to move around without getting noticed. Learn to kill swiftly and efficiently, with minimal increase of enemy awareness to your presence.
Step 2. Learn how to survive and restealth after an ambush. Even a stalker newbie can get a good ambush on one enemy, simply by slowly crouchwalking up to him, and then unloading a sidearm into enemy’s back. Or running into a crowd of enemies and sprint slamming a power knife into someone.
What differs a good stalker from a bad one, is the ability to consistently get good ambushes, survive after the successful ambush or manage the fallout from a bad one.
Step 3. Know when to leave. Don’t stay in one area for too long. Stalkers are annoying. For some reason, people hate “invisible” players that can strike them in the back at any moment. If you stay in one area and repeatedly kill the same players over and over, somebody with Darklight Flashlight will eventually come looking for you. It also makes you predictable and easy to find even without a flashlight.
Teamplay Aspect
Helping your faction
Besides killing, you can help your faction by:
Destroying Motion Spotters, Spawn Beacons, mines and other deployables.
Hacking enemy turrets, even if you’re not going to use them to engage enemies yourself.
Hacking enemy terminals.
Specifically, you can hack an enemy vehicle terminal and pull an extra Sunderer. Things like that are often enough to turn the tide of battle, or at least solidify your faction’s grip on it.
Providing intel on enemy position with a Motion Spotter. You can also Q Spot deployed enemy Sunderers and relay information about their position with a /regionsay chat. Unlike other classes, you can afford to just sit back and type.
Harassing MAXes and their support. Your potential damage against them is limited, but they are bulky, slow and easy targets, and you can harass and distract them, and maybe even force to run away. If a MAX is already getting gunned by your allies, you may join them to focus fire.
Breaking up chokepoints and harassing frontlines from a flanking position, forcing enemies to fight in multiple directions at once. This makes it significantly easier for your faction to advance the frontline.
Helping your squad
Infiltrators increase awareness and protect the squad by communicating incoming threats. Those extra EMPs become critical in softening an enemy push, or destroying enemy Spawn Beacons to keep enemies off roofs, and limit their access to entry points the squad is set up to handle.
A stalker can also deploy and protect a Spawn Beacon during a squad wipe, allowing the squad to to return to the fight before the enemy can fully secure the location.
Between Motion Spotters and EMPs, a Stalker Infiltrator can prevent or mitigate surprise attacks against the squad, reducing the chances of the enemy being able to take advantage of a weakness.
Cloak allows the stalker to place himself outdoors to mitigate pushes and build-ups with Mines and EMPs, though usually leaving the building is not the best option.
Cloaked stalkers can hold a position that would be normally too exposed, and protect their squad from being flanked by a single mobile enemy that could do a lot of damage.
Enemies don’t have an initiative and clientside advantage on a cloaked stalker.
A cloaked stalker doesn’t have to be staring down the corridor, holding his angle, and is free to give more attention to the minimap, and notice buildups in enemy forces and flanking units.
Stalkers can also fly ahead in a Valk or ESF and begin capturing the next base down the lattice lane, this conserves time and prevents the enemy from back capping the facility you had just captured while you’re moving to the next one.
Stalkers can do many things, from hacking AA turrets and pestering enemy Liberators shelling an outdoor point, to overloading SCU Generators in Biolabs.
Sneaking somewhere and placing beacons so your squad can reach higher ground.
The list goes on and on, suffice it to say that infiltrators’ worth should not be strictly based on how many bodies they can pile up. Often playing in a coordinated squad is more about good timing, providing support and increasing awareness.
-[3GIS] Circuitry of Teamwork
Stalkers allow the squad to hold more advantageous locations, choking enemies throughout the battle.
Stalkers can babysit a point so the squad is free to hold key locations.
Stalkers don’t need to leave the squad like a sniper would, and they can salvage a bad situation better than an SMG user could.(Ex: Dropping a spawn beacon after your squad is wiped off point to get them back before connection ticks down to zero)
-CuteBeaver
Closing Thoughts and Credits
We hope that this guide has armed you with necessary knowledge to have success as a Stalker Infiltrator. Please do not hesitate to ask any questions in the comment section below.
Huge thanks to /u/CuteBeaver for her continued support, invaluable help and expertise in developing this guide.


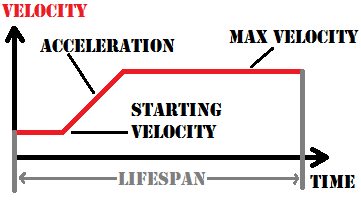
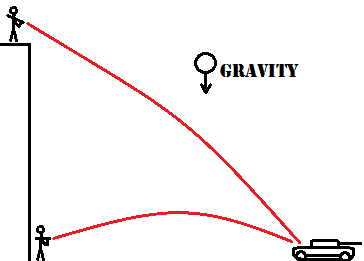
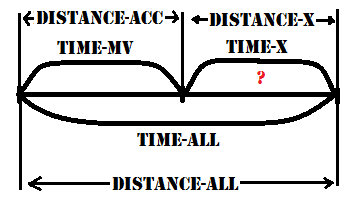
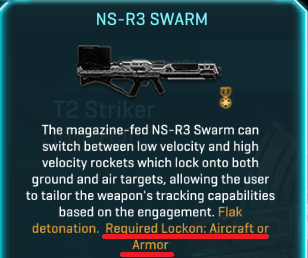


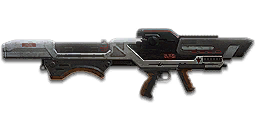
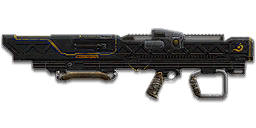
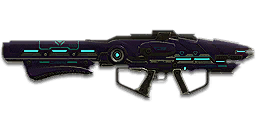
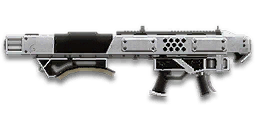


 You’re granted the first rank of the ability for free, and it is enough to give Stalker a try, but for comfortable and effective play, it is strongly recommended to max out this ability, if you’re serious about playing Stalker. Upgrading significantly reduces the downtime when trying to get from point A to point B.


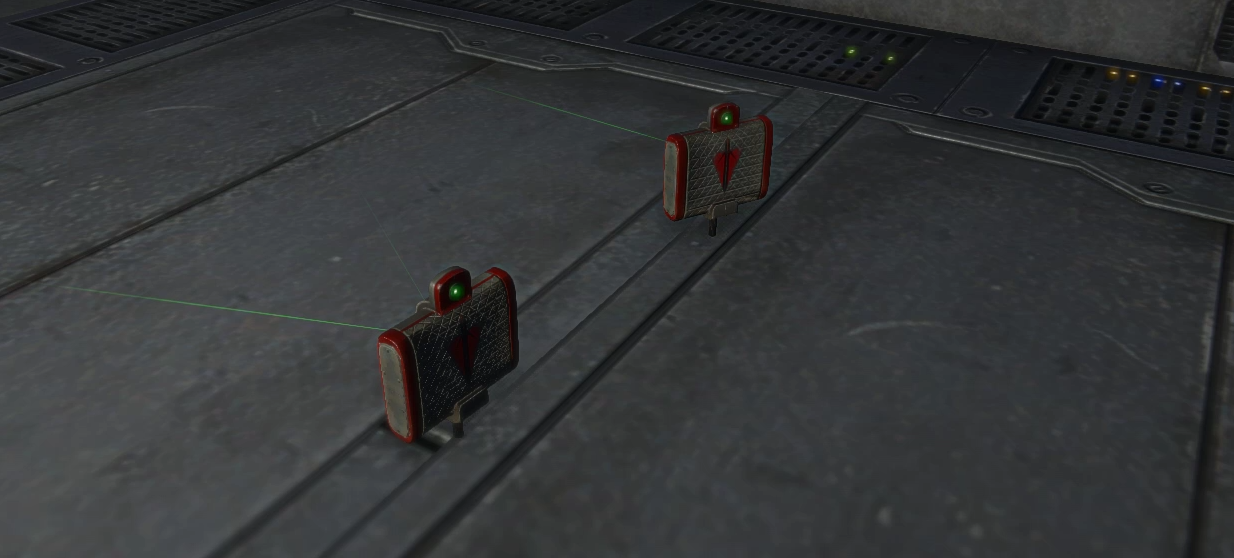

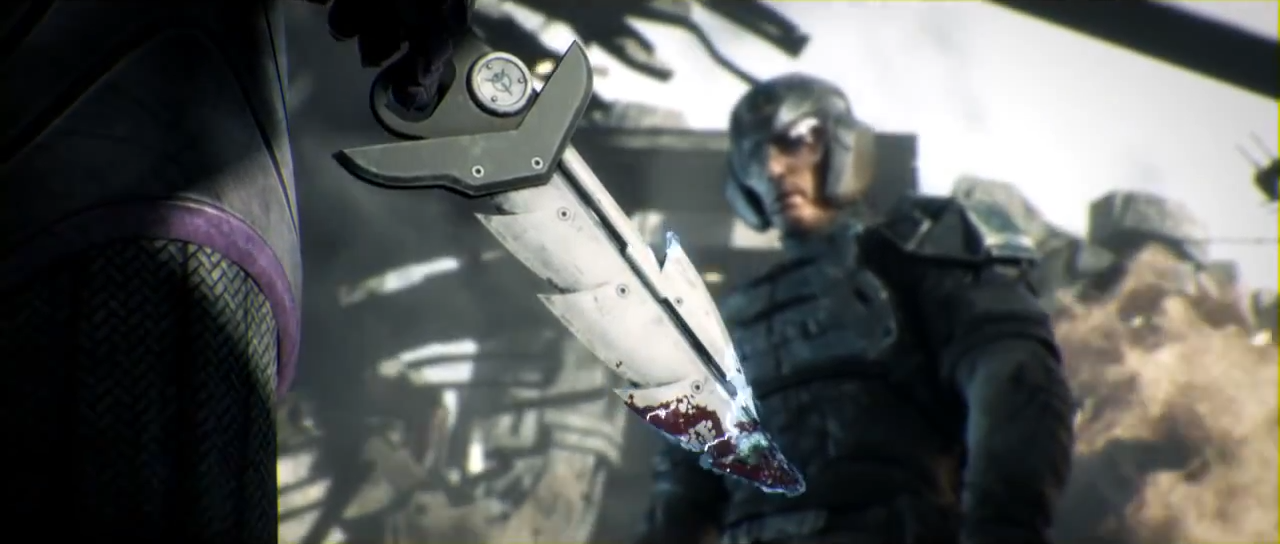


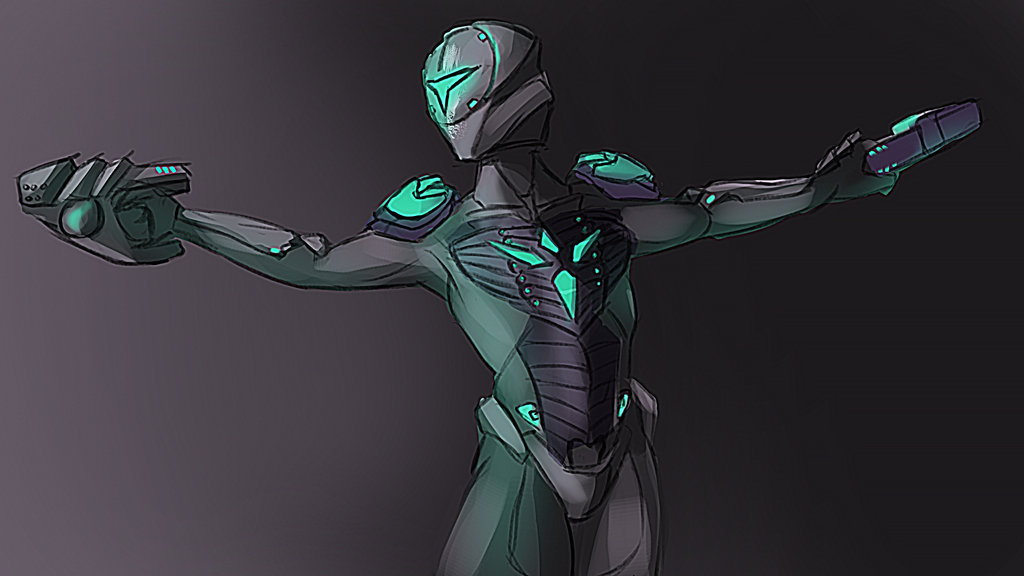
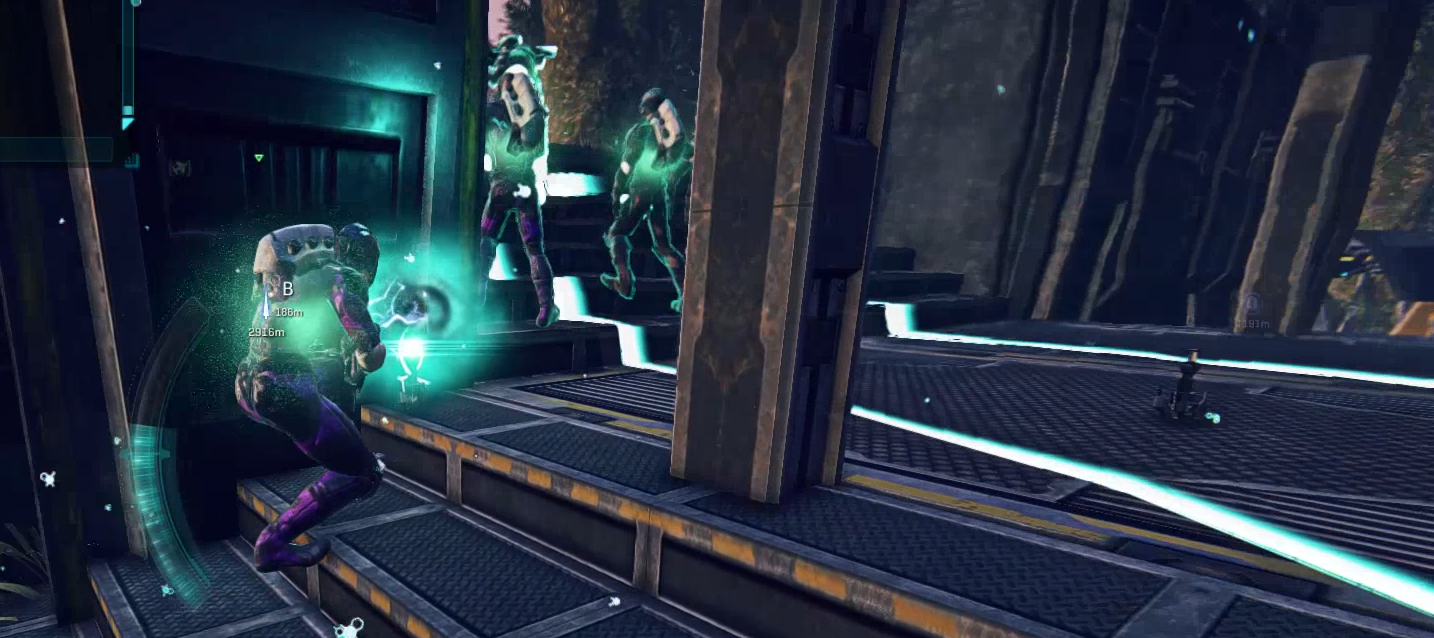
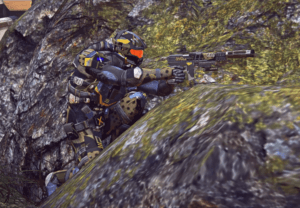
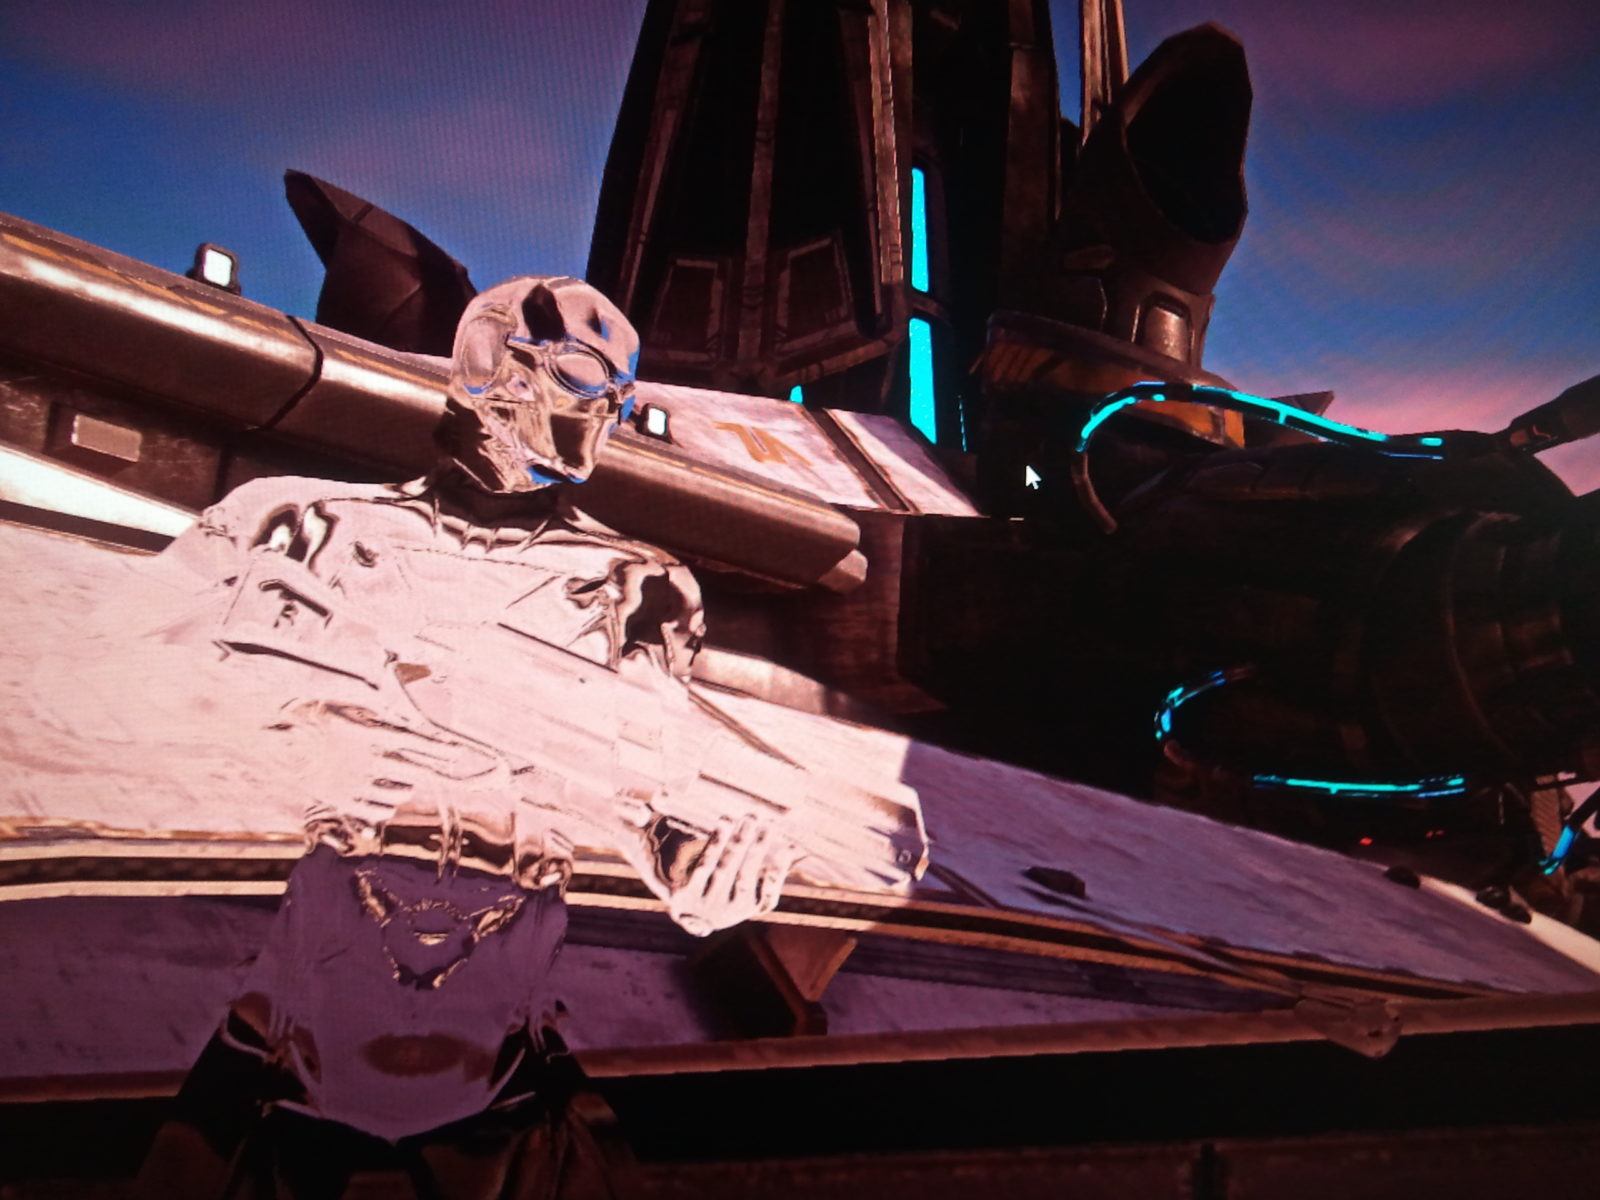