Battle Rifles are semi-auto precision weapons, available to all classes except Light Assault. They are the middle ground between “long range” automatic weapons, and slow-firing semi-automatic precision weapons, such as Semi Auto Sniper Rifles and Scout Rifles.
Compared to these weapons, Battle Rifles deal less damage, but remain more accurate while moving and during sustained fire, and have less damage degradation over range. From the mechanical standpoint, Battle Rifles are among the most consistent weapons in the game.
Battle Rifle Mechanics
Battle Rifles benefit from a lot of mechanics that make it easier to maintain accuracy, regardless if you’re going for accurate tap shots, or just spamming the weapon. No matter what you do with them, Battle Rifles just refuse to become inaccurate.
Negative Recoil Recovery Delay allows to start recovering recoil before they can take another shot, and higher Recoil Recovery Rate increases the speed of that process.
Comparatively low Vertical Recoil makes it easier to keep the crosshair on target while spamming shots.
Increased Cone of Fire Recovery Rate allows to fully reset CoF between shots almost instantaneously. CoF Bloom effectively has no effect on Battle Rifles, unless you specifically try to achieve maximum RoF.
Cone of Fire Bloom itself is low, and Maximum ADS CoF is tiny. So even if you manage to fire the weapon at maximum RoF it will still remain nearly as accurate.
VS Battle Rifles have no bullet drop, and for these weapons this trait is actually useful for a change, as it allows them to reliably snipe stationary targets even at extreme ranges.
First Generation Battle Rifles
| DAMAGE | 250 @ 15m – 225 @ 75m |
| RATE OF FIRE | 333 RPM 313 RPM when Tap Firing |
| VELOCITY | 600 m/s |
| AMMO | 20 / 120 |
| RELOAD TIME | 2.5 sec / 3.4 sec |
| UNLOCK COST | 325 |
First Generation Battle Rifles have the highest Rate of Fire among semi-auto precision weapons, and can fire up to 5.5 rounds per second. You would think that it makes them easier to use, but the relatively low damage per shot actually makes them more demanding; they need to shoot faster to have a competitive time to kill.
/u/ALN-Isolator gives a good run down on the current state of 1st Gen Battle Rifles in this reddit post.
Eidolon VE33 has 30 m/s lower velocity to compensate for its no-bullet-drop trait.
AMR-66

Warden

Eidolon VE33

-30 m/s velocity, no bullet drop
Pros:
- Low unlock cost of 325 certs.
- More or less usable at any range.
- Good hip fire accuracy for a semi auto precision weapon.
- Can be an effective counter-sniping weapon, as it kills non-NAC Infiltrators with 2 headshots at all ranges.
- Has access to underbarrel Grenade Launcher and Smoke Launcher without much of an opportunity cost, as other rail attachments don’t do much for Battle Rifles.
Cons:
- Ineffective in direct combat, especially against automatic weapons at close range.
- Takes a lot of shots to kill.
Bullets-to-Kill

Within maximum damage range (15m stock):
- Consistent 2 headshot kill
- 4 body shot kill, 5 shot vs nanoweave
Outside maximum damage range:
- 3 headshot kill
- 5 body shot kill, 6 shot vs full nanoweave
Attachments
Exact effects of each attachment can be found in this Weapon Attachment Guide.
1st Gen Battle Rifles have a diverse attachment selection. In addition to all barrel attachments, and standard choice of rail attachments Laser Sight – Forward Grip – Darklight Flashlight, Battle Rifles can mount Underbarrel Smoke Launcher and Underbarrel Grenade Launcher, and choose from scopes of 1x through 6x, including HS/NV scope.
High Velocity Ammo is available, but it has nearly no effect on Battle Rifles due to their damage model.
Example Attachment Combinations
Recommended
- Flash Suppressor
- Underbarrel Grenade Launcher
- 2x Scope or up to preference
- No HVA.
This setup is the most versatile, and remains effective at almost any range. It’s especially great on Infiltrators, who can take advantage of their cloaking ability, and easily chain multiple engagements at range. For non-HAs, UBGL provides some situational utility, especially against vehicles.
Long Range
- High Velocity Ammunition
- Compensator* or Flash Suppressor
- Forward Grip – mostly taken to reduce recoil angle
- 3.4x – 4x scope
- 6x would limit your ability to defend yourself at close-medium range.
This setup improves Battle Rifle’s ability to maintain accuracy at long range, but makes it harder to effectively use them in CQC.
This setup is recommended for players that want to develop the skill of instantly ADSing for headshots in any situation. Also great for open field fights, basically turning Battle Rifle into poor man’s Sniper Rifle.
* – Compensator has next to no effect on your tap firing speed. Only take Compensator if you intend to spam shots while pushing through recoil, which has arguable effectiveness due to CoF Bloom.
“Wrelsatility 2014”
- High Velocity Ammunition
- Flash Suppressor
- Laser Sight
- Scope of choice
This setup was Wrel’s personal favorite some time ago. Reasoning: while Battle Rifles benefit from Forward Grip and Compensator, they are far from necessary, especially at ranges where you can actually spam the weapon.
Battle Rifles have a decent hip fire by default, and if you use it with Laser Sight, and avoid Compensator, you’ll have almost as good hip fire as a stock carbine, which is rather impressive for a 250 damage per shot weapon.
Flash Suppressor provides concealment, especially at night. Granted, not as good as suppressor would, but Suppressor has a strong negative effect on velocity, which makes BR much harder to use at range.
This setup is recommended for players that tend to run a lot by themselves, and enjoy having an option to hip fire.
Smoke Launcher
- HS / NV Scope
- Underbarrel Smoke Launcher
- Flash Suppressor or Suppressor
- HVA optional
The core idea behind this loadout is straightforward: cover enemies with smoke, and use HS/NV scope to kill them through smoke while concealing your muzzle flash and making yourself harder to notice.
The major problem with this loadout is that it completely relies on smoke, which is rather underpowered at this moment, you can read more about that here.
HS/NV scope only highlights enemies within ~80m, which essentially cuts Battle Rifle’s effective range in half.
Gameplay Tips
With a Battle Rifle, you generally want to stay with your team and be right behind the front line. 500-450 headshots at 333 rpm are insane if you can manage the vertical recoil, but never try to fight the enemy when you’re under fire.
Be very careful and maintain awareness of your surroundings. If the enemy gets the jump on you, more often than not, it will be a loss for you.
Be ready to ADS if you suspect enemies are near, because you need to fire first. Ideally, you want to always open with a headshot.
Flanking is generally a good idea if you can get behind enemy lines safely; 2-5 shots to kill means you’re more likely to die rather than run out of ammo.
You never want to force close quarters fights, but you can still win them with headshots.
Due to Battle Rifle’s high damage / low rate of fire profile, shielded Heavy Assaults are your worst enemy.
Choose your engagements and positioning around the scope you have. 2x means you can stay near the frontline, whereas 3.4x-4x means you want to stay a bit behind it. It also makes it easier to pick off snipers, but sacrifices your CQC ability.
Battle Rifles are decent mid/long range anti-MAX weapons, as you can strip ~half their health in one mag. You won’t kill many full-strength MAXes, but you’ll certainly make them run for cover, even at rather long ranges (150-200m). If you see a MAX trying to run away from a fight, try your best to shoot him. Often they’re hurt enough that only 3-4 shots will kill them.
-Erendil
Second Generation Battle Rifles
These Battle Rifles have unique models created by the famous D0ku. All of them feature pinpoint accuracy while moving, and high damage per shot without any damage degradation whatsoever. That makes them deadly at any range, though low Rate of Fire and low Damage per Second mean that they require good accuracy from the user, especially in direct combat, and fairly mediocre projectile velocity makes them slightly harder to use at extreme ranges.
Second Gen Battle Rifles are overall similar between factions, but there are some meaningful differences and interesting empire-specific attachments.
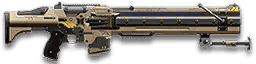
MG-HBR1 Dragoon
| DAMAGE | 334 |
| RATE OF FIRE | 185 RPM |
| VELOCITY | 550 m/s |
| AMMO | 8 / 96 |
| RELOAD TIME | 2 sec / 3.1 sec |
| UNLOCK COST | 1000 |
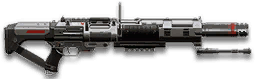
Auto
Dragoon is the only automatic Battle Rifle, though it still has the same Rate of Fire as other Second Generation Battle Rifles. Considering that it fires ~3 shots per second, being fully automatic doesn’t really do anything for this weapon.
Due to high Hip CoF Bloom, Dragoon is not well suited for hip firing, even at close ranges and even with Laser Sight.
In addition to classic Flash Suppressor, Dragoon has access to a unique Single-Fire Barrel attachment, which reduces Vertical Recoil by 20% to 0.64 and makes the weapon semi-automatic, putting it more or less on par with other 2nd gen Battle Rifles in terms of recoil management.
In automatic mode, Dragoon’s crosshair lingers in the air for a long time, which can potentially make it slightly easier to correct aim while engaging moving targets. However, the delay before Recoil Recovery starts isn’t that big, and the only thing it really does is make Dragoon worse at tap firing.
In semi-auto mode, the crosshair fully recenters between shots, removing the requirement to compensate for recoil to keep the crosshair on target.
![]()
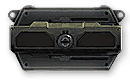
Heavy Magazine is a unique Ammo Slot attachment that increases magazine size by 2 rounds at the cost of increasing Hip Fire CoFs by 20%. This penalty can be compensated by using Laser Sight, not that you should do something like that. Dragoon already has fairly poor Hip Fire accuracy, so Heavy Magazine should be your go-to attachment.
Explosive Ammunition is a unique Ammo attachment that reduces Dragoon’s Direct Damage from 334 to 250 (minus 84) and adds up to 75 Indirect Damage within 1.5m, so it will deal up to 325 damage per shot.
Indirect Damage: 75 @ 1.5m – 25 @ ~3m, Damage Resist Type 6

The difference appears to be small, but it’s actually enough to make full health enemies require an extra shot to kill, which is a big deal for such a slow-firing weapon.
A full health enemy will take 2-3 magazines worth of ammo to kill with just the splash damage, so its power isn’t exactly mindblowing, but there is some legitimate utility in being able to damage an enemy who’s out of your direct line of sight.
Splash damage to allies is reduced by 75%.
Attachment Recommendations
- The “killing” build uses Single Fire Barrel and Heavy Magazine to bring the Dragoon closer to other 2nd gen Battle Rifles.
- The “support” build uses Flash Suppressor and Explosive Ammo to harass enemies behind cover, while still being able to deal heavy damage with direct hits.
- You can, of course, use Flash Suppressor with Heavy Magazine, if you feel the recoil in automatic mode is not a hindrance.
- Forward Grip is recommended for builds that use automatic firemode. It doesn’t do much, but it’s better than other rail attachments.
- Single Fire build doesn’t care about recoil, so you may as well run a Laser Sight, though you shouldn’t be hip firing often with this weapon.
MGR-M1 Bishop
| DAMAGE | 334 |
| RATE OF FIRE | 185 RPM |
| VELOCITY | 550 m/s |
| AMMO | 10 / 100 |
| RELOAD TIME | 2.2 sec / 3.25 sec |
| UNLOCK COST | 1000 |
Semi-Auto
Bishop has less recoil than other 2nd gen Battle Rifles, and its bullets will pierce through one enemy, meaning it can damage up to 2 enemies with one shot.
In addition to classic Flash Suppressor, Bishop has access to a unique Tungsten Liner attachment, which slightly increases damage at close range at the cost of increasing Vertical Recoil by 200% and Horizontal Recoil by 0.05.
Damage: 350 @ 10m – 334 @ 20m.
Comfort Grip is a rare variant of the Forward Grip that reduces Equip and Unequip Times and Horizontal Recoil, but reduces Hip Fire accuracy.
Sabot Ammunition is the unique Ammo attachment that gives Bishop’s rounds the ability to pierce an unlimited number of targets instead of just 1, but reduces effective Rate of Fire by 10%. This is a rather concrete penalty for a situational benefit. In actual gameplay, it’s hard to find specific situations to benefit from piercing even one target. Consider situationally equipping Sabot Ammo in especially large fights, full of crowded choke points.
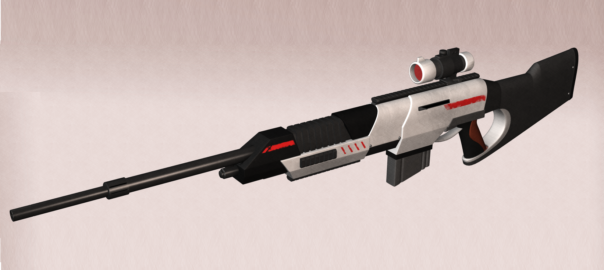
VE-LR Obelisk
| DAMAGE | 334 |
| RATE OF FIRE | 185 RPM |
| VELOCITY | 550 m/s |
| AMMO* | 6* / ∞ |
| RELOAD* | 3 sec* |
| UNLOCK COST | 1000 |
* – uses Heat Mechanic.
Semi-Auto
Obelisk is overall similar to other 2nd Gen Battle Rifles, but instead of traditional ammunition it uses a Heat Mechanic. It also benefits from lack of bullet drop at no cost to Projectile Velocity, as well as slightly better Hip Fire accuracy.
Heat Mechanic
Firing the Obelisk accumulates Heat, at a rate of 1000 per shot. If you don’t take another shot right away, then in 0.4 seconds since your last shot, the weapon will start cooling down, at Heat Recovery Rate of 3000 per second.
It takes 1.66 + 0.4 = 2.06 seconds to fully recover heat from 5 shots, assuming you don’t allow the weapon to cool down between shots.
Reloading the Heat Core can be done manually at any time, and it will take 3 seconds. A reload is triggered automatically if you overheat the weapon by accumulating more than 5999 Heat. It’s always faster to let the weapon cool down naturally, and reloading manually is always a mistake and should be avoided, unless you’re using Manual Calibration attachment.
If you swap to another inventory item, Obelisk will passively cool down in your inventory, unless it is overheated, in which case you will still have to reload the Heat Core the next time you equip the Obelisk.
Attachments
![]()
Enhanced Plasma Containment is just a Flash Suppressor under a different name.
![]()
Safety Override is a unique rail attachment that improves Obelisks’s Hip Fire Accuracy by 25%, like a Laser Sight. When Hip Fired, it also makes the weapon fully automatic, doubles Rate of Fire, but halves the damage and Heat per Shot.
Hip Fire Damage: 167 @ 368 RPM (still 1024 DPS)
Hip Fire CoFs: 1.88 / 2.25 / 2.25 / 2.63
Obelisk has better Hip Fire accuracy than other 2nd Gen Battle Rifles by default, and Safety Override improves it to almost usable levels. It’s still not a very good idea to hip fire it outside of very close ranges, since you can fire only 12 shots before overheating, and DPS is very low.
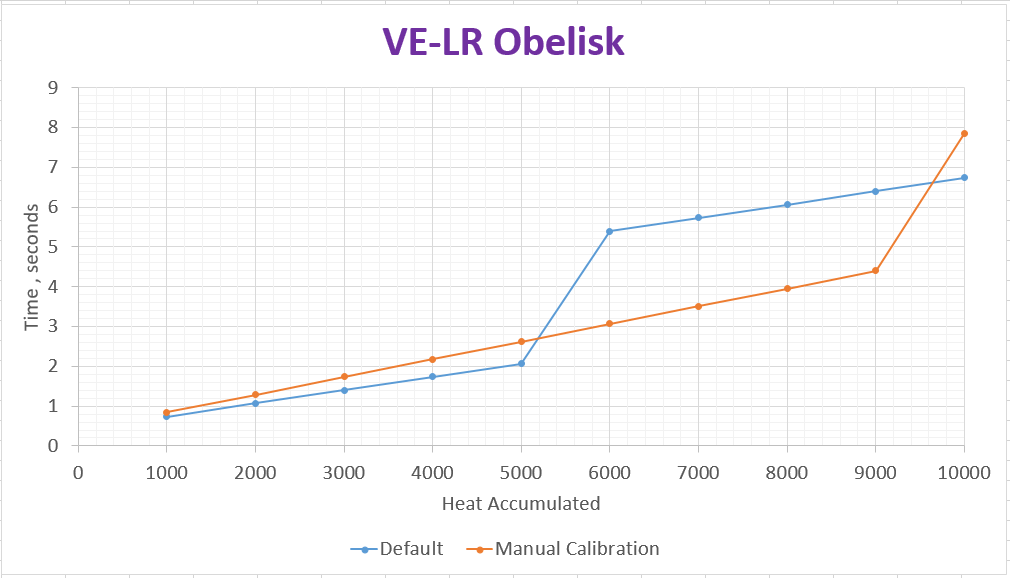
Manual Calibration is a unique rail attachment that increases the amount of consecutive shots you can take without overheating by 4 at the cost of reducing Heat Recovery Rate by 25%.
This attachment significantly affects Obelisk’s heat dynamics. If you fire only a few shots at a time, then Manual Calibration is a detriment, and will increase the time it takes to cool down by up to ~0.6 seconds for 5 shots. However, without Manual Calibration you can’t take more than 5 shots without overheating the weapon in the first place.
If you take more than 5 shots with Manual Calibration, it will take less time to cool down than Default, while still allowing you to keep firing.
If you take more than 6 shots, manually reloading the Obelisk is faster than letting it cool down, although this will make you unable to fire during the reload process.
Overall, Manual Calibration significantly increases the “skill cap” of heat management, providing you with plenty of opportunities to shave off half second here and there, but at the same time with the same amount of opportunities to metaphorically shoot yourself in the foot.
If you never overheat the Obelisk, then by default it can fire slightly more rounds-per-minute than with Manual Calibration. Whether you should use Manual Calibration is likely to depend more on playstyle than anything, since there are clear upsides and downsides, though on paper upsides do outweigh the downsides. Tying Obelisk without this attachment, and consider using it if you overheat it often.
Directive Reward Battle Rifles
The only way to get one of these rifles is to complete the Scout Rifles Directive.
These prestige copies of First Generation Battle Rifles have a cosmetic auraxium shader and a predetermined set of attachments: Forward Grip, Compensator and HVA. These attachments have slightly different effects:
- HVA has no penalty to Minimum Damage Range and its bonus to velocity varies between factions.
- Forward Grip has no effect on Recoil Angle
Directive rifles themselves have a bit of faction flavor as well:
- TR rifle gets larger magazine.
- VS rifle gets faster reload, but slightly more Vertical Recoil.
- NC rifle gets higher velocity.
Despite all of that, directive Battle Rifles still play very similar to their base versions.
DMR-99

| DAMAGE | 250 @ 15m – 225 @ 95m |
| RATE OF FIRE | 333 RPM 324 RPM when Tap Firing |
| VELOCITY | 650 m/s |
| AMMO | 22 / 132 |
| RELOAD TIME | 2.5 sec / 3.4 sec |
GD Guardian
| DAMAGE | 250 @ 15m – 225 @ 95m |
| RATE OF FIRE | 333 RPM 324 RPM when Tap Firing |
| VELOCITY | 680 m/s |
| AMMO | 20 / 120 |
| RELOAD TIME | 2.5 sec / 3.4 sec |
Revenant
| DAMAGE | 250 @ 15m – 225 @ 95m |
| RATE OF FIRE | 333 RPM 316 RPM when Tap Firing |
| VELOCITY | 620 m/s |
| AMMO | 20 / 120 |
| RELOAD TIME | 2 sec / 2.9 sec |
Credit
Thanks to /u/Davregis for his original Battle Rifle Guide that was used as a basis for this article, however since then it received so many edits that nearly none of the original content remains.
Contrary to your opinion, I believe the Sabot Ammunition is one of the best ammo attachments in the game, due to the unique nature of the Bishop-not only because of the ability to penetrate many enemies is very handy in crowded fights (such as NC arsenal), but because that 10% decrease in fire rate allows the gun to reliably chain headshots. This is similar to the commissioner or Blackhand where you can “chain headshots” reliably as long as you know where you are shooting. For example, on the 99SV one must have trigger discipline to chain headshots, due to the high ROF and how if you shoot one bullet, you must “wait” for the recoil to settle to ensure the 2nd one hits the same target. The Sabot ammunition eliminates this problem for the bishop- making the bishop a very good gun for even the most mediocre shooters. At the very least, the Sabot ammunition is a good learning tool to teach Bishop users patience, and if you do not find it necessary you can always remove it.
Are you going to include the new battle rifles that are coming out soon?
Of course, when I have the time, hopefully this weekend.